Follow the steps below to connect a cash drawer to the POS:
Ensure that the cash drawer is plugged into the wall and into the receipt printer.
-
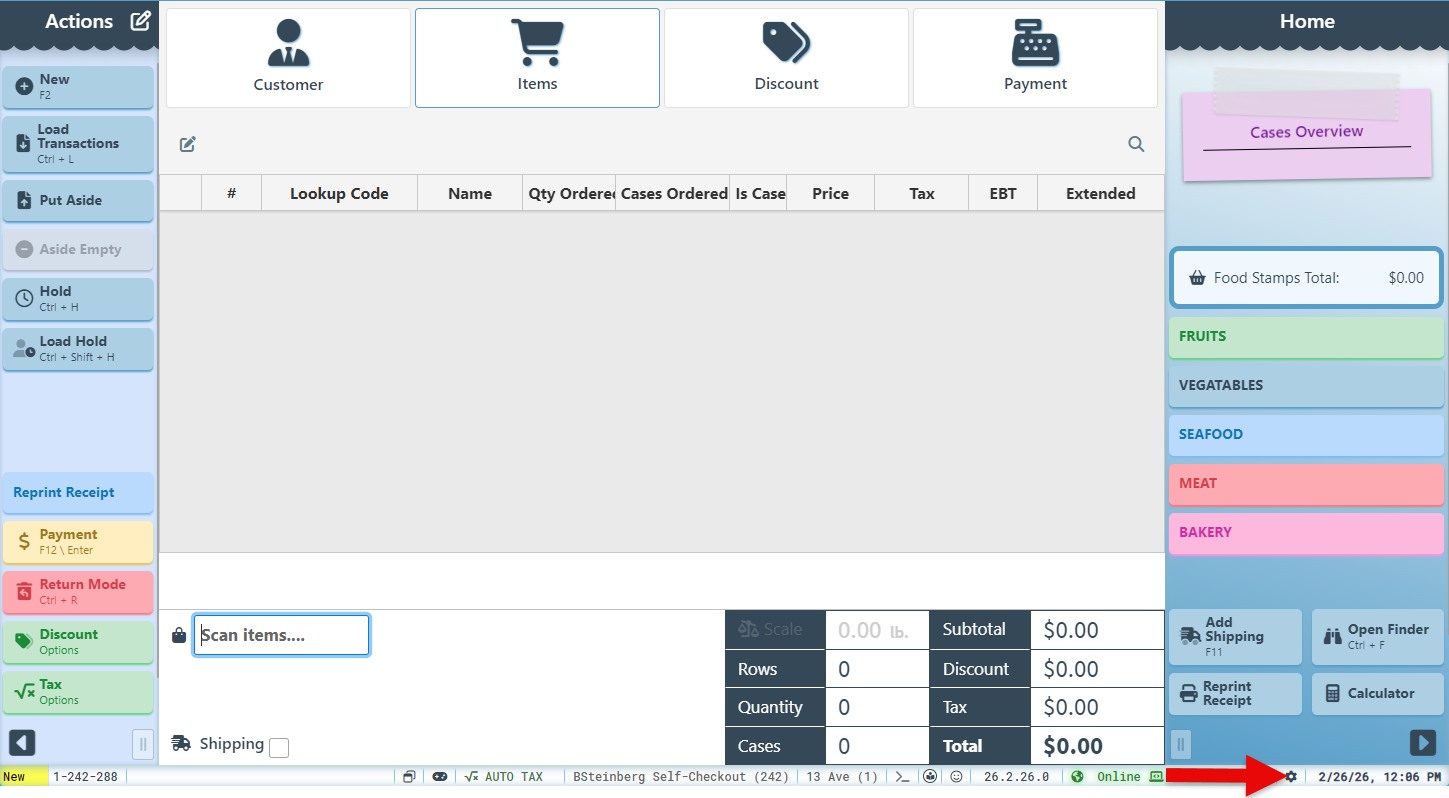
Open the POS.
-
Click the settings icon to open the configuration options.
-
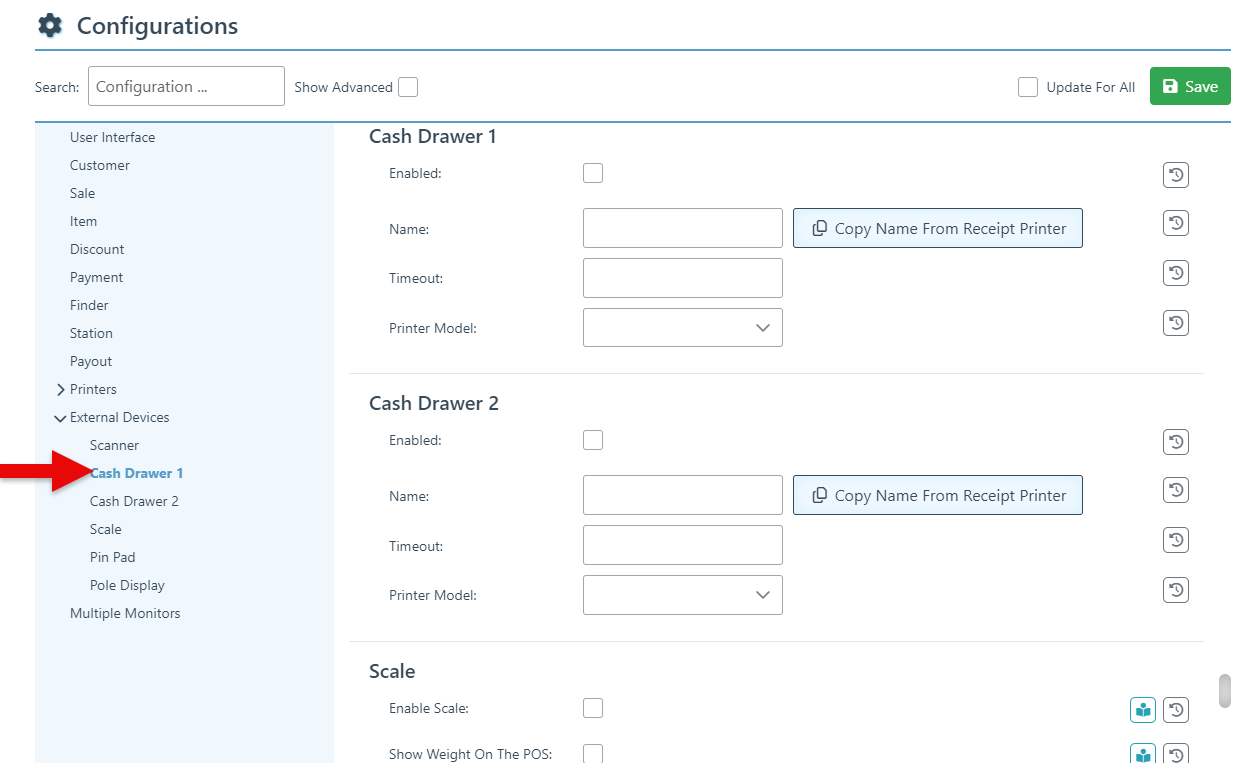
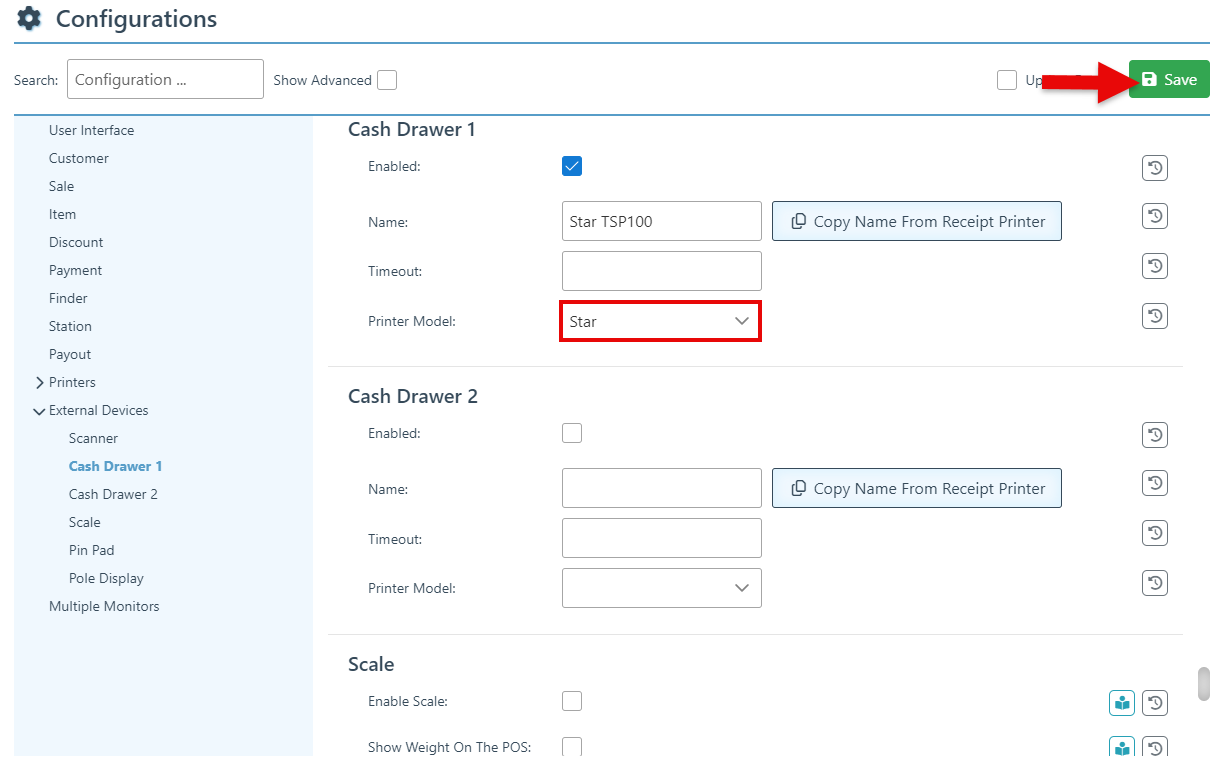
Click “External Devices” in the left-side menu and navigate to the “Cash Drawer 1” section.
-
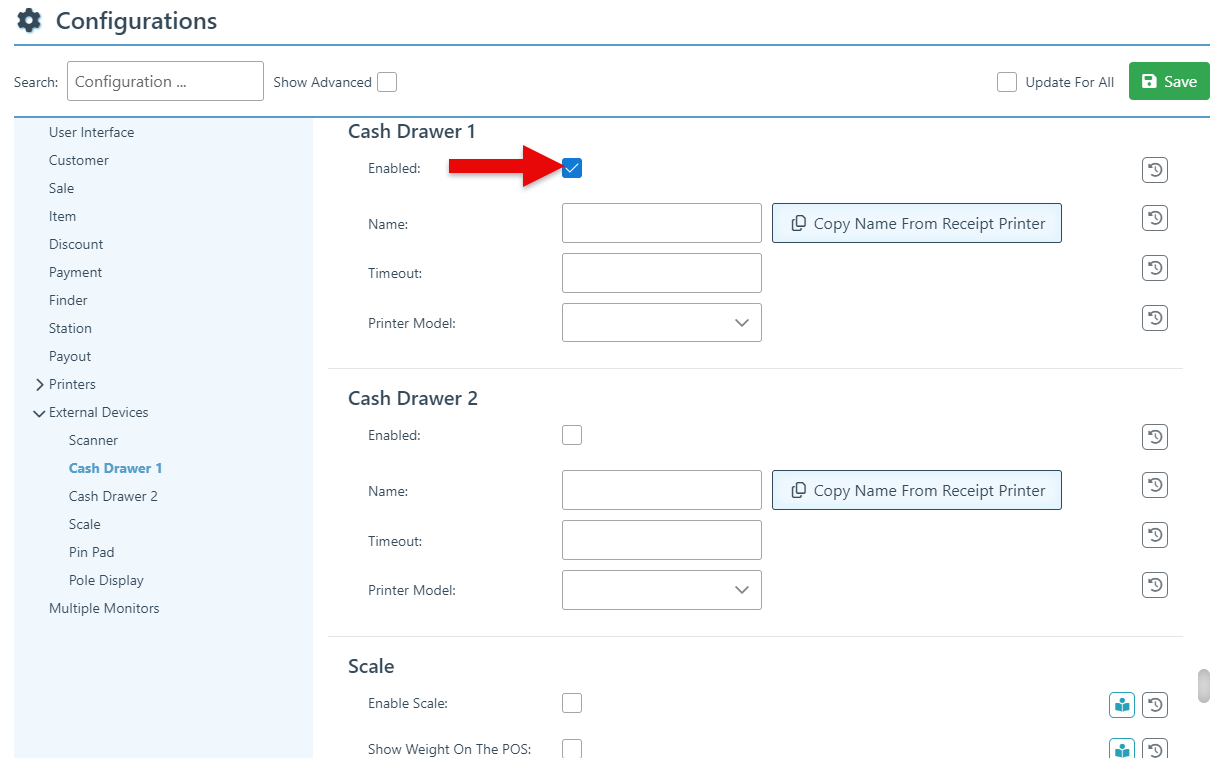
Select the “Enabled” checkbox to activate the cash drawer.
-
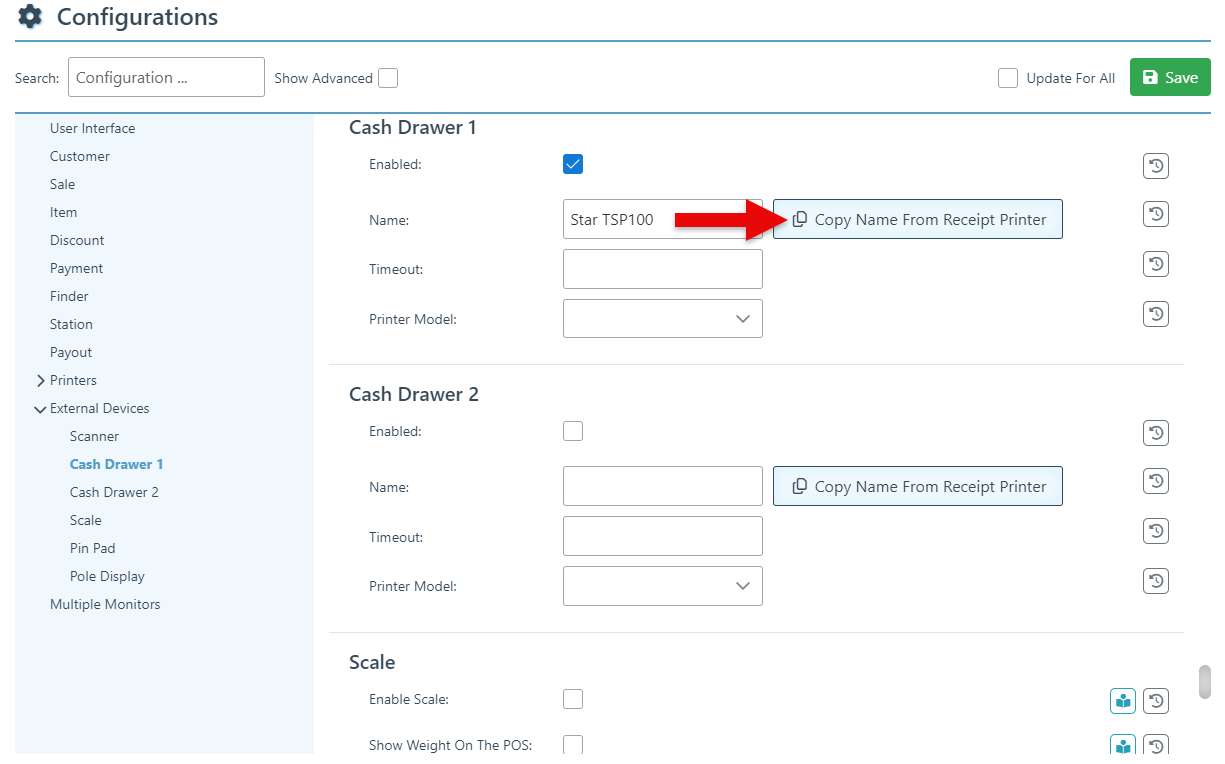
Click “Copy Name From Receipt Printer” to auto-enter the printer name in the designated field.
-
Select the printer model in the dropdown menu and click “Save” at the top right of the page.
To automatically pop the drawer when processing a cash sale, ensure the “Should Pop Drawer” configuration is selected in the cash tender settings.
To enable manual pop-up of the drawer, add the Cash Drawer button with the “Open Drawer” action.