Connecting a DataLogic Magellan Scale
Follow the steps below to connect a barcode scanner scale to the POS:
Plug in the scale and wait for it to play its startup sound.
Proceed to connect the scale to the computer via the scale’s host port.
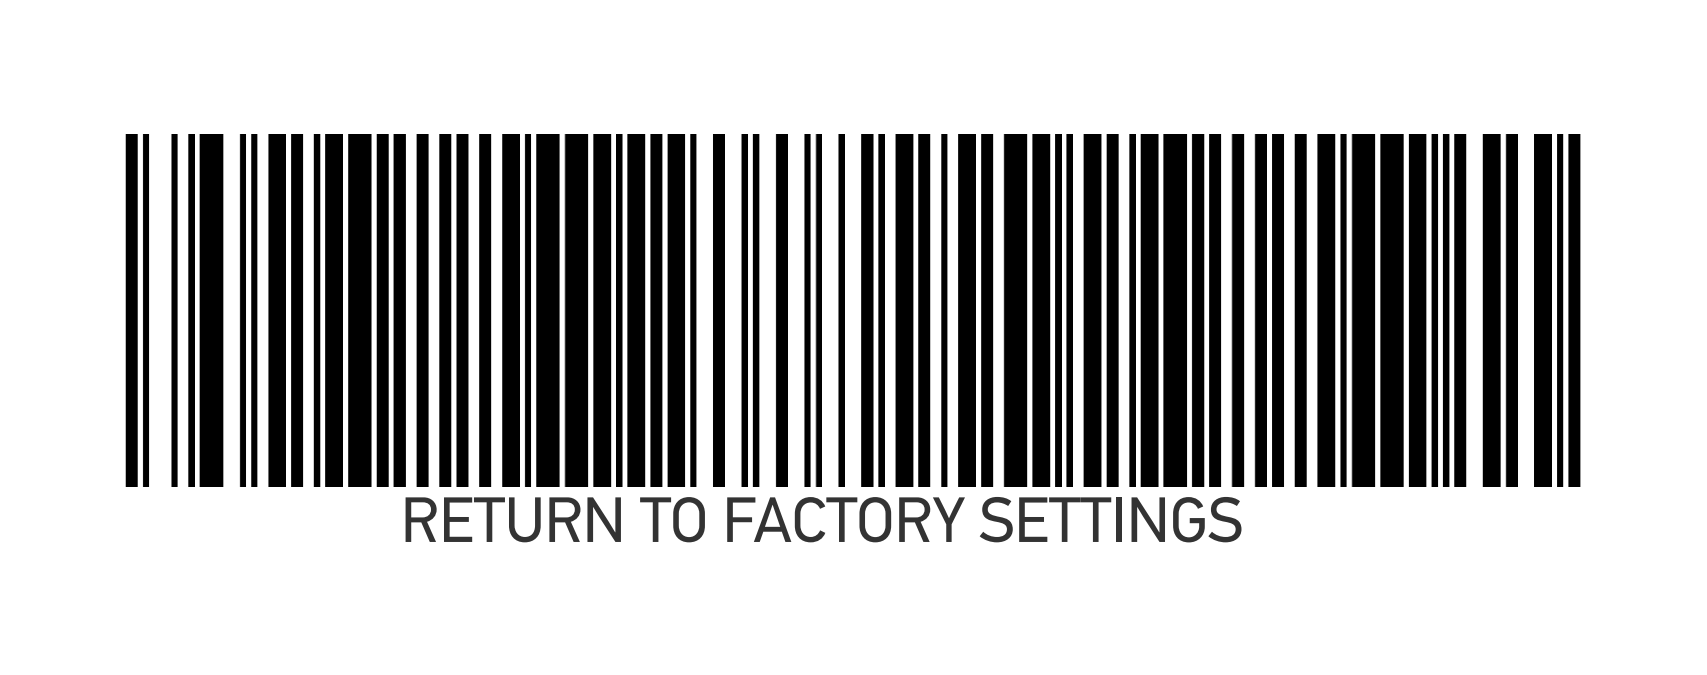
Scan the “Return To Factory Settings” barcode to reset the device settings.
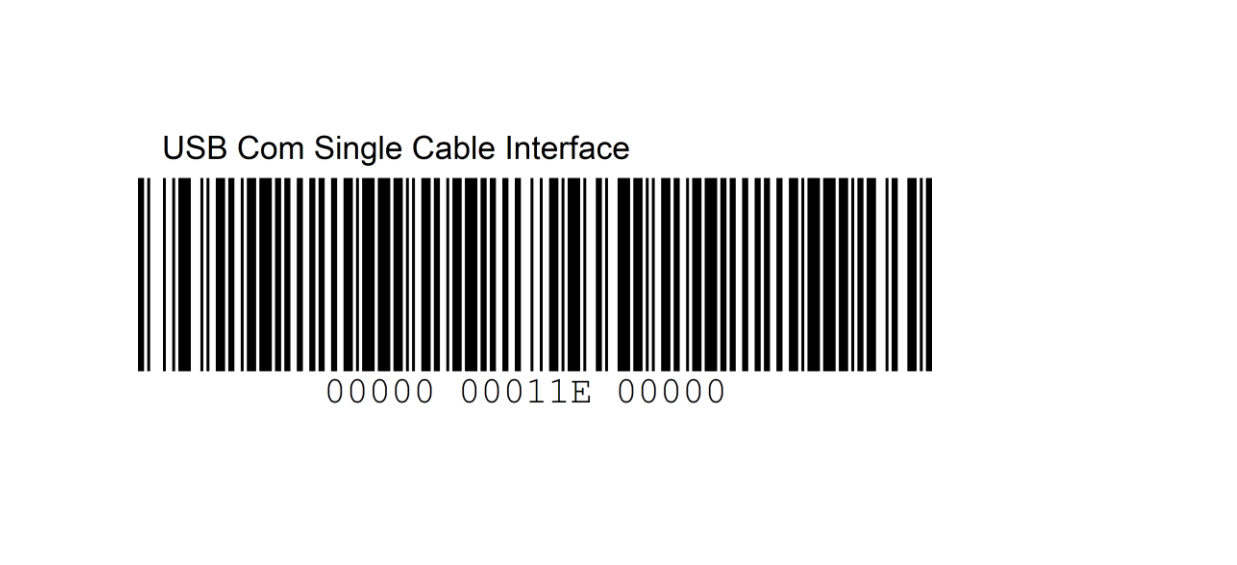
Scan the “USB Com Single Cable Interface” barcode.
Follow the steps below to identify the COM port to which the scale is connected.
Open the Windows menu.
Search and select “Device Manager” to open the configurations.
Click to expand “Ports (COM & LPT.)”
Two barcode scanners ending with (COM followed by the port number), should appear in the list.
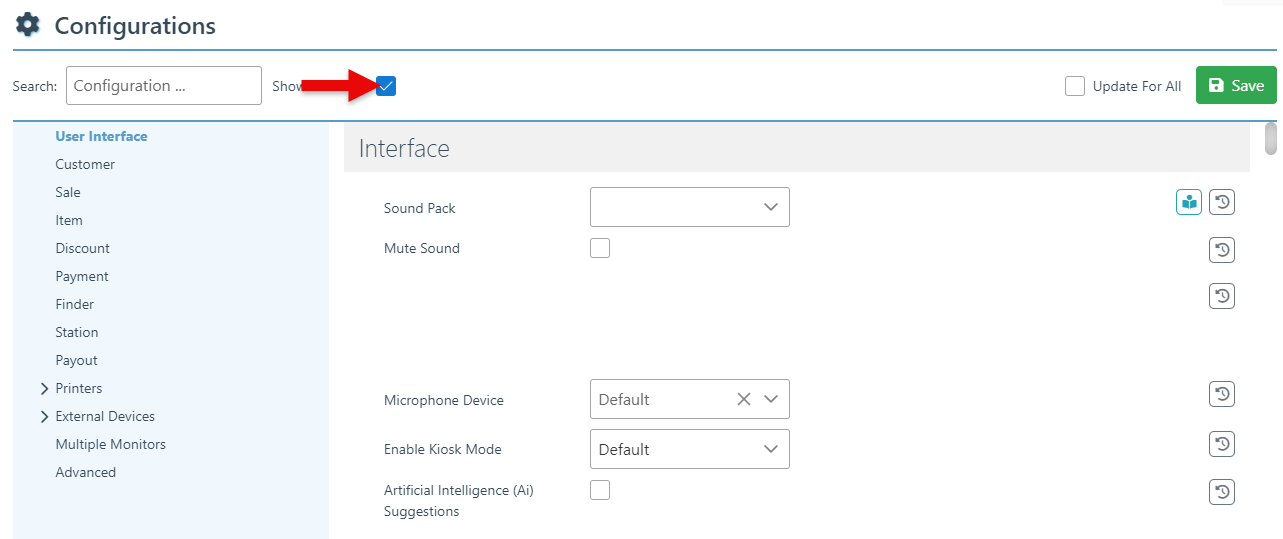
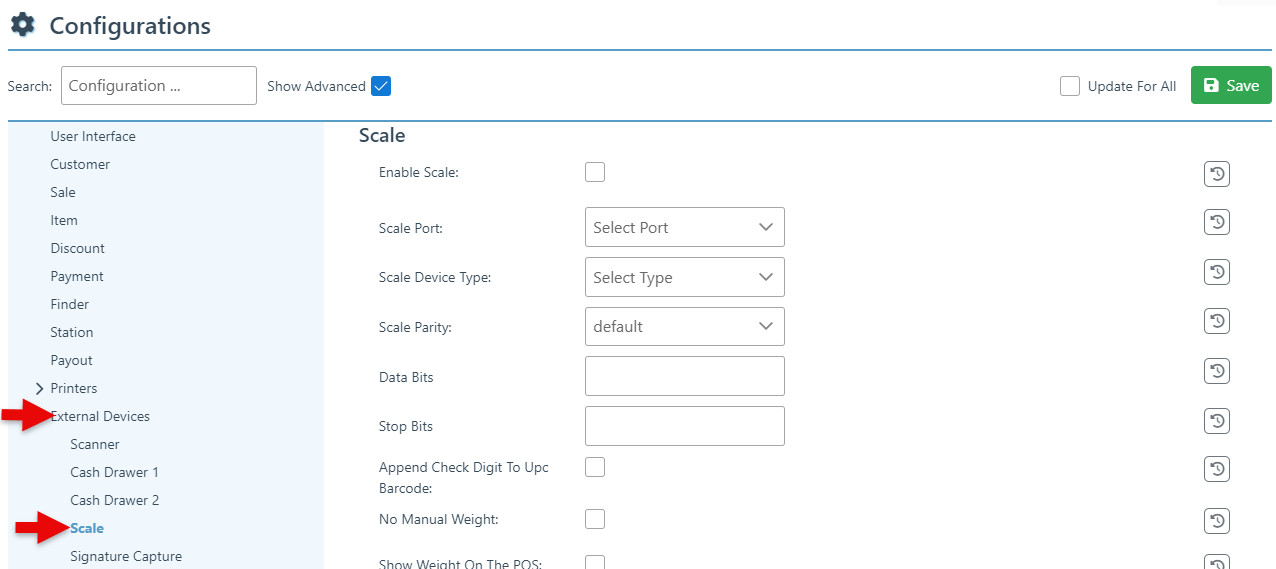
Open the POS and click the configurations icon at the page footer.
Ensure that the open POS is the installed version and not the self-checkout version. The scale connection will not work on the self-checkout version.
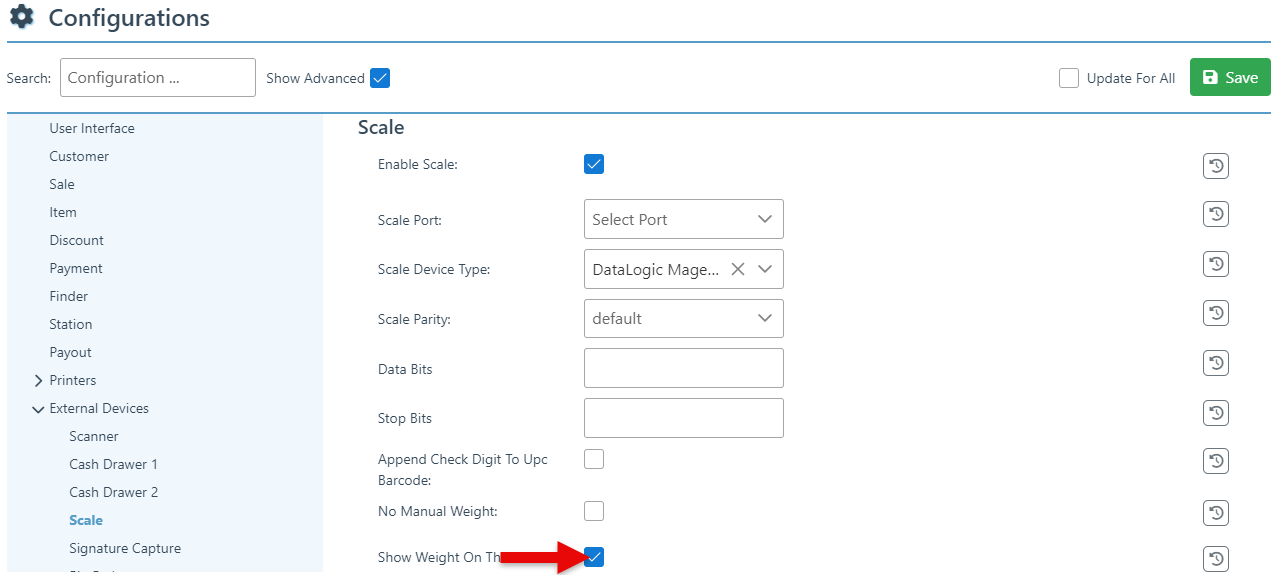
Select the “Show advanced” checkbox at the top of the page.
Navigate to “External devices” and select “Scale” from the expanded menu.
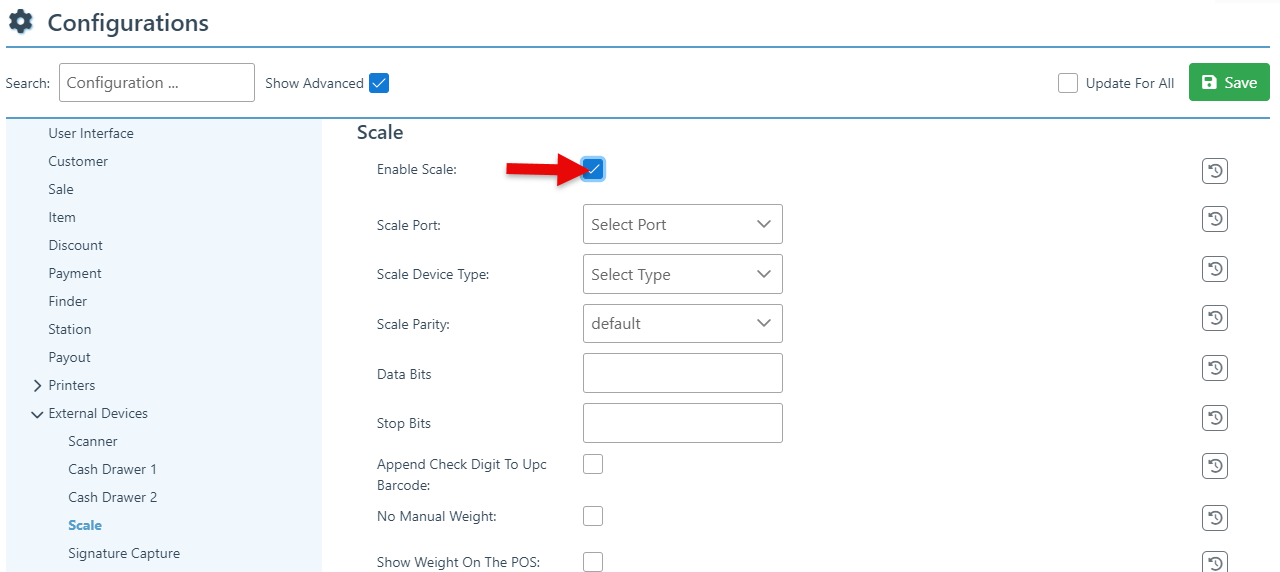
Select the “Enable Scale” checkbox.
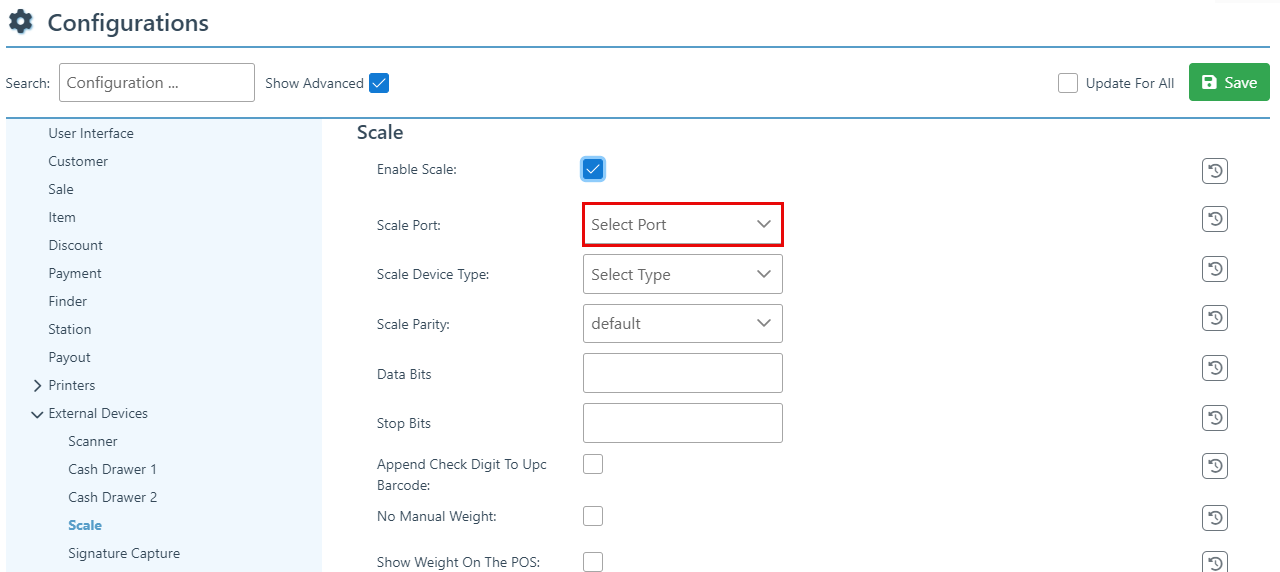
In the “Scale Port” dropdown, select either of the COM port numbers identified above. If an error appears later in the process, this might need to be changed to the other option.
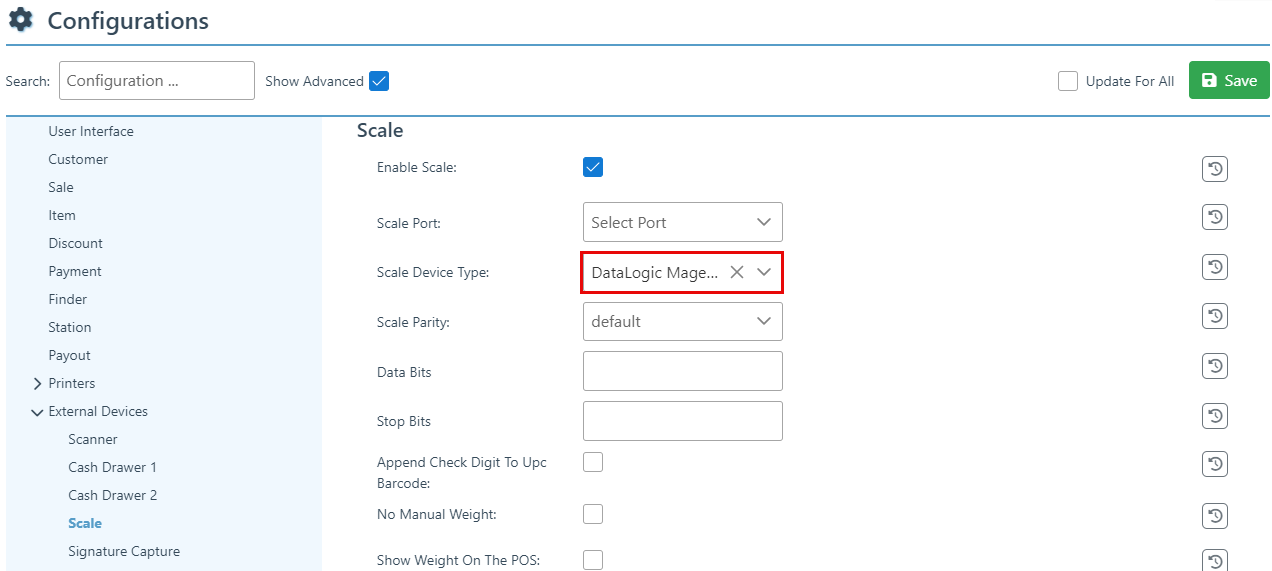
Select “DataLogic Magellan” from the Scale Device Type dropdown.
Select the “Show Weight on the POS” checkbox.
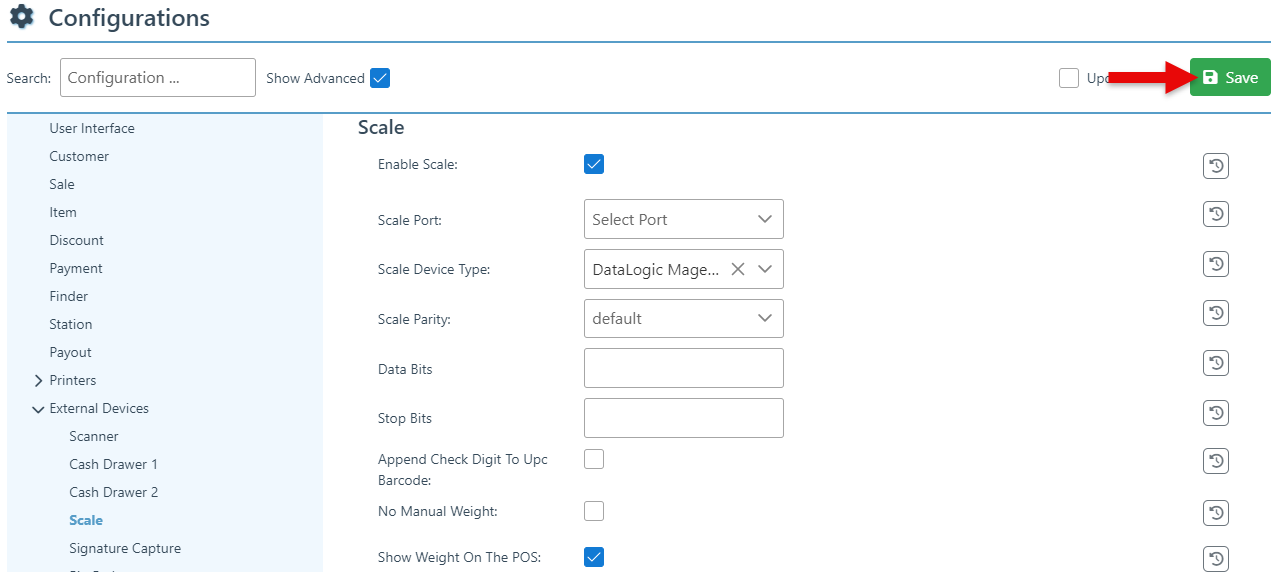
Click “Save” at the top right to save configurations.
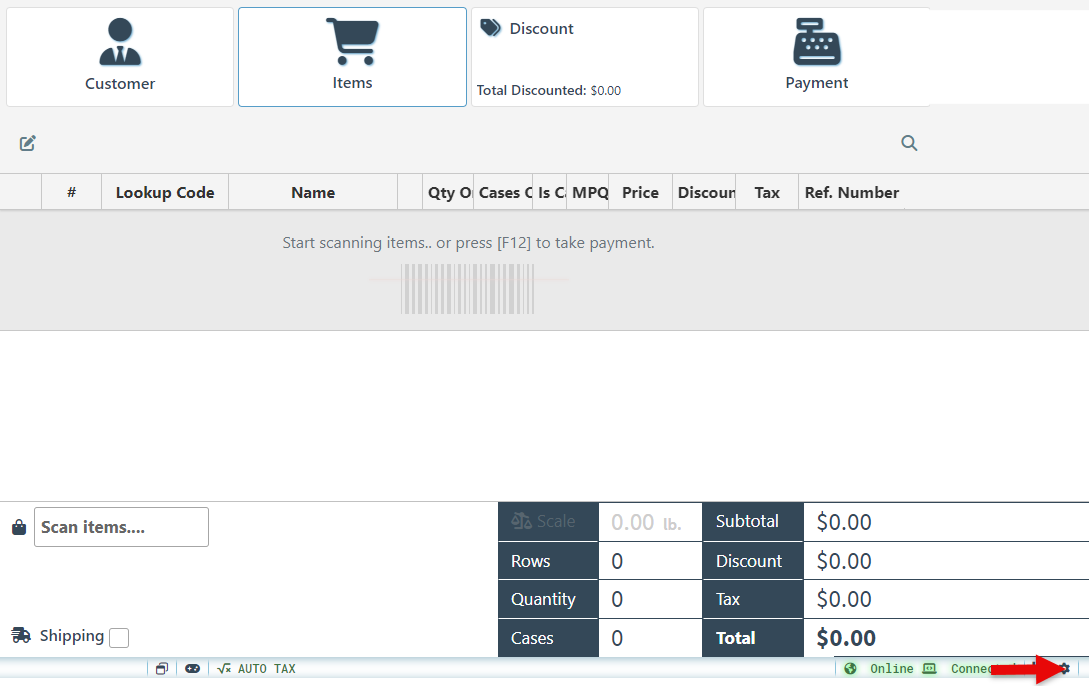
Return to the POS checkout and run a test sale using the scanner.
If any errors occur, including items automatically scanning twice, restart the POS to refresh and update the system.