Installing a Receipt Printer
Follow the steps below to Install a receipt printer :
Before installing a new printer, ensure that both ports are plugged in, and the power switch is on; This will turn on the power light.
In addition, receipt paper should be inserted with the First choice logo print, face up.
To troubleshoot printer issues, go to Controlpanel>Devices and printers>right-click and select Printer properties>Print Test Page. If the test print fails, the printer itself is causing the issue.
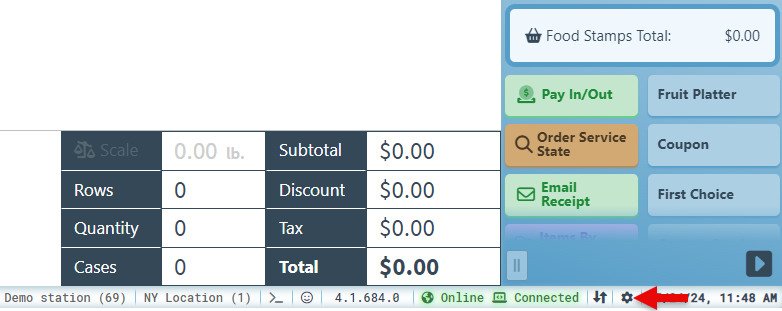
Log in to the station the printer is being set up for.
Enter Username and password to sign in.
Click the “Setting icon” at the bottom right of the screen, and the configurations page will pop up.
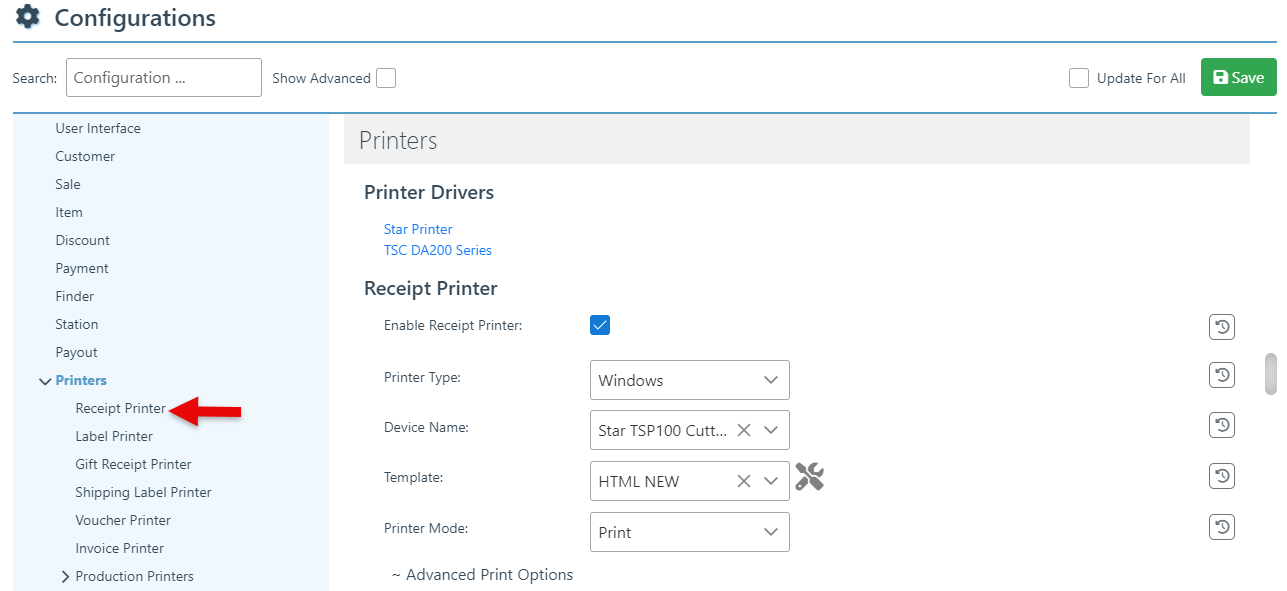
Click “Printers” in the left side menu and select “Receipt printer” in the dropdown.
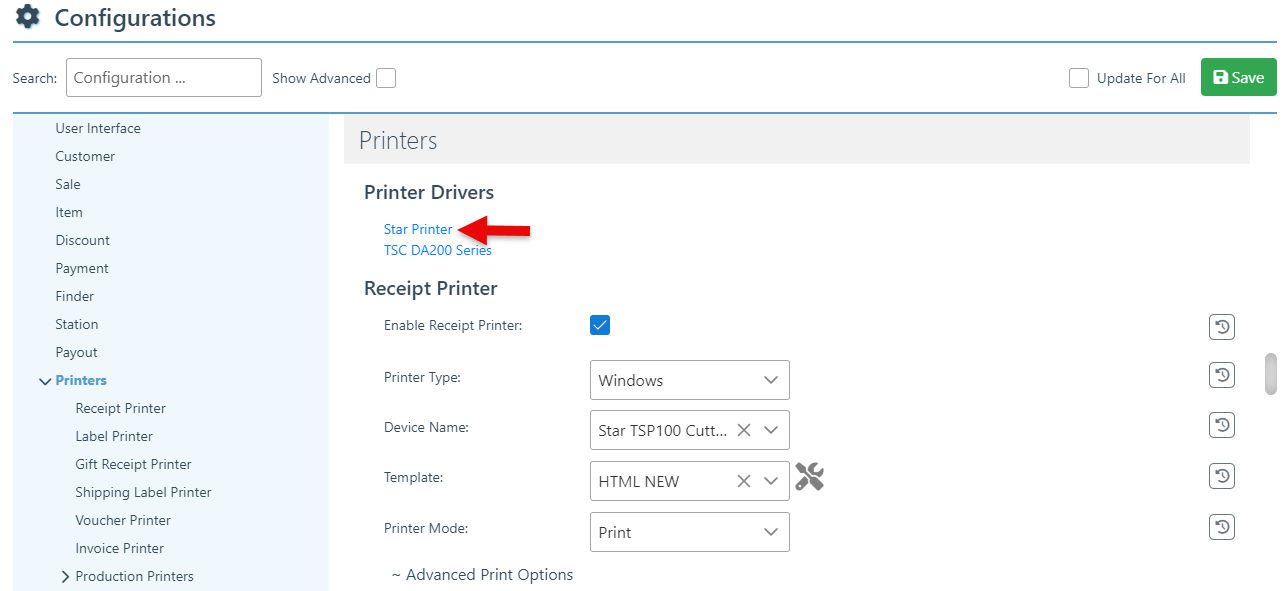
Click “Star printer” to be redirected to the Star website. ( The Printer name may vary based on the printer brand.)
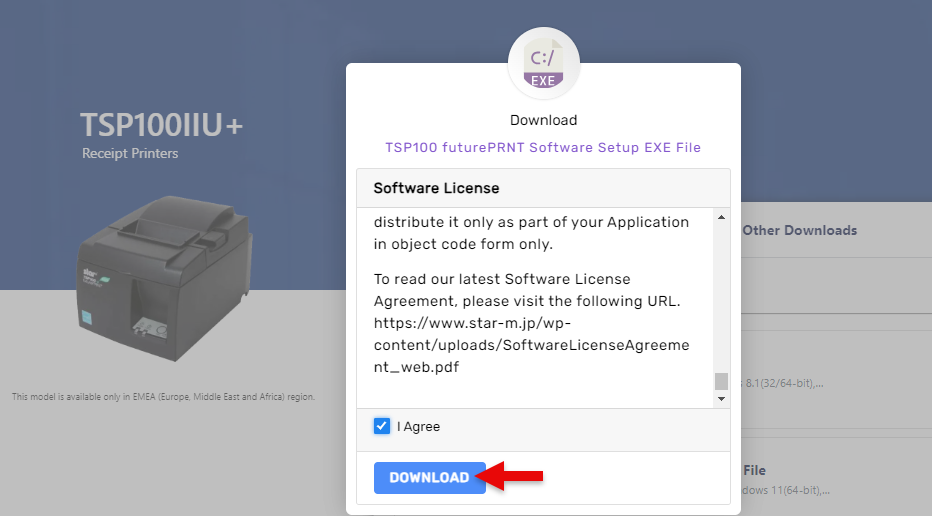
Click on the “Download” button in the EXE file.

On the software agreement pop-up, select the “I Agree” check box and click “Download.”
Click the download icon at the top right of the screen, and then the folder icon on the downloaded file.
In the computer downloads folder, double-click on the file.
Select Yes on the pop-up to allow changes.
Select Accept terms on the license agreement pop-up.
In the setup type pop-up, select Typically and click Next.
On the Ready to Install pop-up, Click Install.
Click Finish on the Installation Complete pop-up.
Once completing the installation of the printer, proceed to Connect the printer to the POS.