Label printer settings
Follow the steps below to set up a label printer:
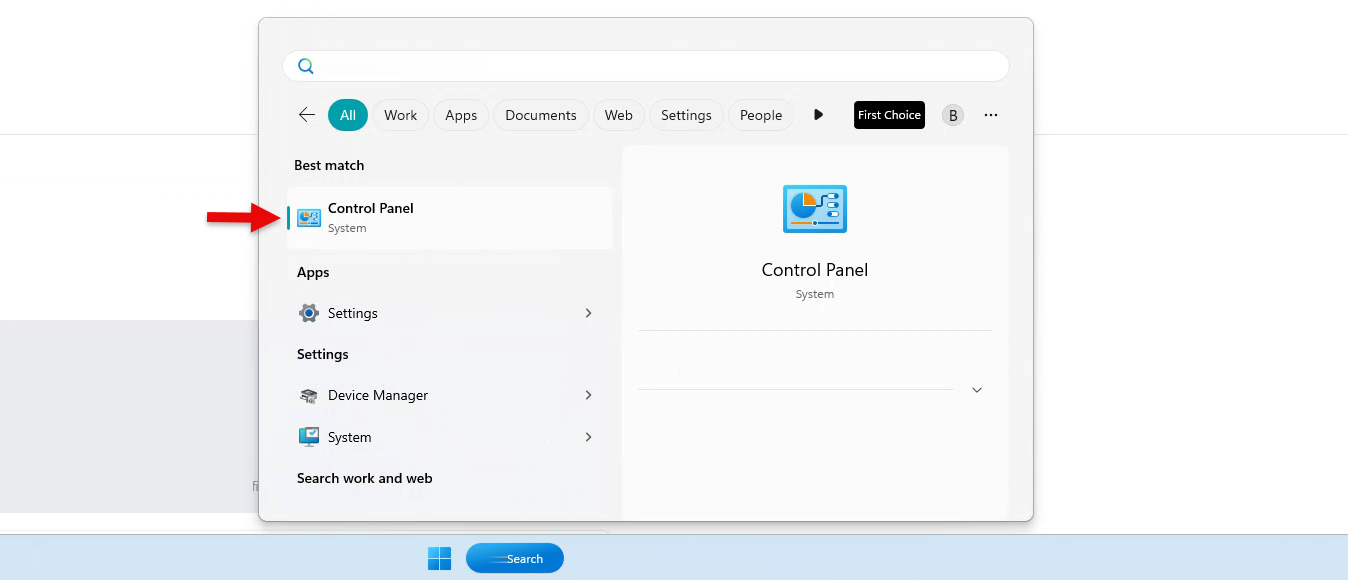
Click the search bar on the page footer, and search “Control Panel” in the popup.
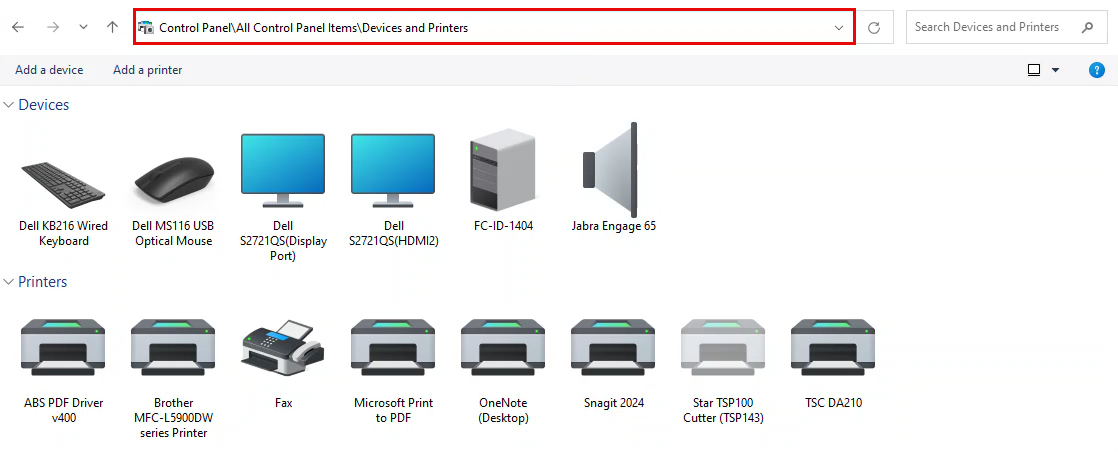
Enter and search “Control Panel\All Control Panel Items\Devices and Printers” in the search bar.
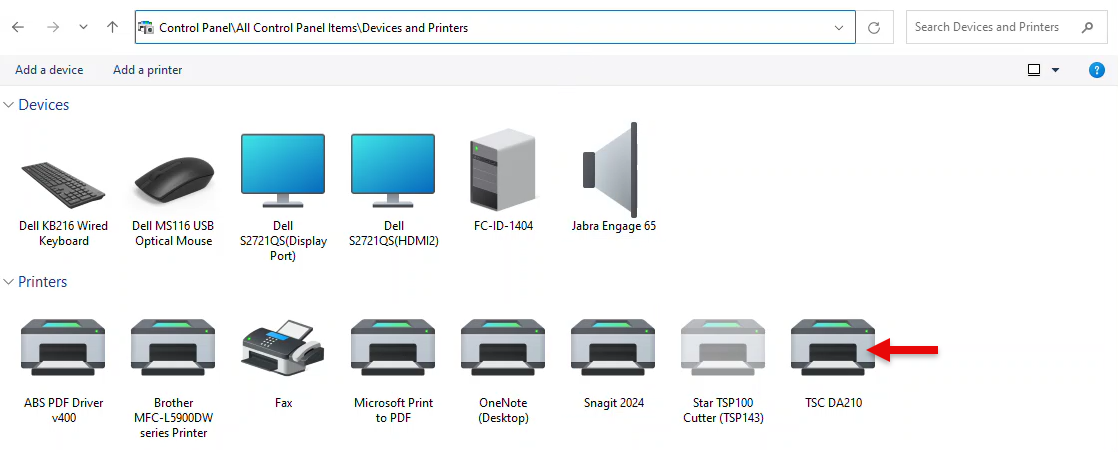
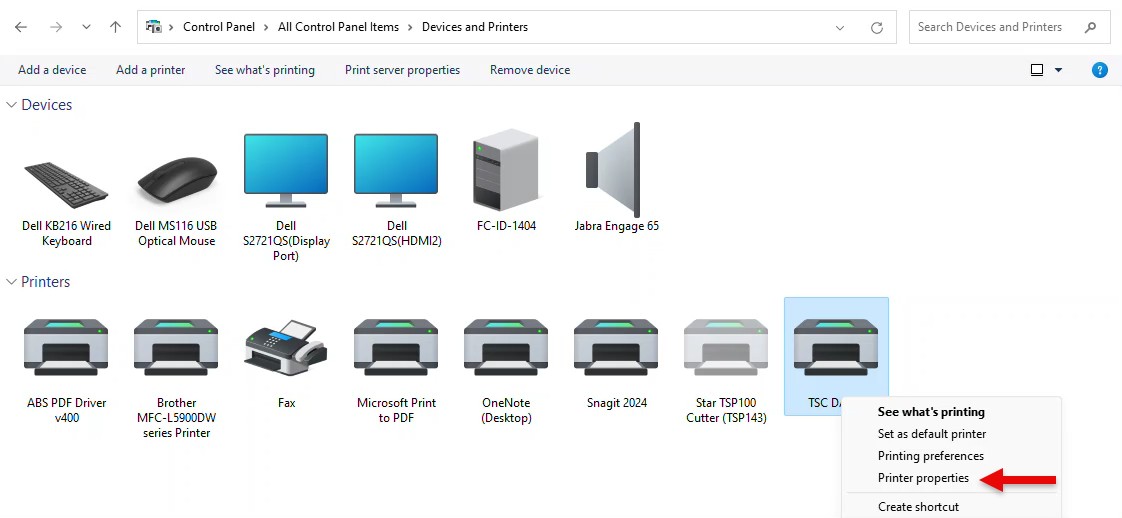
Right-click on the TSC DA210 printer icon.
Click “Printer Properties” on the pop-up.
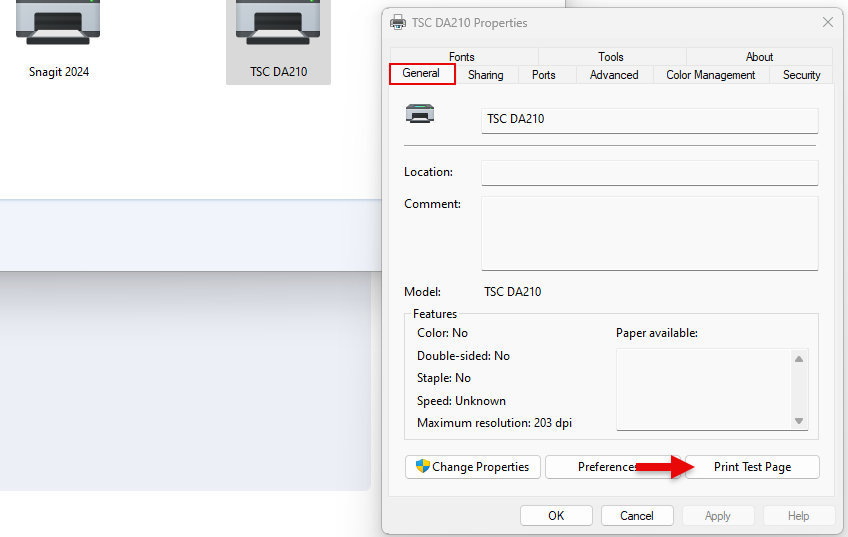
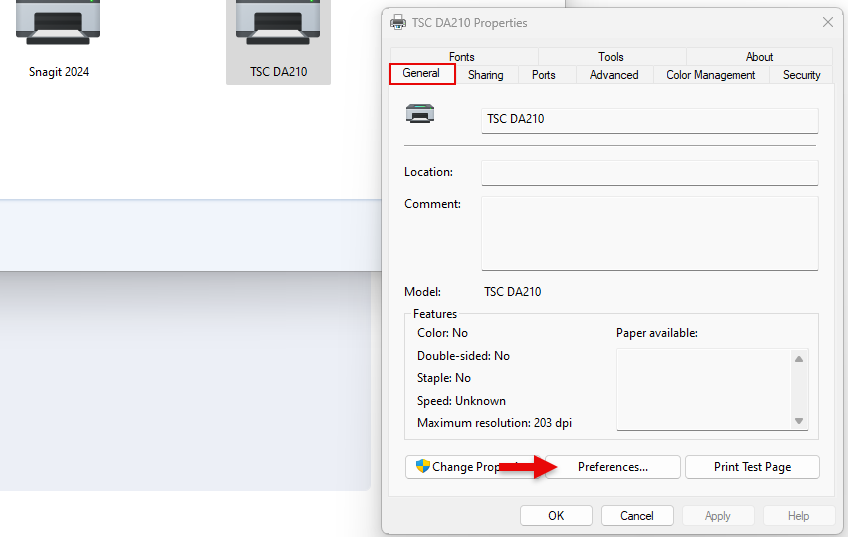
In the general tab, click “Preferences.”
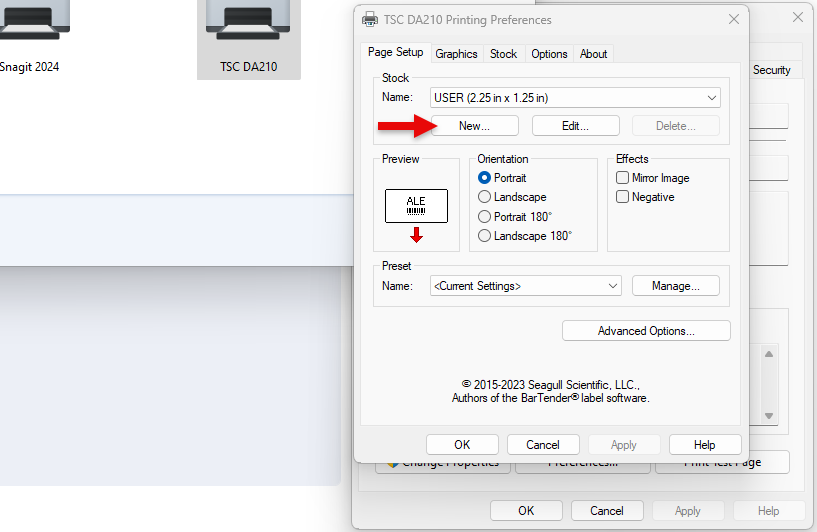
Click “New” to select a new label size.
Enter the label Width and Height, and click “Okay.”
Ensure the side margins are set to “0” to avoid text cutoff.

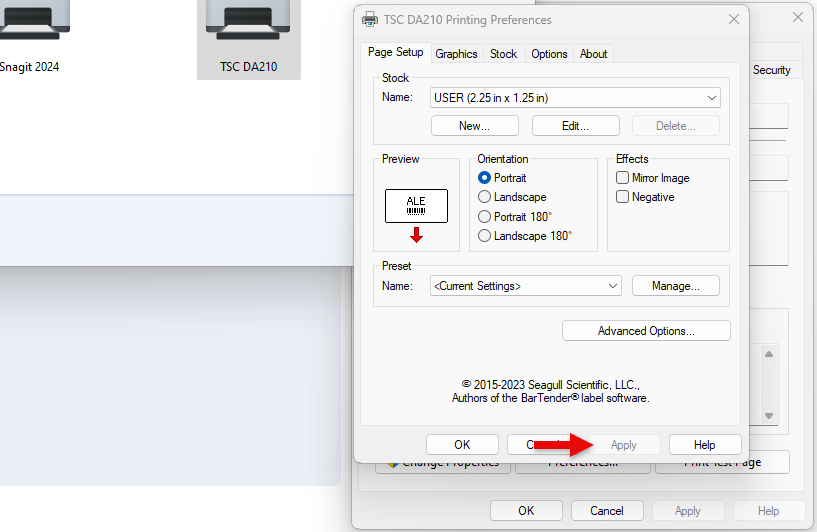
Click “Apply” in the page setup tab to apply changes.
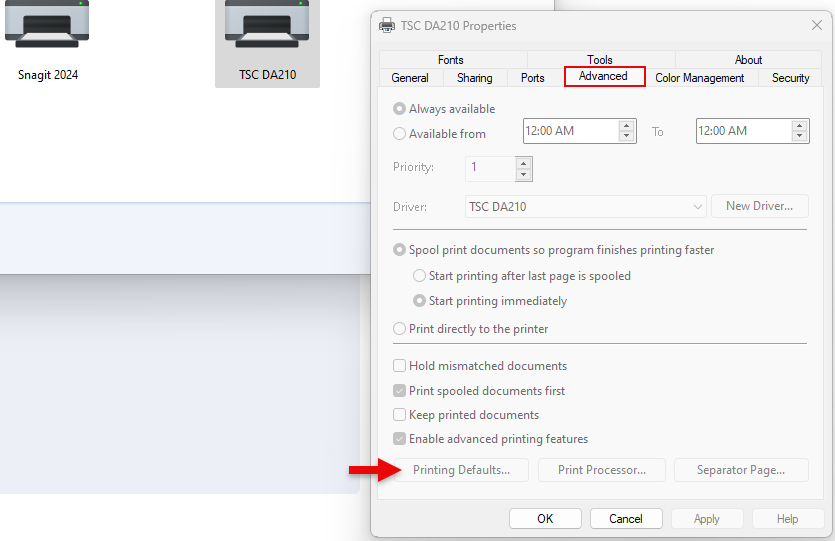
Navigate to the Advanced tab and click “Printing Defaults.”
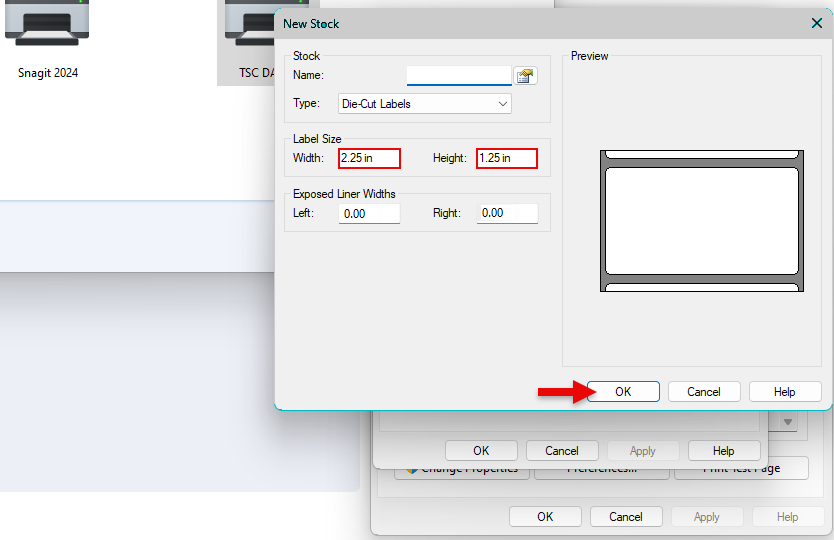
Click “New,” to select a new label size.
Enter the label Width and Height, and click “Okay.”
Click “Apply” on the page setup tab to apply changes.
Navigate to the General tab and click “Print Test Page.