Item Matrix- pivot
A matrix is an essential tool used to organize a wide range of options for similar items. It is a visual representation of data that can be structured in rows and columns, providing a comprehensive overview of the inventory. By creating a matrix, it is easier to compare and contrast different features of the items systematically, which helps with efficient and effective purchasing, selling, and inventory management.
Below are the steps to create a new matrix pivot:
Open Backoffice.
Click “Items” in the Main Navigation on the left. In the scrollable dropdown, select “Create Matrix / Pivot.”
Following is a guide on navigating the different sections of the Matrix page.
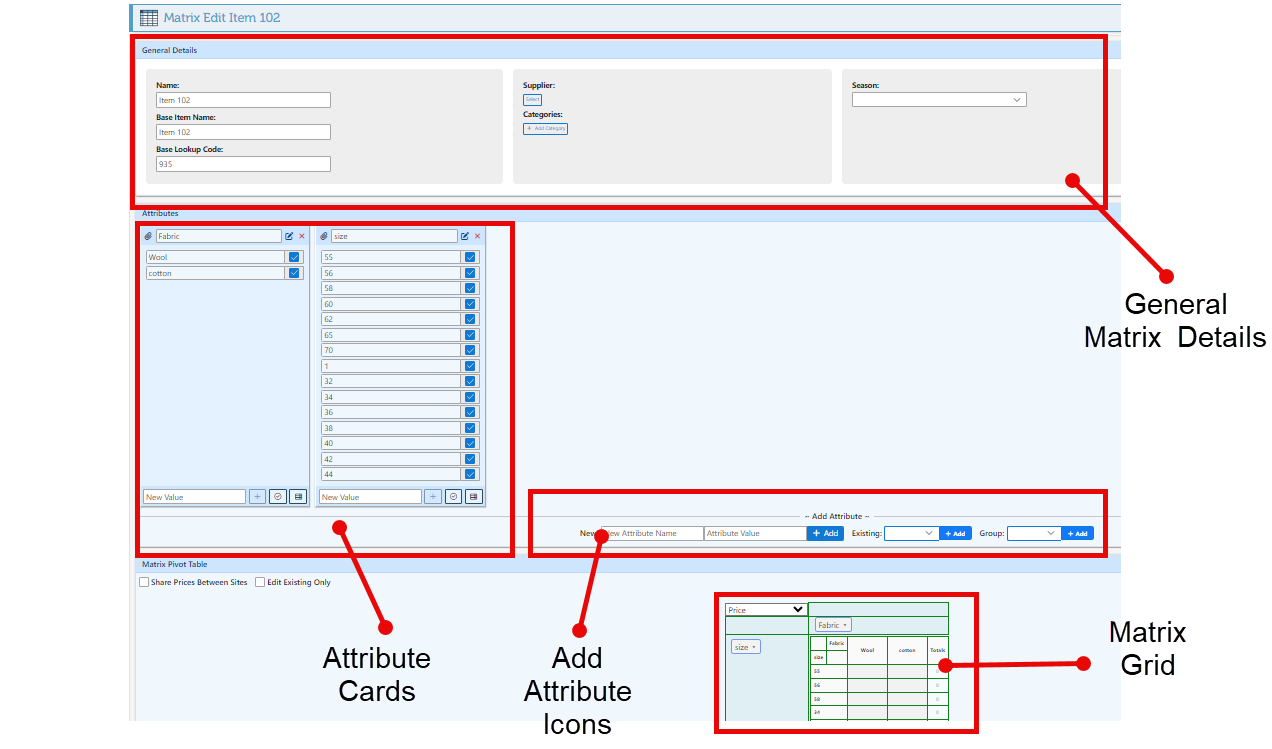
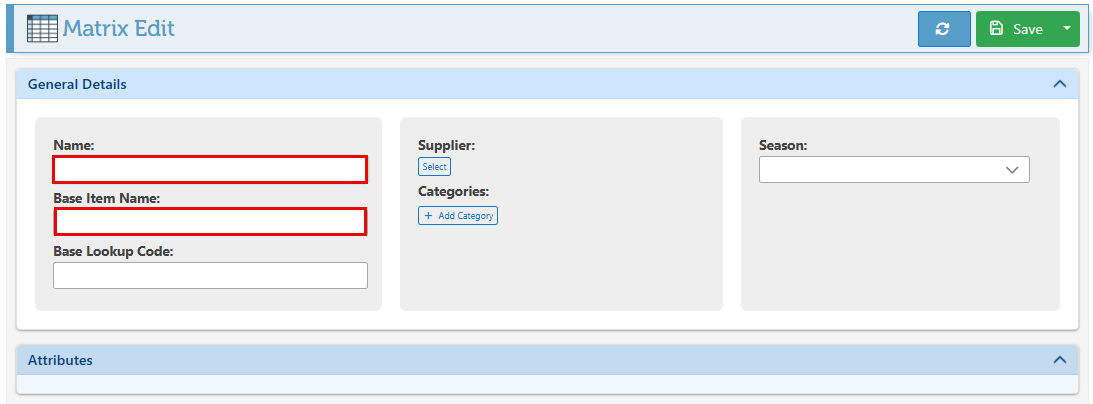
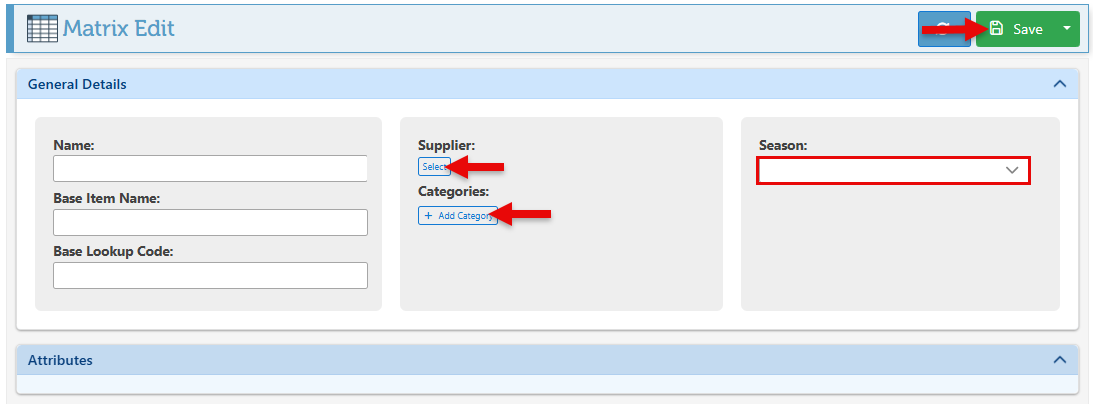
General Matrix Details
Enter the Matrix/ Pivot Item and Base Item name.
These could be the same or two different names. The pivot base item name is the primary name that will be displayed as a prefix for all items in the Pivot, while the item name is used for a more detailed description.
Select and enter the desired Fields. ( Supplier, Category, Season, style #, etc.)
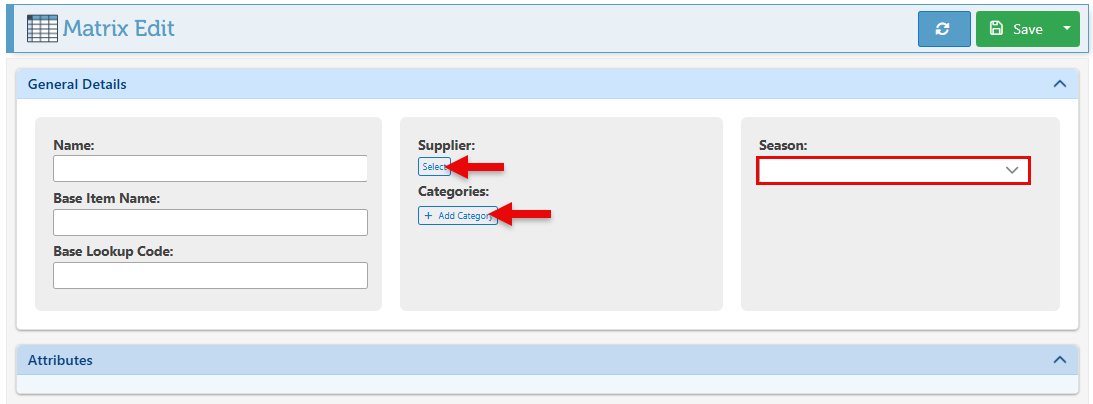
The Matrix homepage features a range of custom fields. To select which fields to display, click on the “Page Layout Configurations” icon located on the right side of the bottom ribbon. Select specific configurations in the page setup pop-up to show or hide certain fields on the matrix page, and click “Save” to apply the changes.
Click “Save” at the top right to save.
Add attributes Icons
Once saved, attributes can be added to the matrix in either of 3 ways. For more on how to create attributes, Click here. For more on how to use attributes, Click here.
Enter a new Attribute name, enter the value, and click “Add.”

To add an existing attribute, click on the bar. In the dropdown, select the relevant attribute and click “Add.”

Add an Already created attribute group to the matrix, select from the dropdown, and click “Add.” (Creating Attribute groups coming soon…)

Attribute Cards
The selected attribute will appear as a card on the page. At the bottom of the card, additional values can be set for the attribute. The following are three options on how to do so:

Click on the “New value” bar. If values have already been created for the attribute, a selection dropdown will appear; otherwise, the new value can be typed in the bar. Click on the “+” icon to add the value.
To add all attribute values, click on the select icon.
Click on the grid icon to see the list of values, which can then be selected.
Navigate to the matrix grid section at the bottom of the page. The selected attributes will be displayed at the top of the grid. To add them to the matrix, click and drag the attributes to the column or row header.
Attributes can be set up to appear in a specific position, …. click here.
Matrix Grid
Select an action from the dropdown menu at the top-left of the matrix to access various operations that can be performed on the matrix.
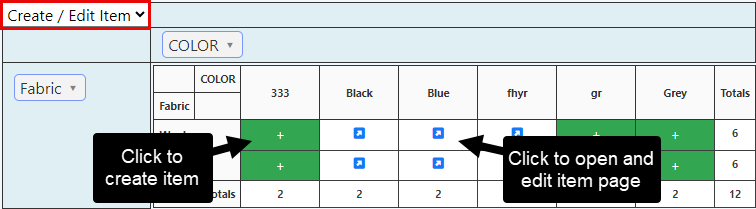
Create / edit item.
Click on item spaces to create new items or use the arrow icon to open and edit items.
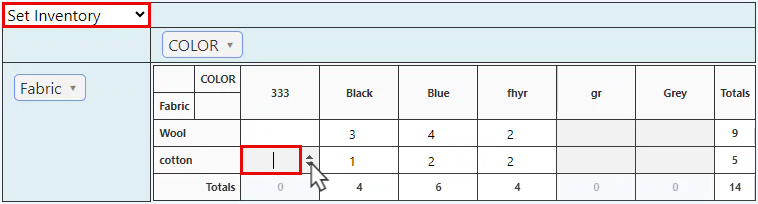
Set inventory
Click on the arrows or enter an amount in the item space to create or edit an item inventory.
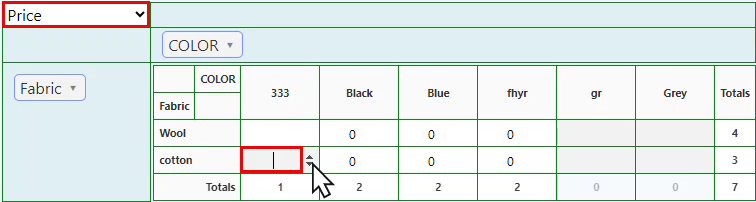
Price
Click on the arrows or enter an amount in the item space to create an individual item price.
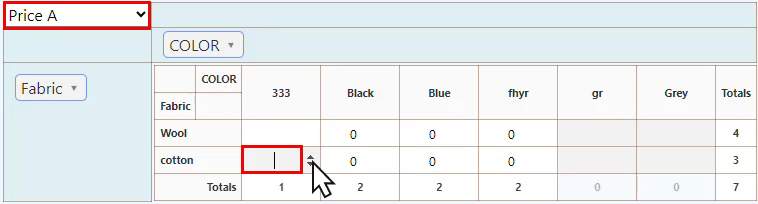
Price A/B
If applicable, enter item price A or B
Cost
Enter the item cost.
MSRP
Enter the suggested retail price for the items.
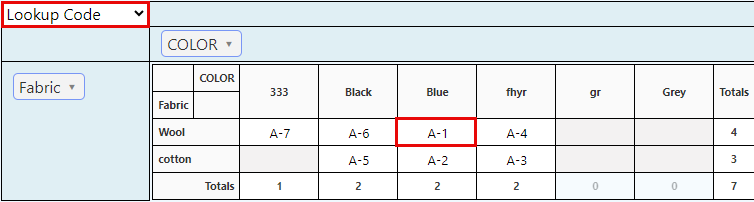
Lookup Code
To change an item lookup code, click on the item space and edit the code.
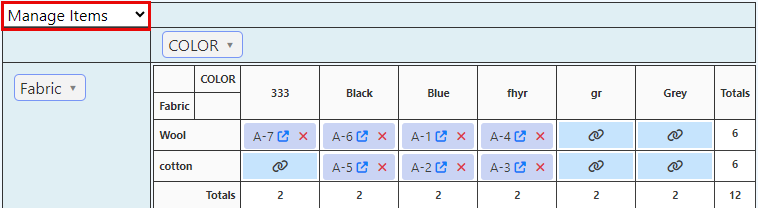
Manage items
To link an existing item (an item already in the system) to the matrix, click the link icon in the item space and select an item from the appearing items list.
To view the details and to edit the item, click on the arrow icon.
To delete an item from the matrix, click on the X. This will remove the arrow icon from the item space, disabling the view or editing of the item details.
By default, clicking on the X will remove the item from the matrix, but the item will still exist in the system. However, it is possible to configure the page layout so that clicking on the X should also delete the item from the system. It is essential to note that this feature will only work if there is no inventory movement on the item in question, such as an open transaction, purchase order, or set inventory page.
Once the matrix has been created, a chart listing all the relevant item details will be displayed. The chart allows for individual item editing. Click on an item field to edit or enter item details.
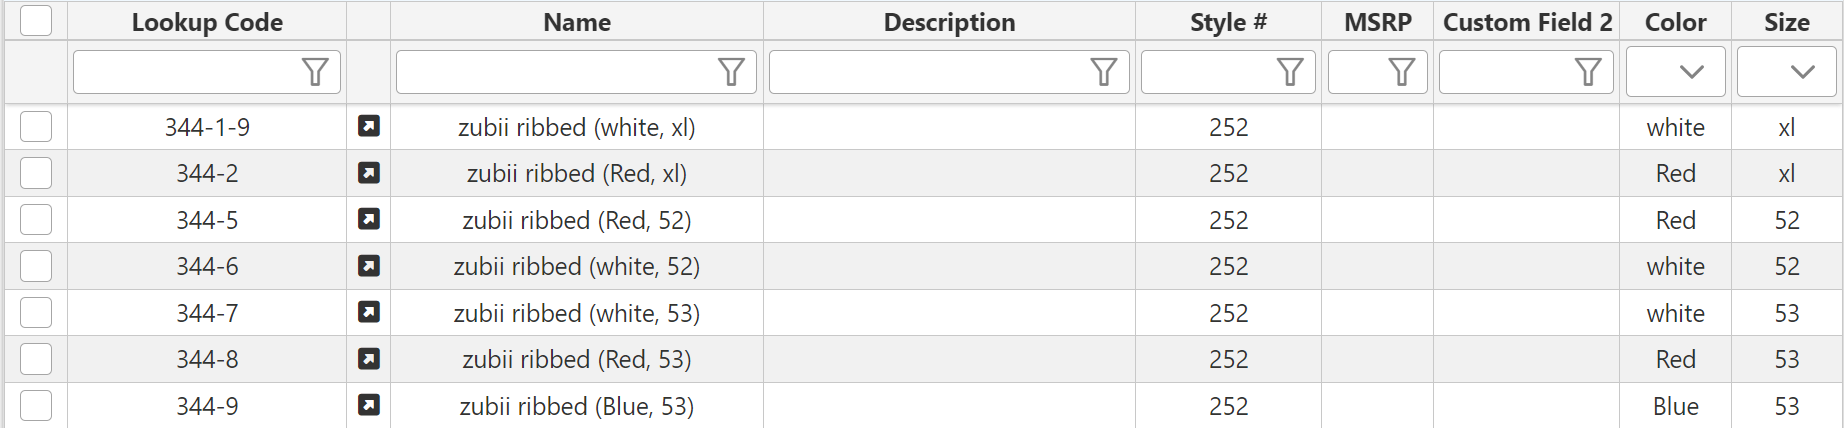
Navigate to the bottom of the page. In the item detail tabs, Enter or modify general item information.

Click save at the top right of the page to save all updated matrix details.
Click on the edit (yellow, pencil) icon to edit the matrix/pivot name and attributes.

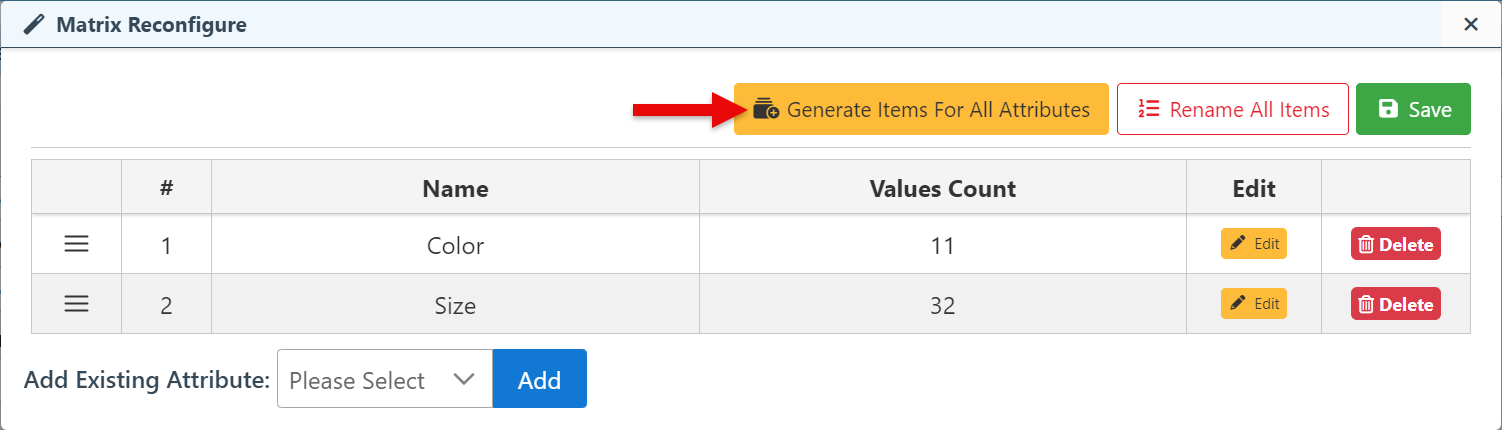
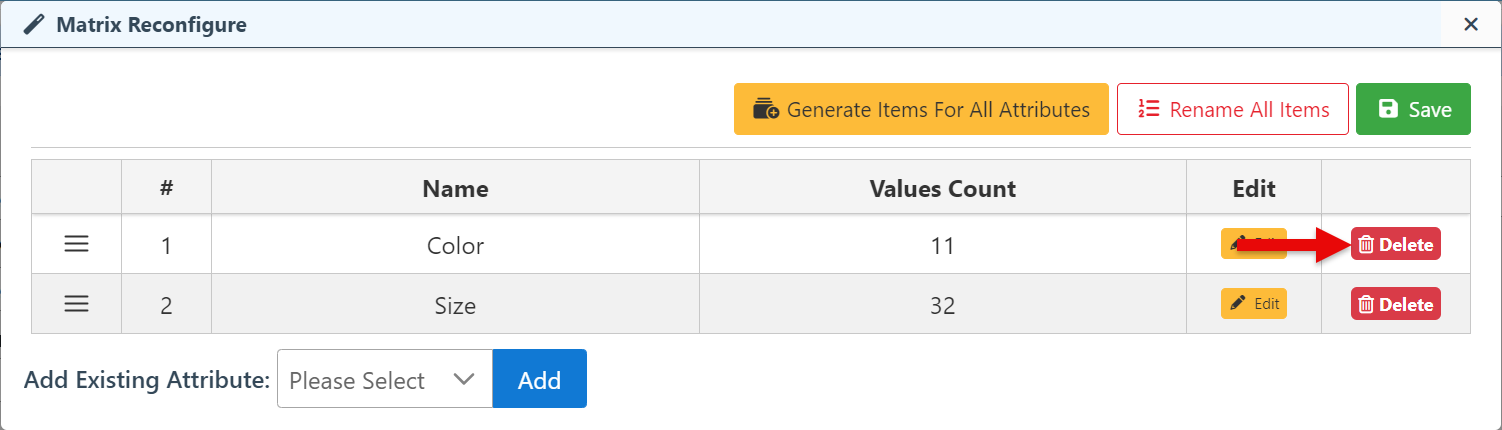
To create items for all attributes, click “generate items for all attributes.”
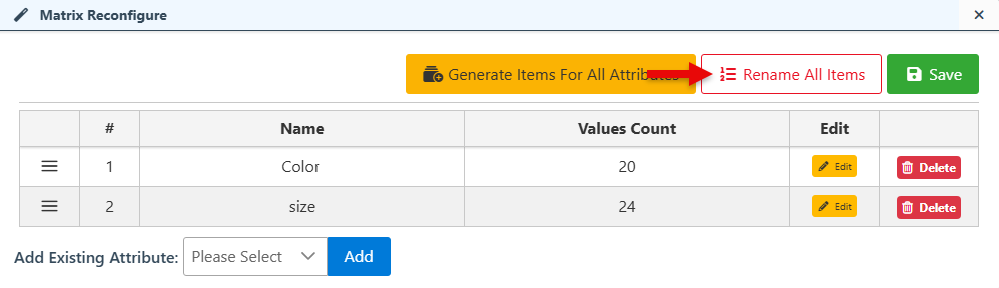
Click "Rename All Items" to rename all items in the matrix. This feature is used to update all item names if any changes have been made, such as modifying the matrix name (the prefix for all matrix items) or any attribute name.
Click “Edit” on the relevant attribute to be redirected to the attribute page. Proceed to edit relevant attribute details. For a guide on the attributes page, Click here.
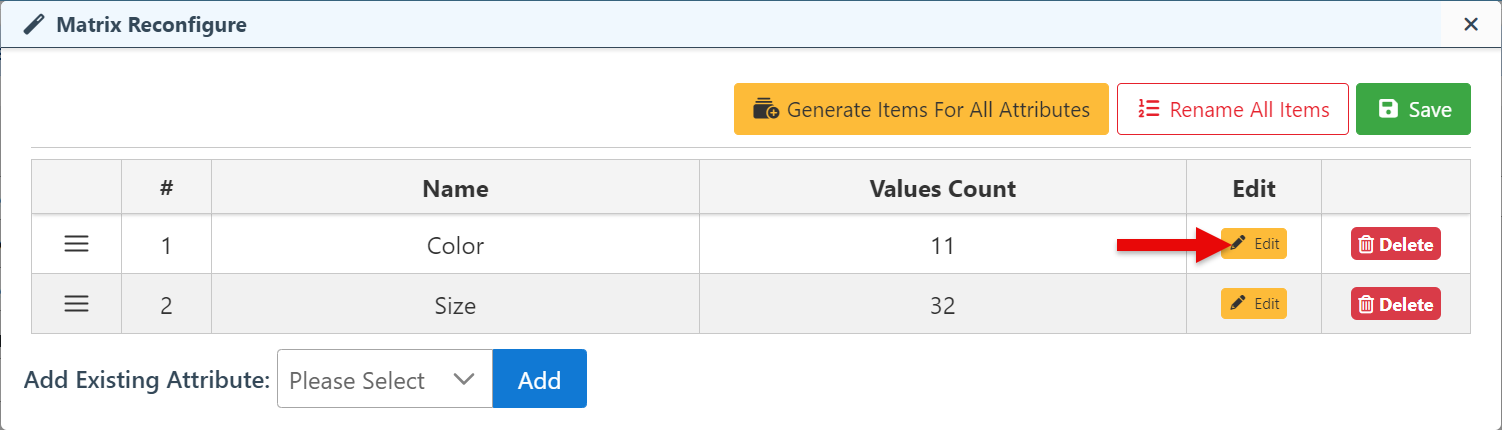
Click “Delete” to delete a specific attribute from the matrix.
To view or edit an existing matrix pivot:
Click on “Items” in the Main Navigation menu. In the scrollable dropdown, select Matrix/ Pivot.
Search and select the relevant Matrix.
Use matrix actions outlined above to edit matrix items or details.