Set Customer Credit Limit
Follow the steps outlined below to set the credit limit for new and existing customers. This guide explains how to establish a general credit limit for all customers. For detailed instructions on setting the credit limit for an individual customer, see Create New Customer.
Default Credit Limit for New Accounts:
Open BackOffice.
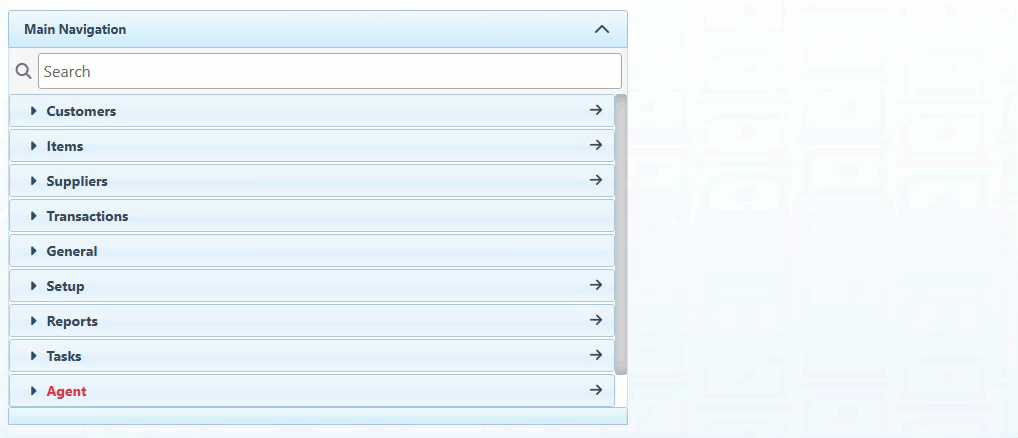
Click “Agent” in the Main Navigation menu, and select “Configurations” from the scrollable dropdown.
Select “Site Keys” from the Level dropdown menu.

Choose the relevant location from the “Configuration Set” dropdown menu.

Use the Name column filter bar to search for the “CustomerDefaultCreditLimit” configuration.

Enter the default credit limit to which to set all new accounts in the “Value” field.

Click “Save” at the top right.

Update the Credit Limit of Existing Accounts:
Open Backoffice.
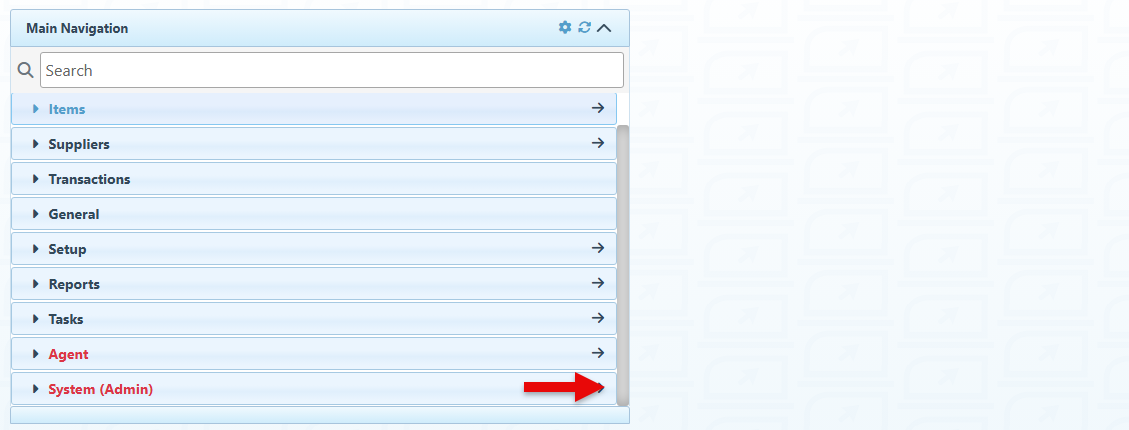
In the Main Navigation menu, click the arrow on the right of the System(Admin) tab.
Use the search bar at the top right of the page to find and select the “Customer Update For All” configuration.

Enter the credit limit to be established for all existing customers in the designated field.
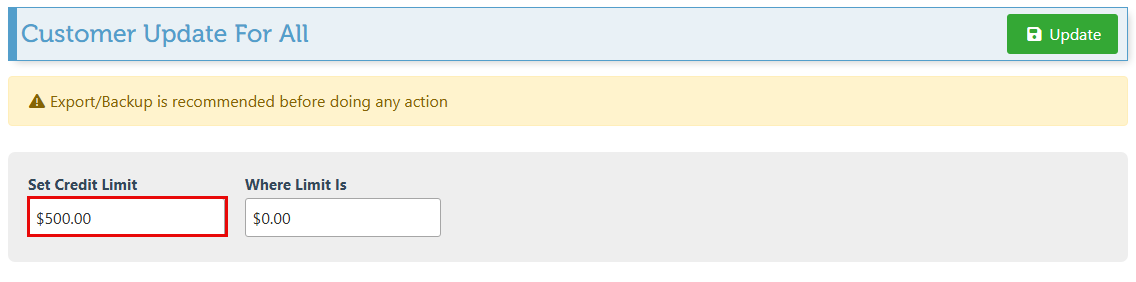
Enter the current credit limit that is to be replaced with the new credit limit in the “Where Limit Is” field. The new credit limit will only be applied to accounts with a current credit limit matching the entered amount. This process enables all default accounts to be updated while excluding accounts with a unique and specific credit limit from receiving the new credit limit.

Click “Update” at the top right to update the credit limit for all applicable accounts.
