Purchase Order Page Layout Configurations
The Purchase Order (PO) page layout can be customized to create a unique and efficient setup according to specific business preferences. Below is a guide on the Purchase order page configurations:
Log in to the BackOffice.
Click ”Transactions” in the Main Navigation on the left, and select “Purchase orders” in the scrollable dropdown.
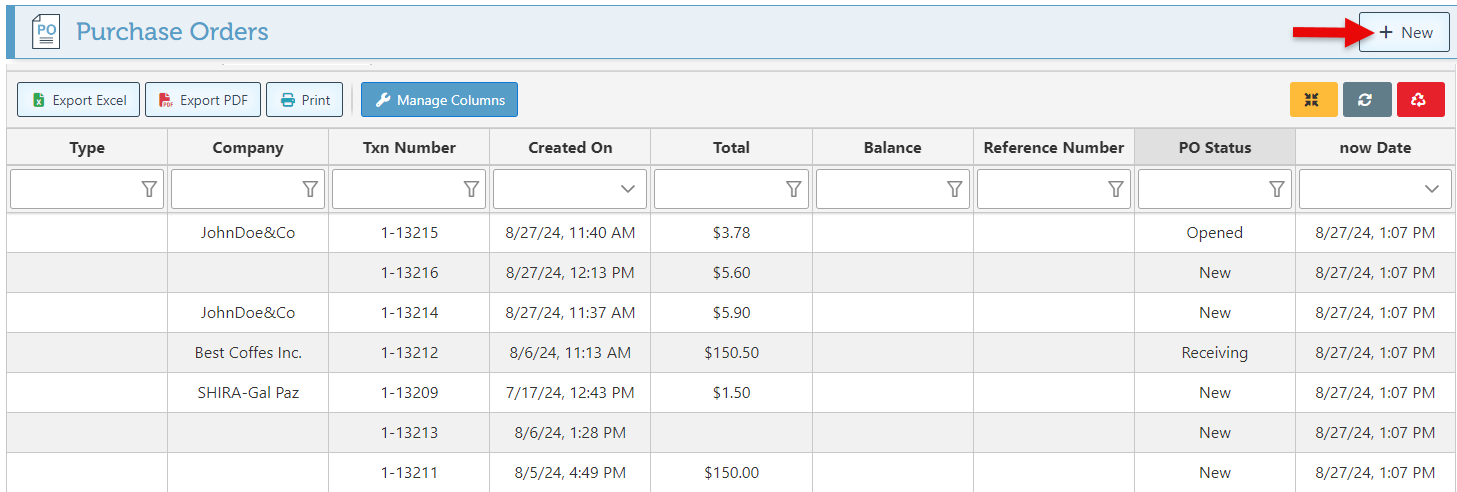
Click “New” or select a PO from the list to access a purchase order.
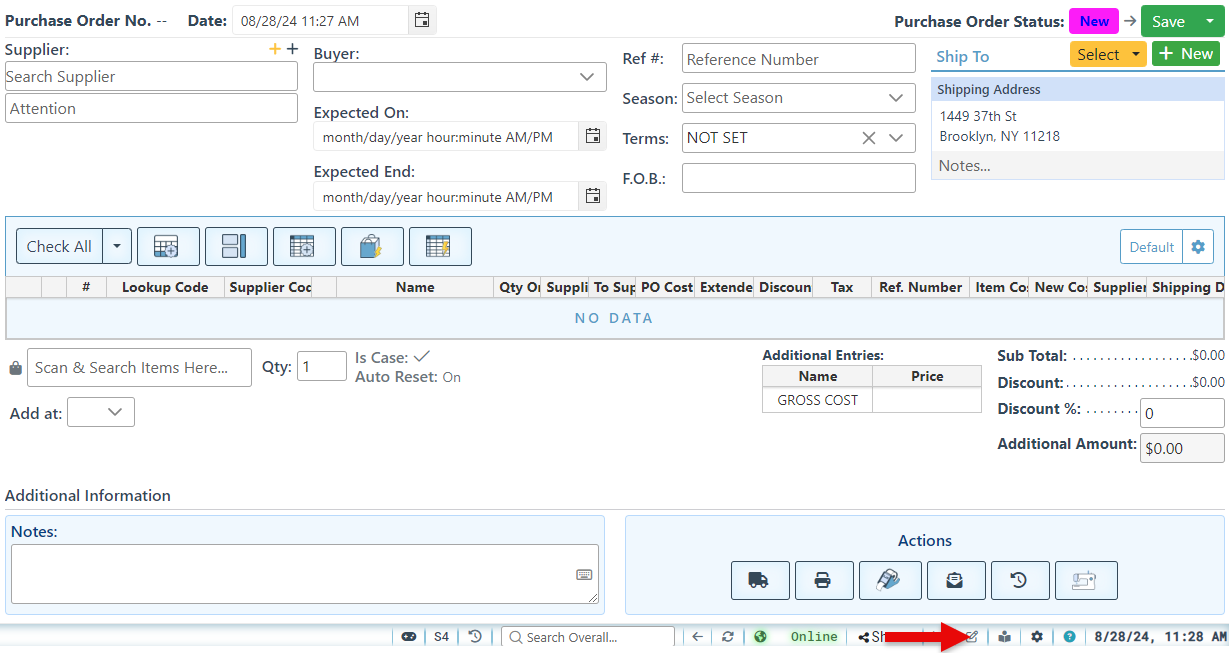
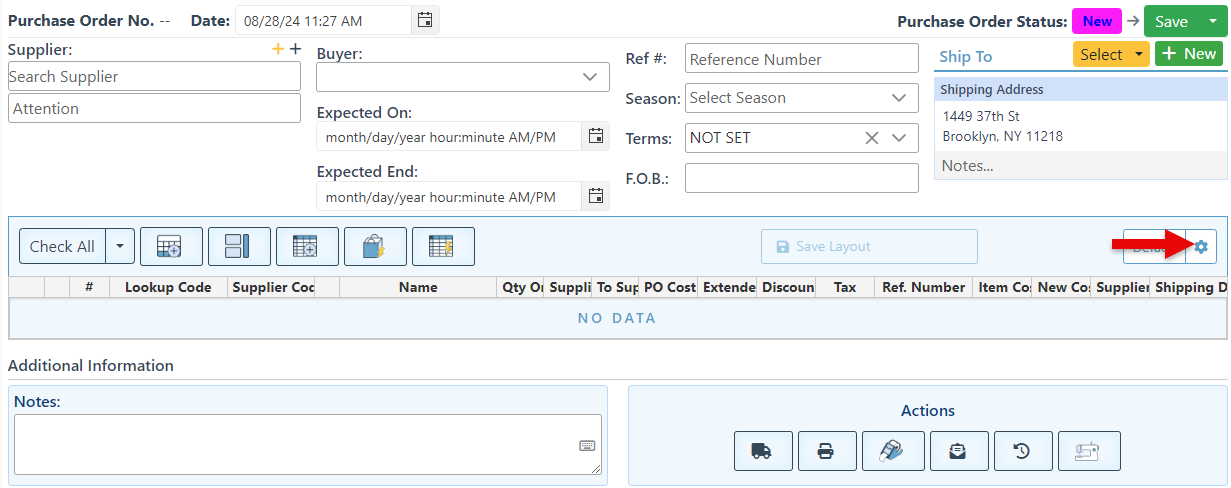
Click the "Page Layout Configurations" button at the bottom left of the page to open.
Configurations
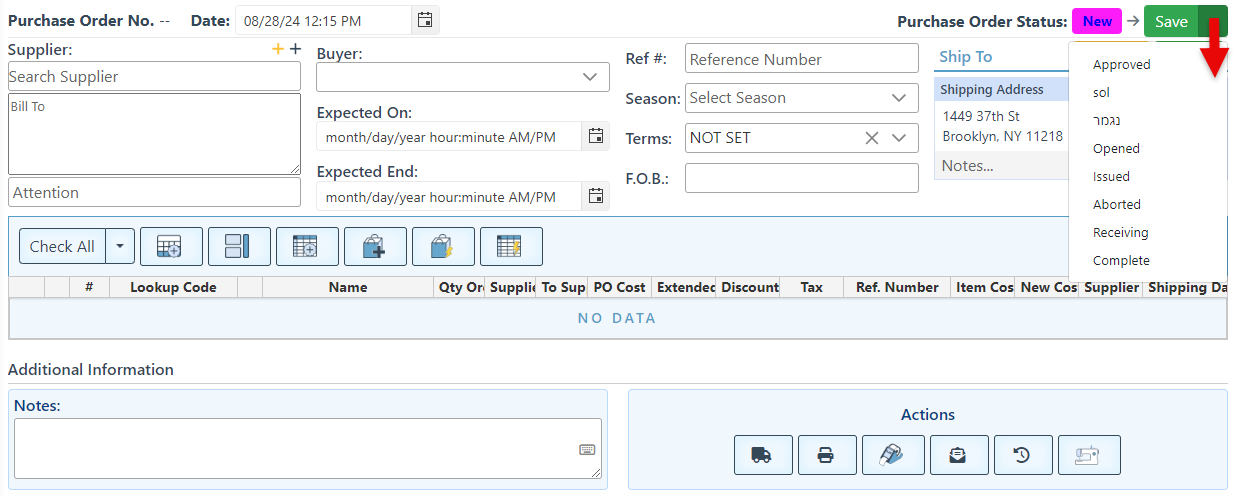
The configurations below follow the order in which they are listed on the Purchase Order Configurations page. The attached images illustrate the change in the purchase order when selecting the configuration.
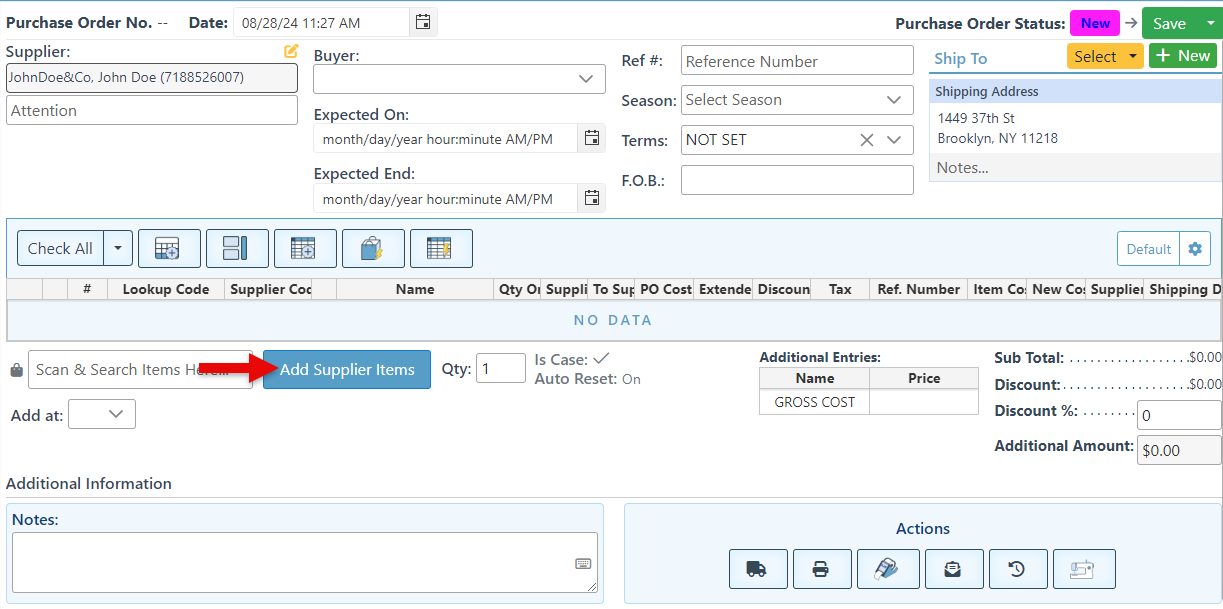
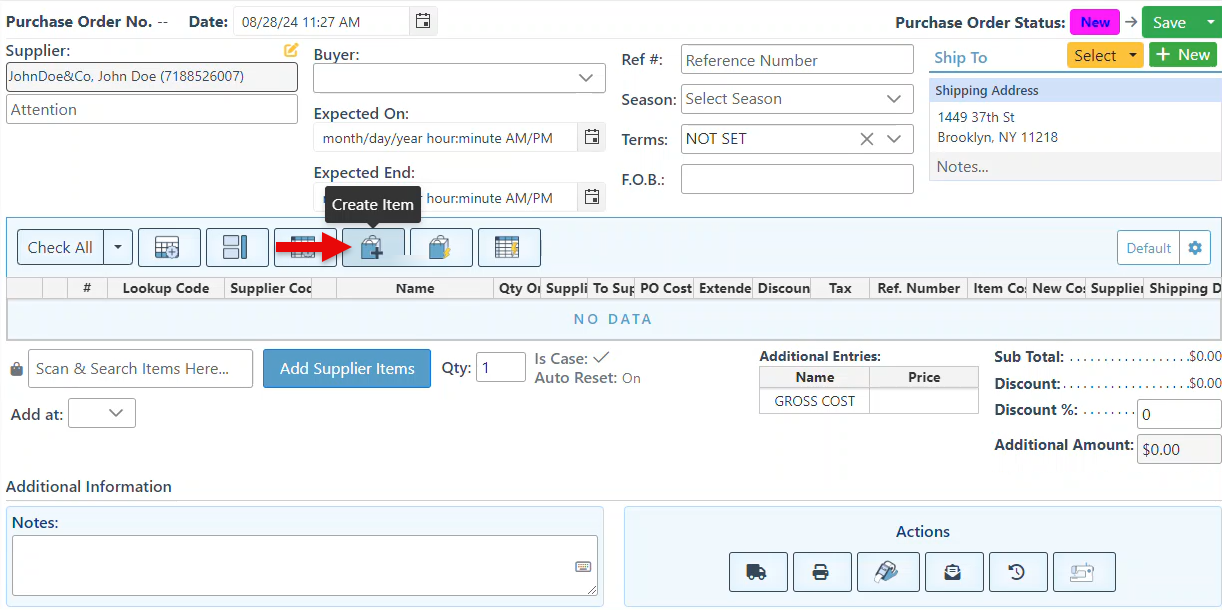
Select the “Show Add Supplier Items Button” checkbox to add the button that opens a list of the supplier’s items from where items can be selected and added to the purchase order.
Select "Update PO Cost on Item Cost Change" to automatically update the purchase order item cost based on default item cost changes.
See Purchase Order Pricing for more information on purchase order costs.
Select "Update Item Cost on PO Cost Change" to automatically update item costs based on the PO item cost changes.
See Purchase Order Pricing, for more information on purchase order costs.
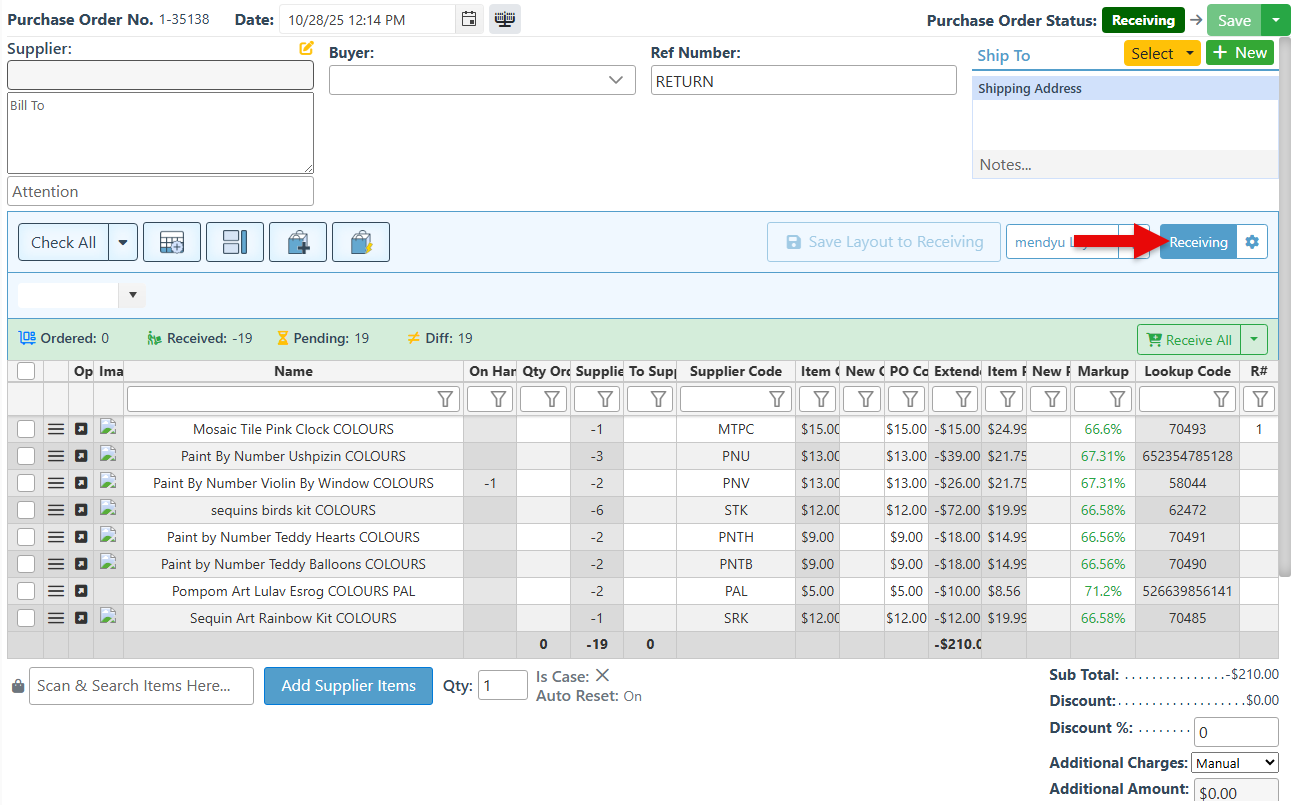
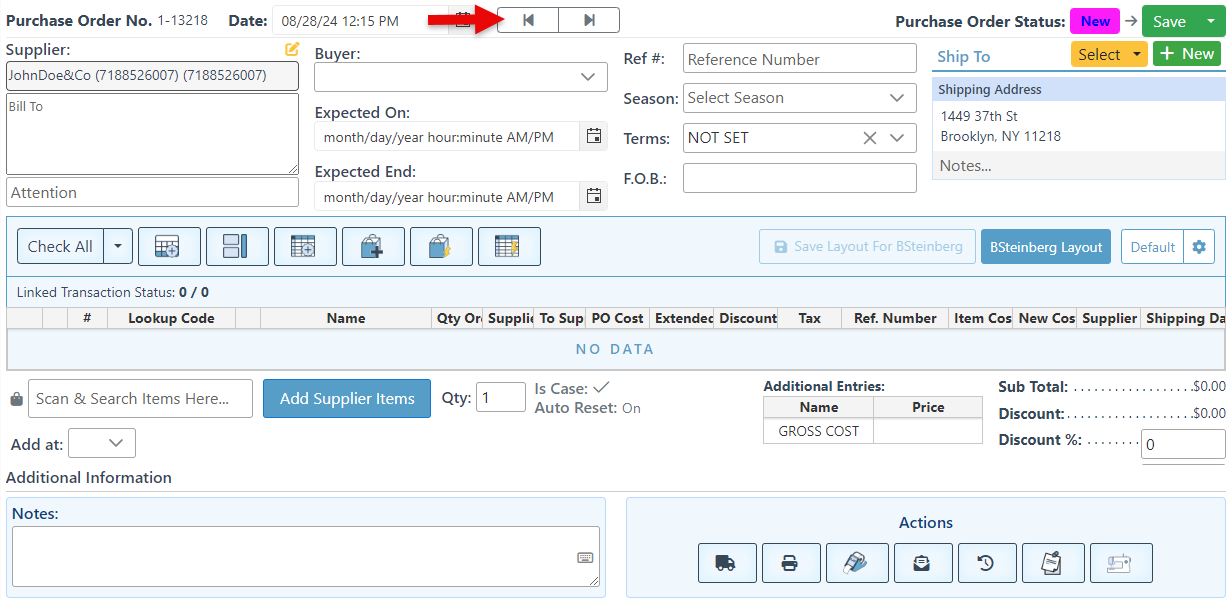
Select the “Show Offset Navigation Buttons” checkbox to add navigation arrows that enable the state of the Purchase order to be updated to the next or returned to the previous state.
Select “Default Scan Is Case” to set all items to be scanned as a case automatically.
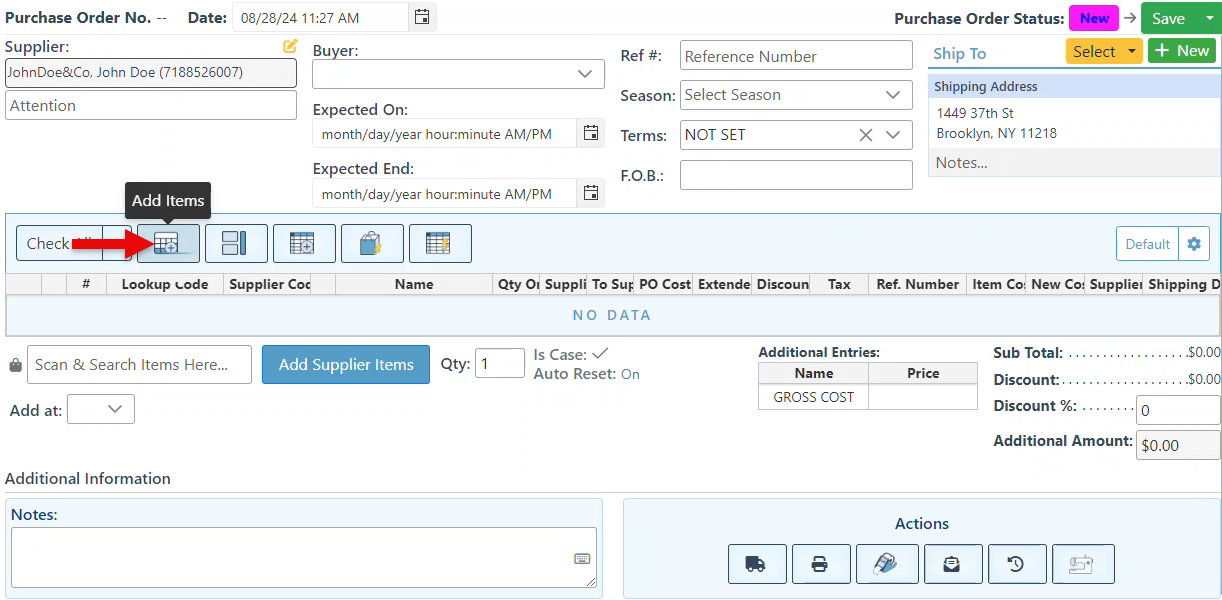
Select the "Show Add Items Button in the Toolbar" to add the button that opens an items list from where items can be selected and added to the purchase order.
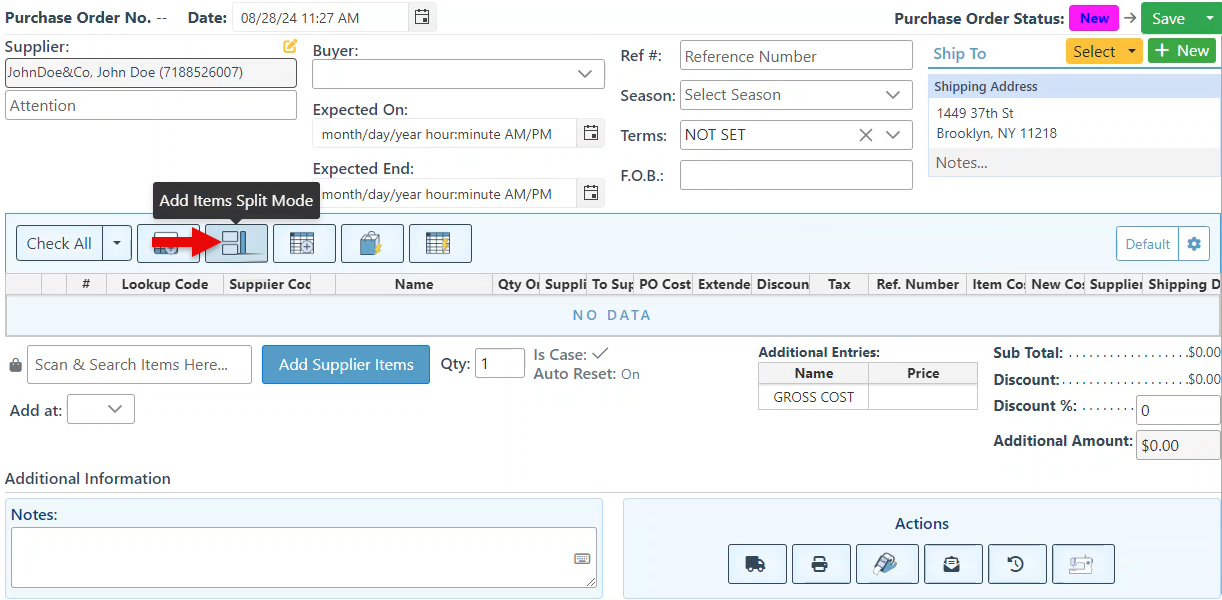
Select “Show Add Items Split Mode Button In Toolbar” to add a button that splits the screen and displays the items list page on the right side, providing a clear view for selecting and adding items to the purchase order.
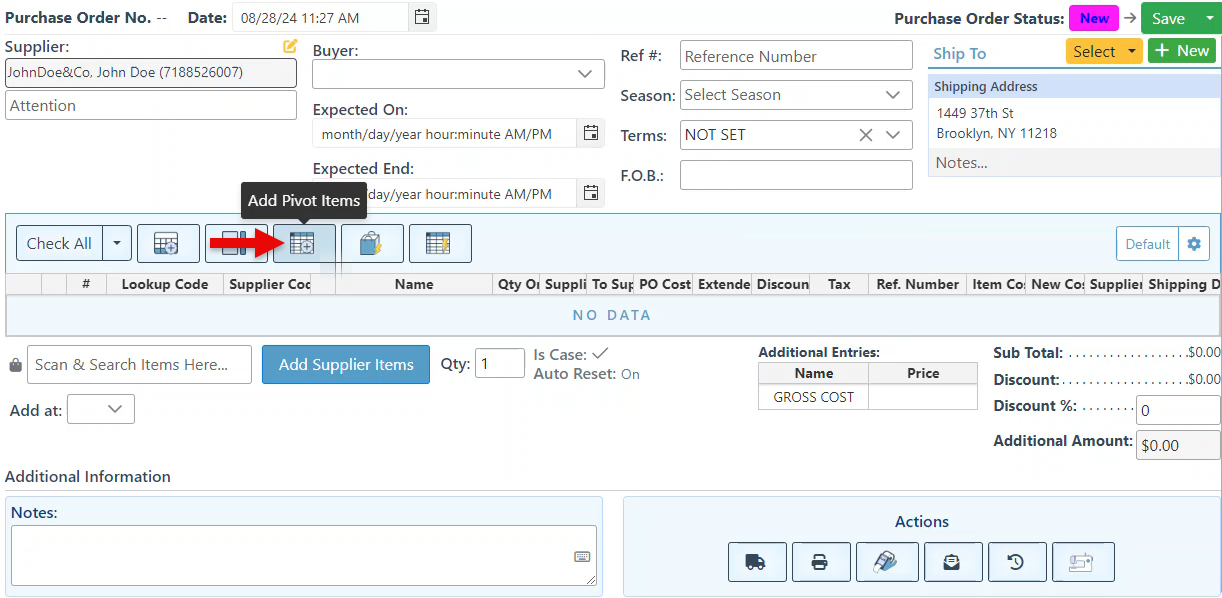
Select “Show Add Pivot Items Button In Toolbar” to add the button to the Purchase Order page. The buttons opens a matrix list, enabling items from a pivot to be selected and added to the purchase order.
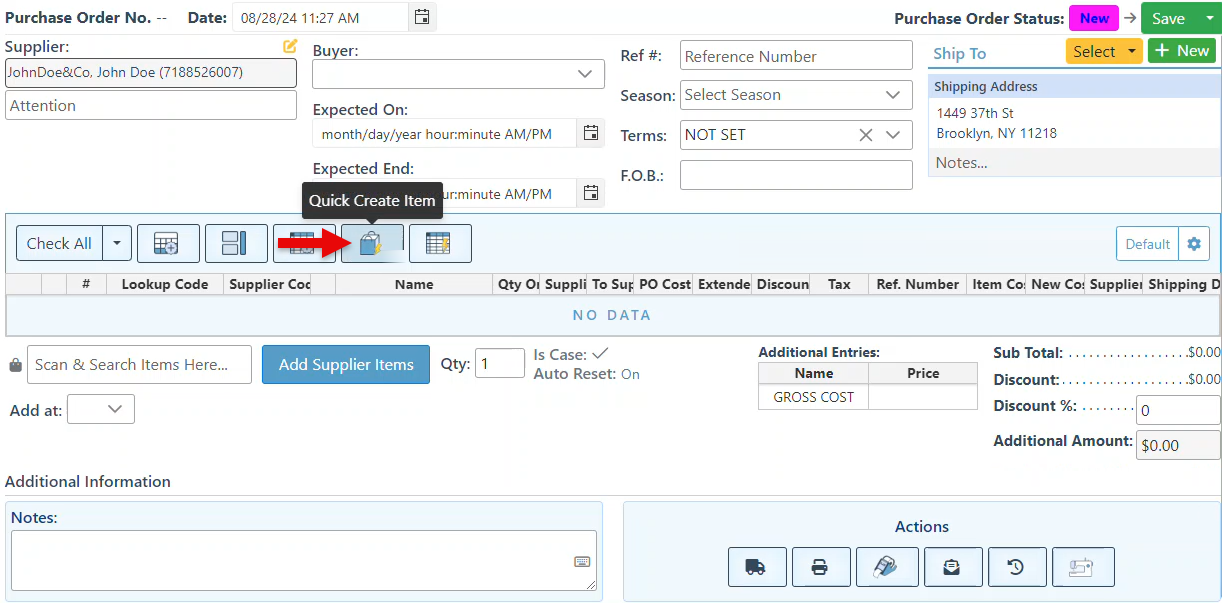
Select “Show Quick Create Item Button In Toolbar” to add the button to the Purchase order page. This allows new items to be simultaneously created and added to the purchase order.
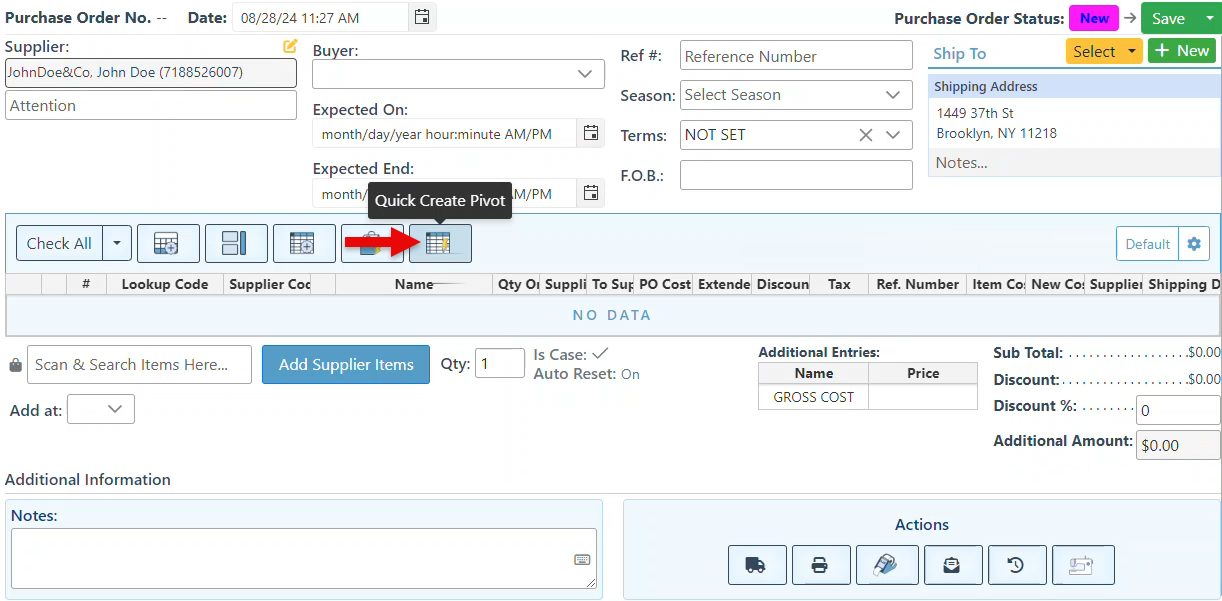
Select “Show Quick Create Pivot Button In Toolbar” to add the button that enables the creation of a new pivot and the simultaneous selection and addition of items from it to the purchase order.
Select “Show Full Create Item Button In Toolbar” to add the button from where a new item can be created and added to the purchase order using the detailed create item page.
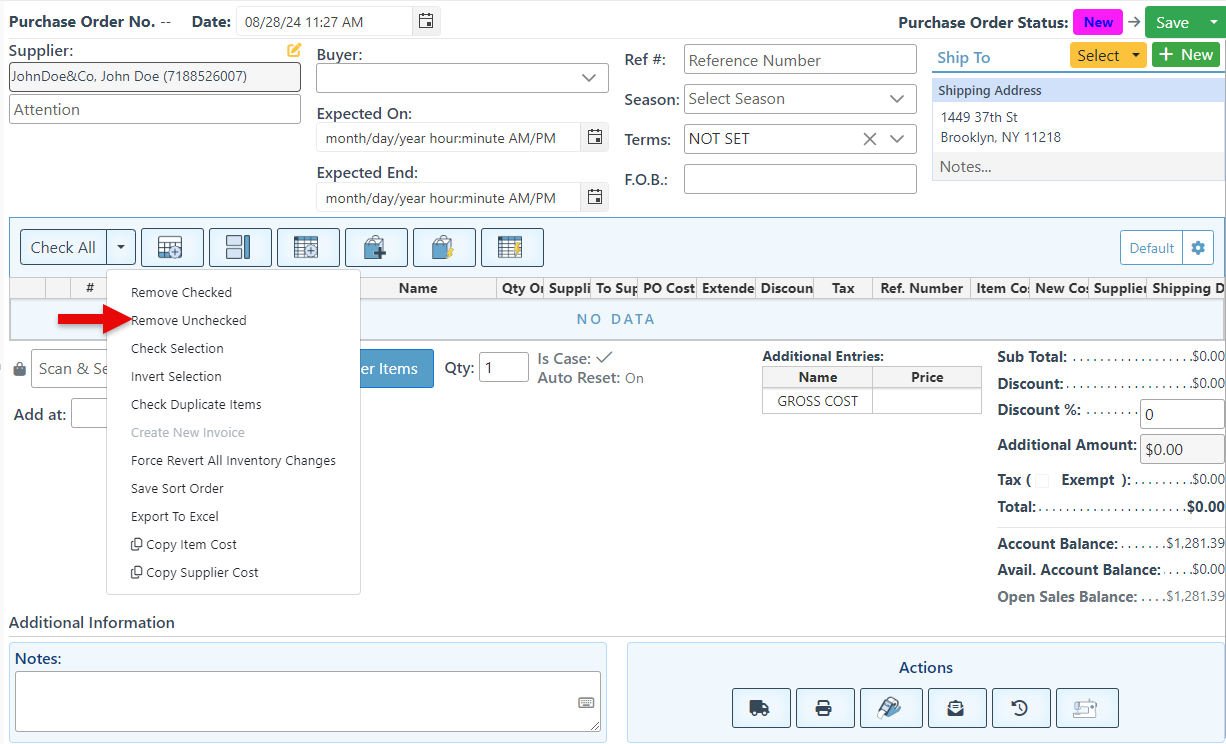
Select “Show Remove Unchecked” to add the option of removing all unchecked items from the Purchase Order to the “Check All” dropdown. This enables of all items in the purchase order except those selected.
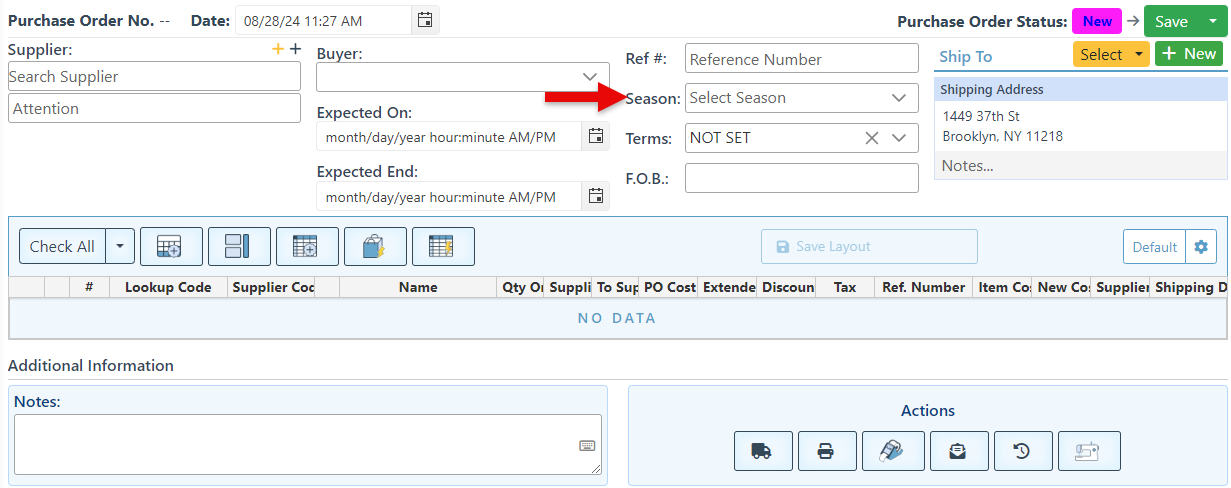
Select “Show Seasons” to add the Season field to the purchase order page.
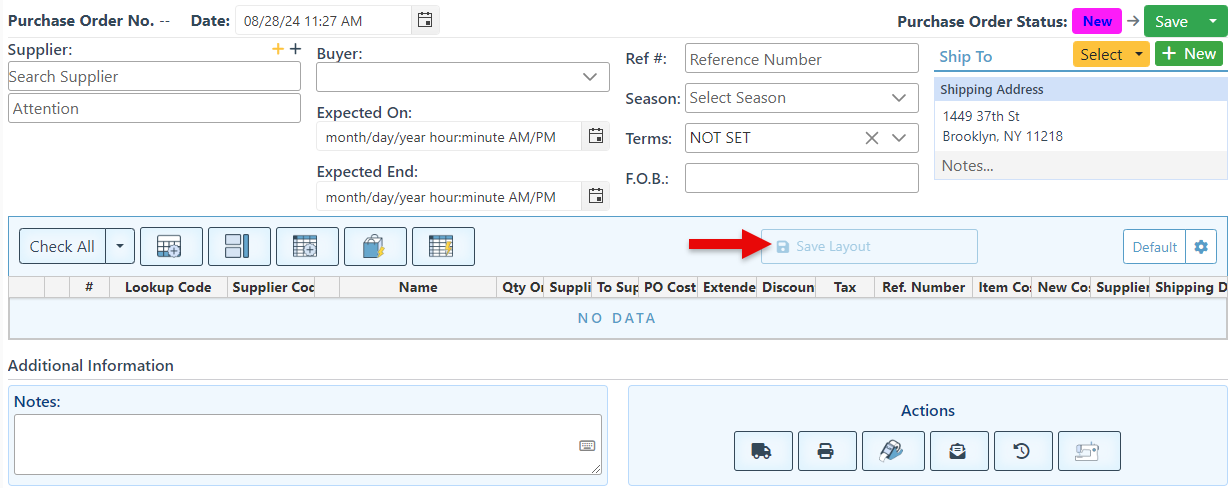
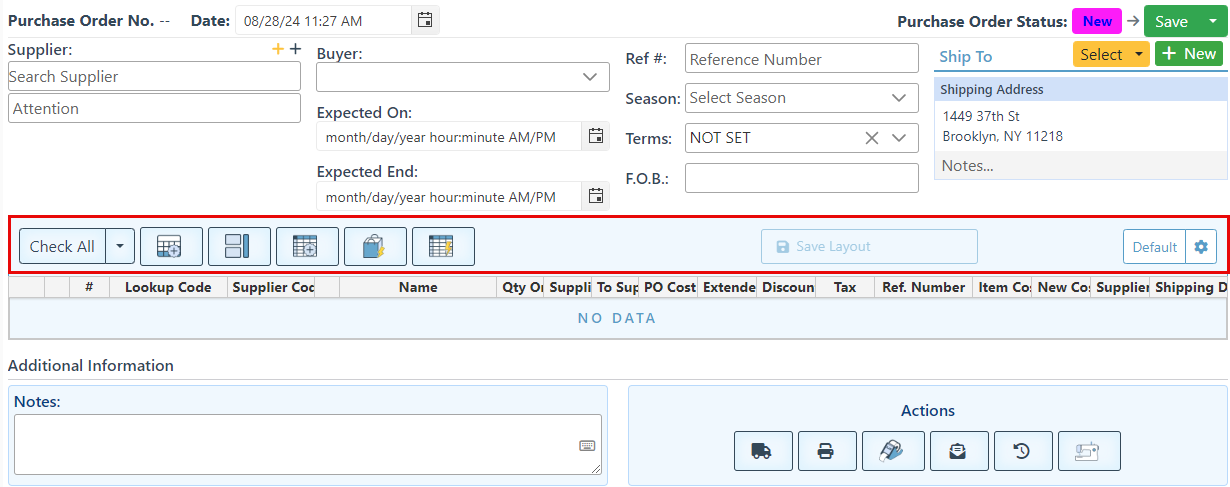
Select “Show Save Layout Button In Toolbar” to add the button to the Purchase order page. This is used to allow quick changes made to the item grid layout to be saved as the default layout.
Select "Show Edit Layout Button In Toolbar" to add the item fields settings button to the purchase order page. This button allows access to the item grid configurations, where specific fields can be added, removed, or modified.
Select “Show Toolbar” to display the toolbar, including the item add-on tools and layout setting icons, on the Purchase Order page.
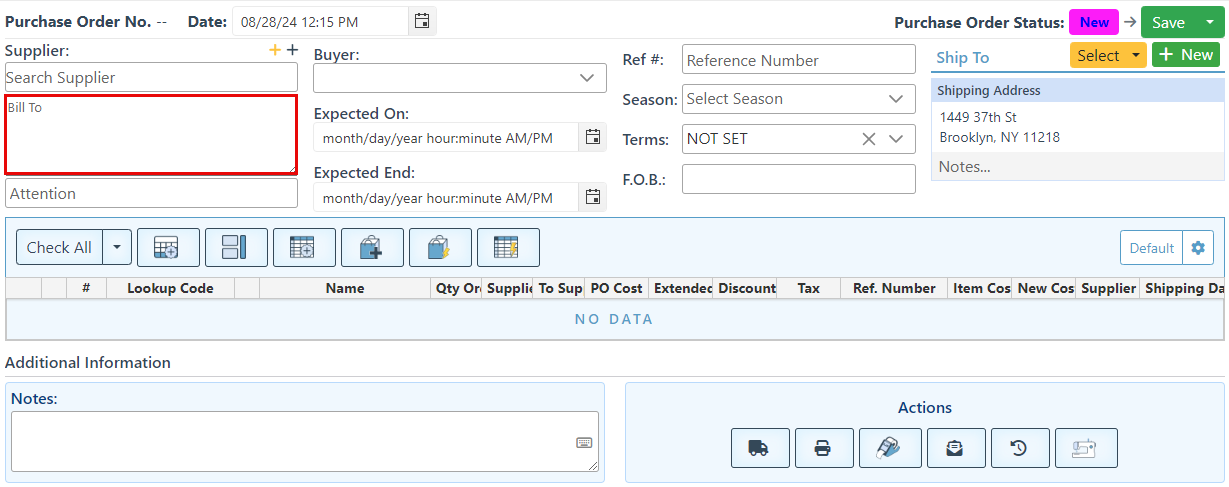
Select “Show Bill To” to add the ‘Bill To’ text bar to the Purchase Order Page.
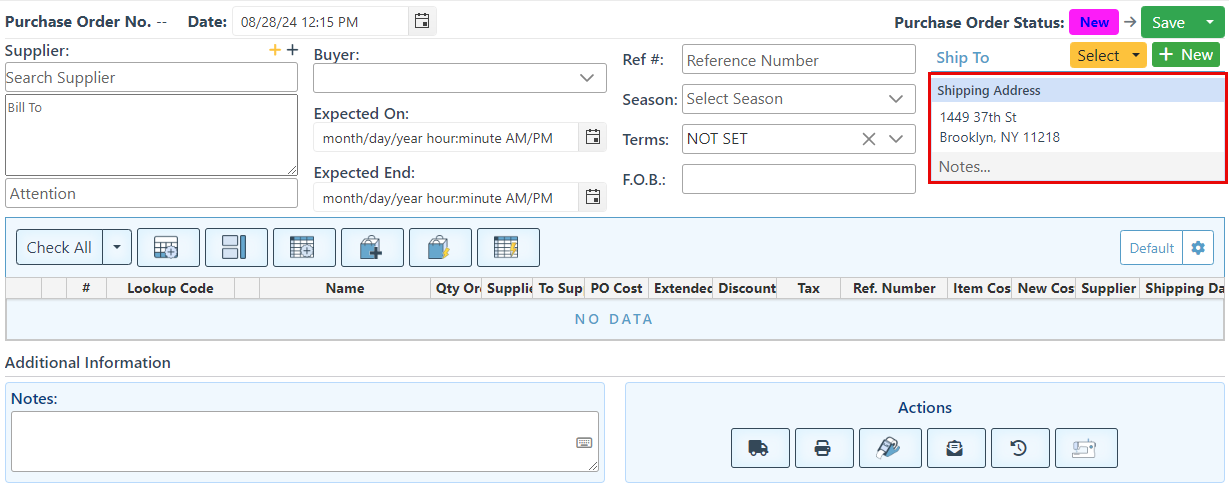
Select “Show Ship To” to add the field displaying the customer shipping address to the Purchase Order Page.
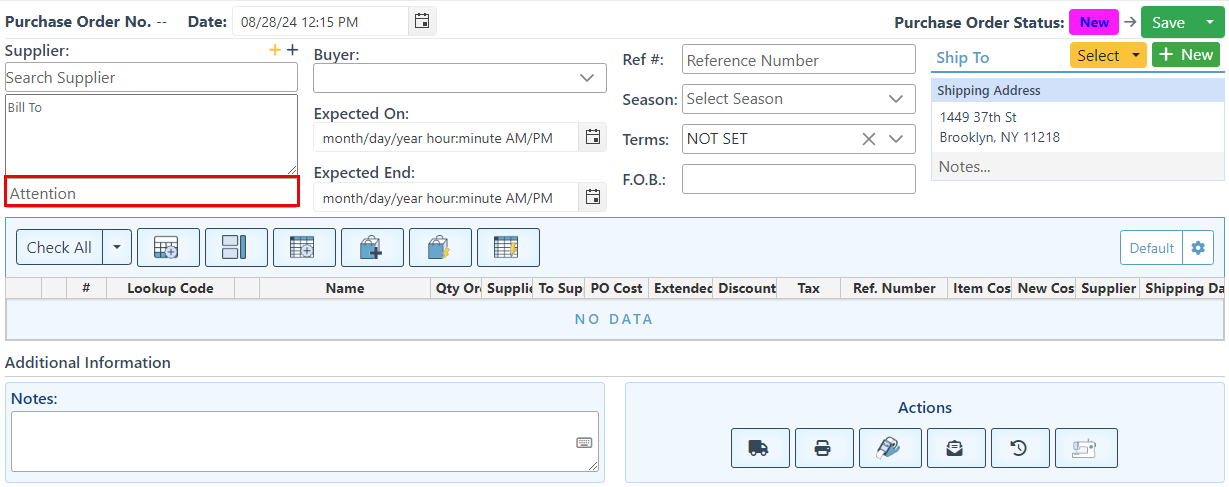
Select “Show Attention” to add the attention field, where PO instructions can be entered, to the Purchase Order Page.
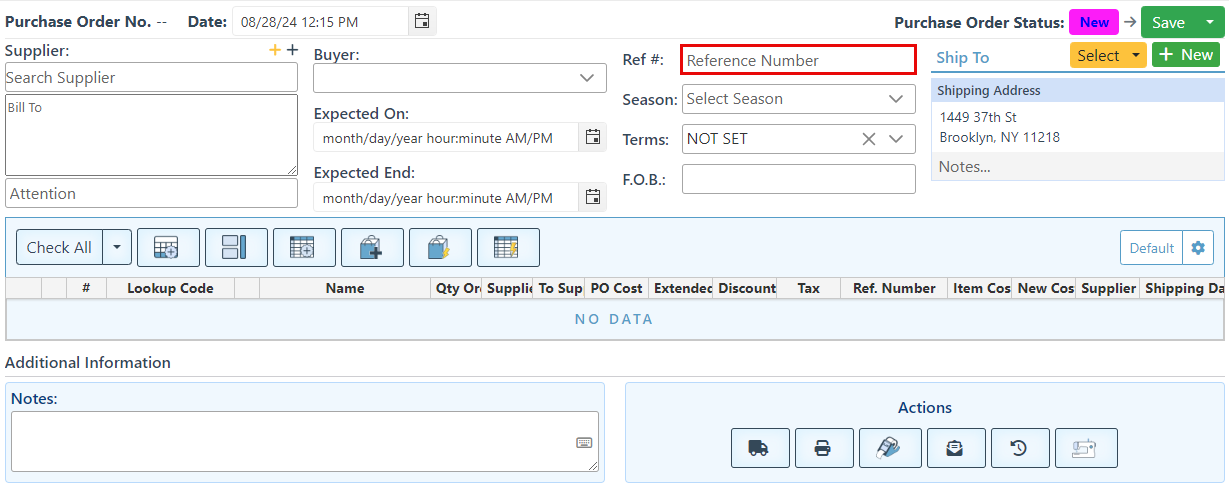
Select “Show Reference Number” to add the reference number field to the Purchase Order Page.
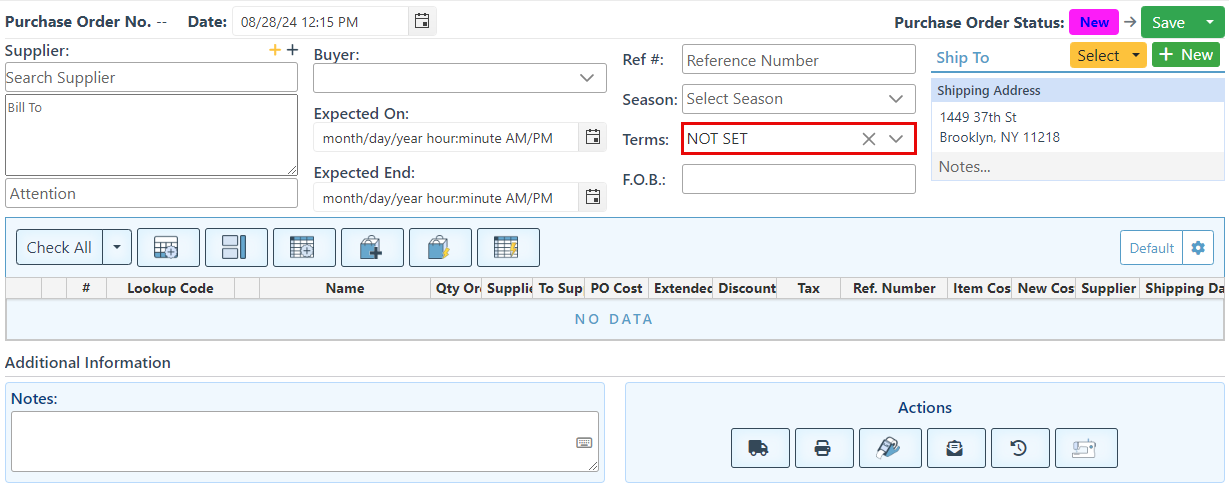
Select “Show Terms” to add a dropdown, where the payment terms can be set, to the Purchase Order Page.
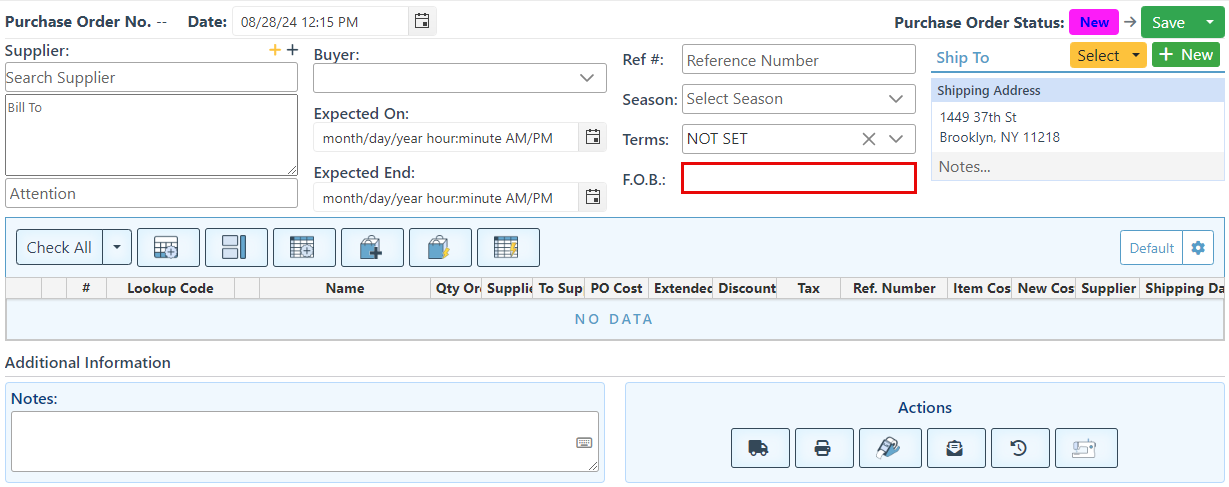
Select “Show F.O.B.” to display the F.O.B. field on the Purchase Order Page, which designates the responsible shipping party.
Select "Show Expected" to display a calendar field for entering the expected receiving date of the purchase order items.

Select "Show Expected End" to display a calendar field for the expected end receiving date; the date at which all items should have been received.
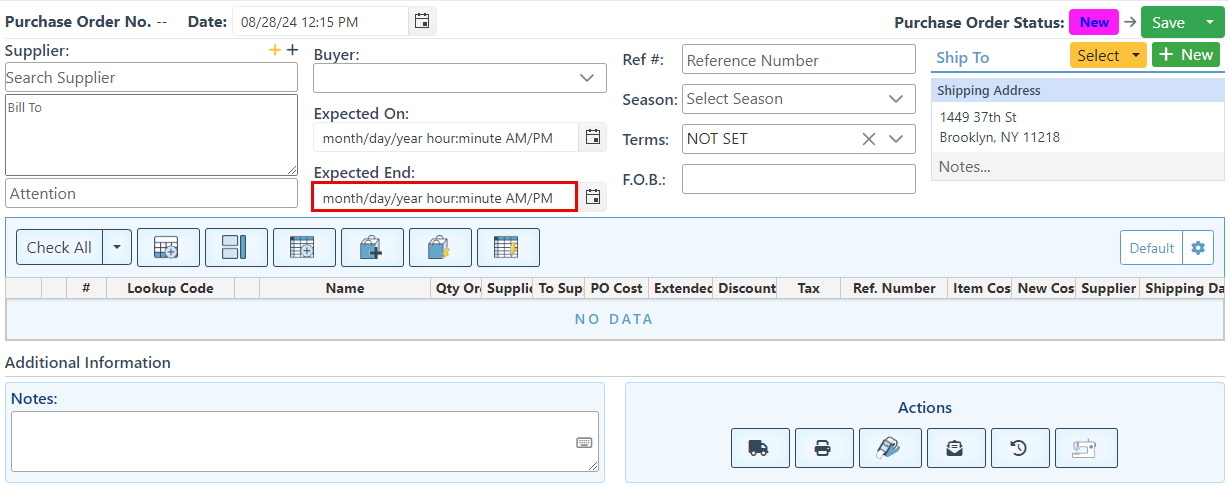
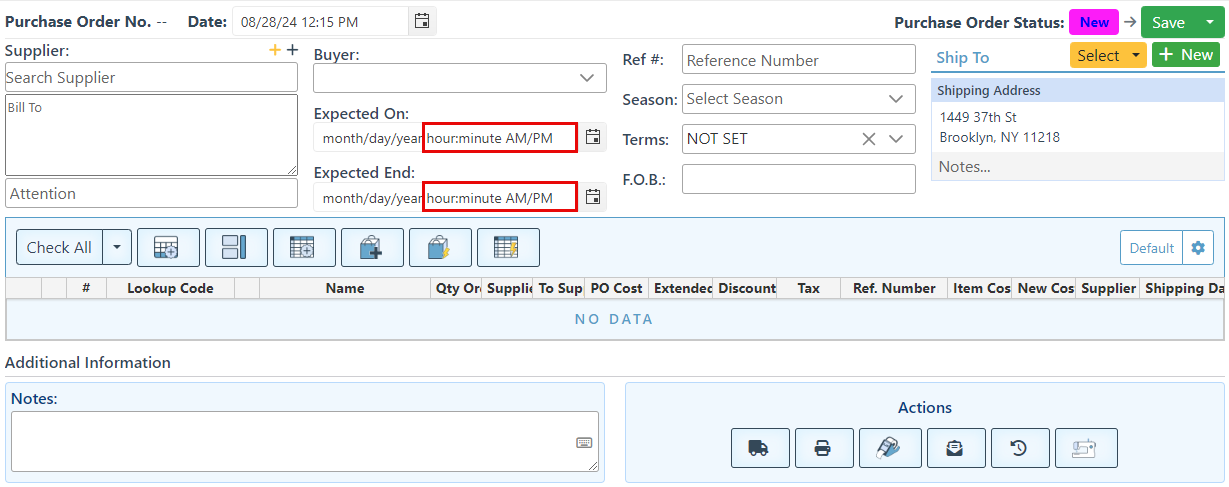
Select “Show Expected Time” to add a time selection to the calendar bars.
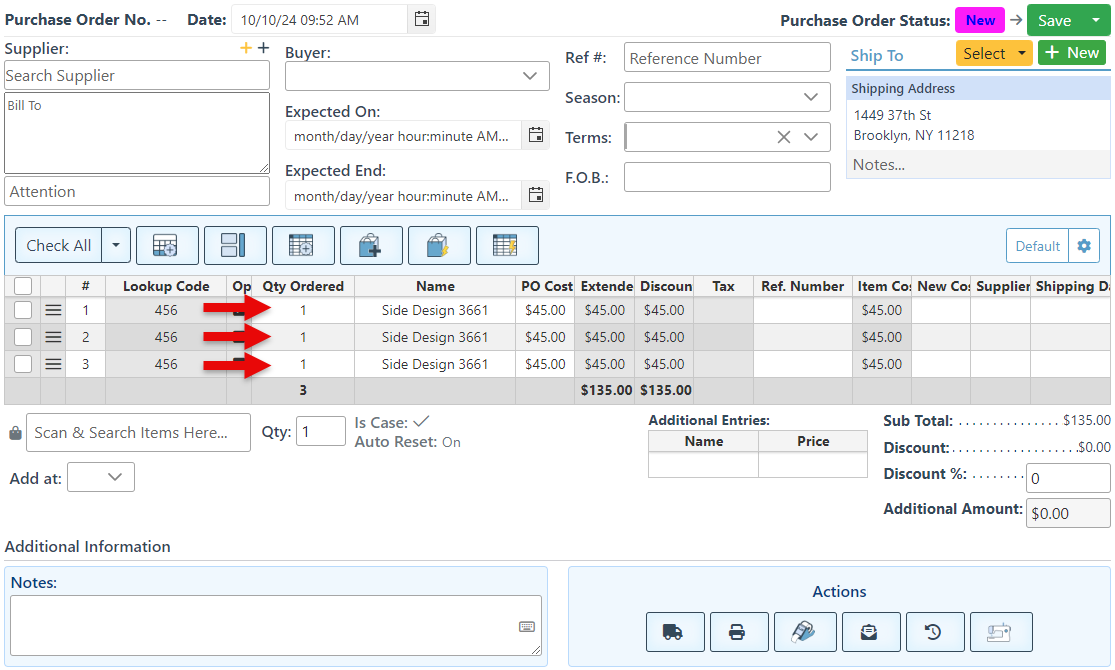
Select “Show The Next Item Qty” to add the Qty bar below the item scan bar, enabling a quantity to be set for scanned items. For example, when the quantity is set to three, the next item scanned will be automatically added with a quantity of three.
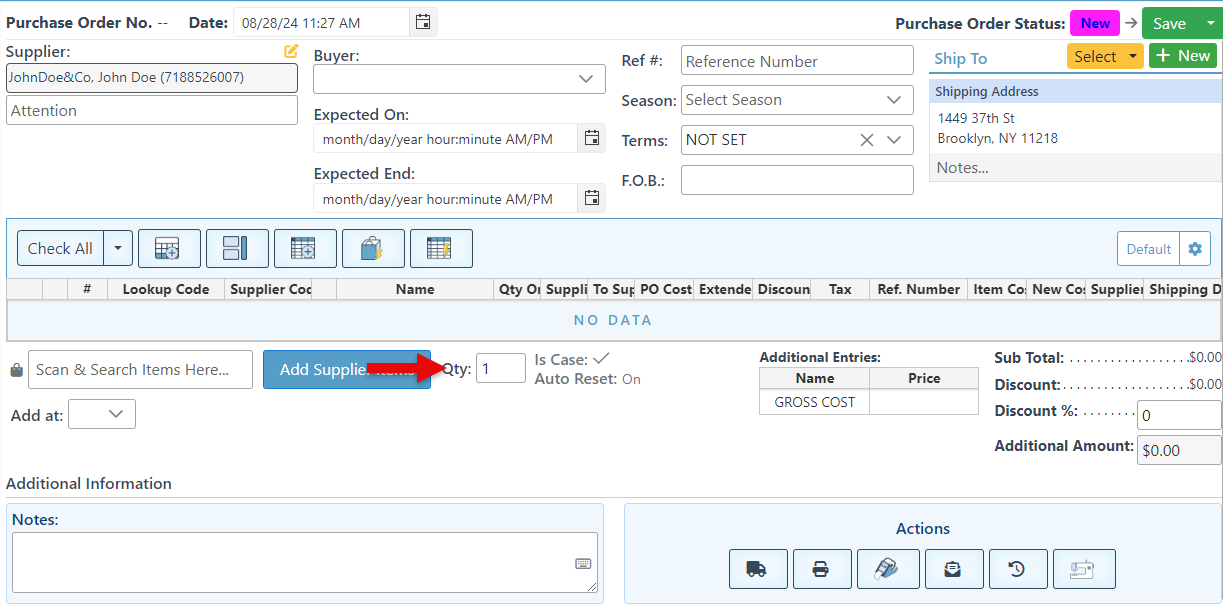
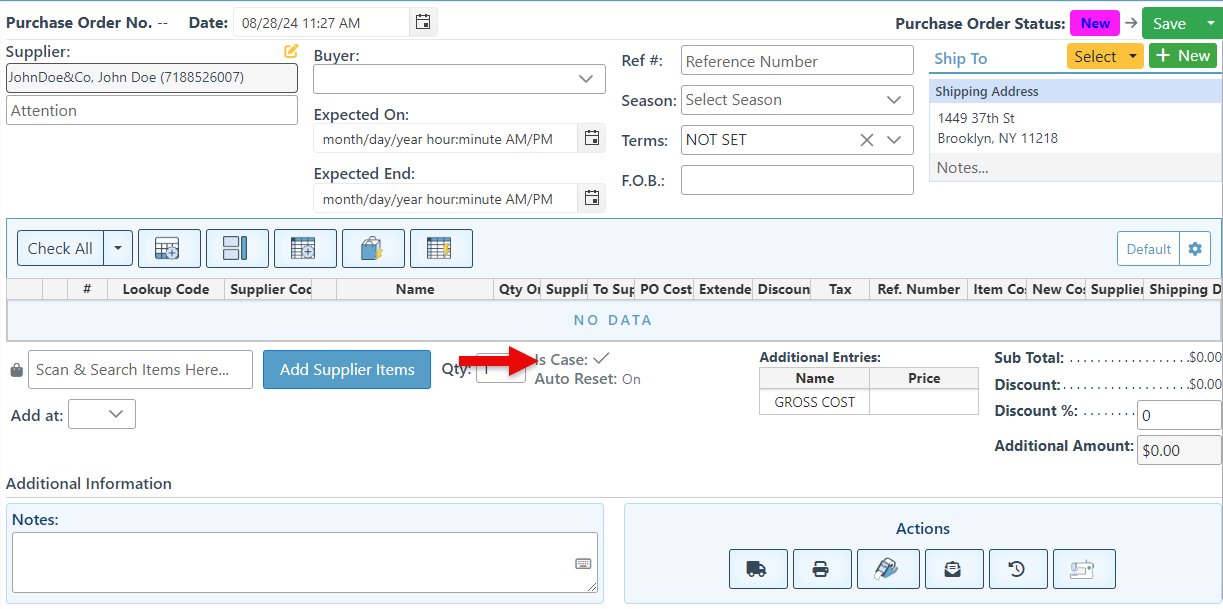
Select “Show Next Item Is Case” to add the ‘Is Case’ icon to the Purchase Order Page. When this option is set to "Yes," the subsequent item will be added as a case.

Select "Show Next Item Auto Reset" to add the button to the purchase order page. When “Auto Reset” is set to “On,” the Is Case setting will automatically reset to “No” after each scanned item.

Select "Always Sum Duplicate Items" to ensure that if multiple of the same item is scanned, it should be added in a single row.
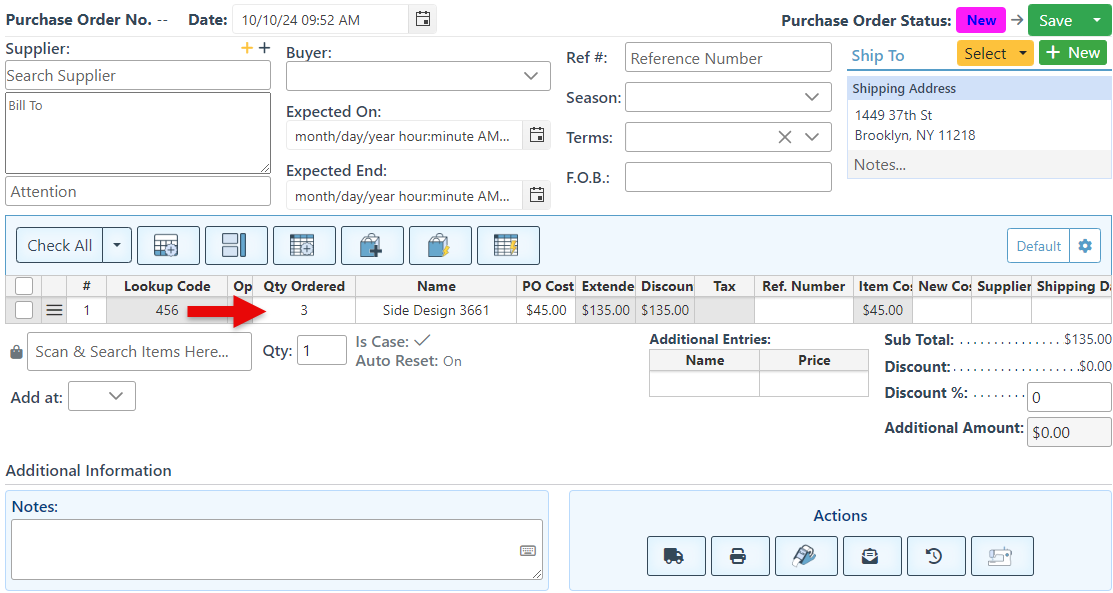
Select the "Always Add New Line For Duplicate Items" option to set each item, including multiple of the same item, to be added in a separate row. Choosing neither of the configurations will always prompt to add a new line or combine duplicate items.
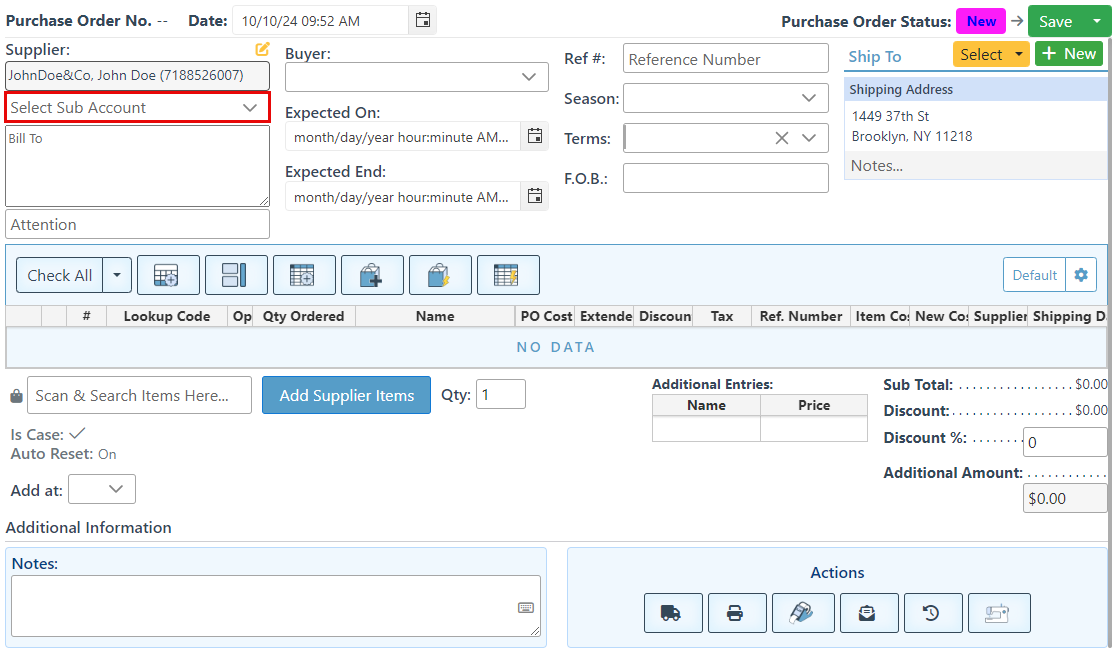
Select "Must select Sub Account If Exists" to require a subaccount selection if a supplier has one. For example, when creating a PO for a customer with multiple sub-accounts for different business departments, a specific sub-account will have to be selected.
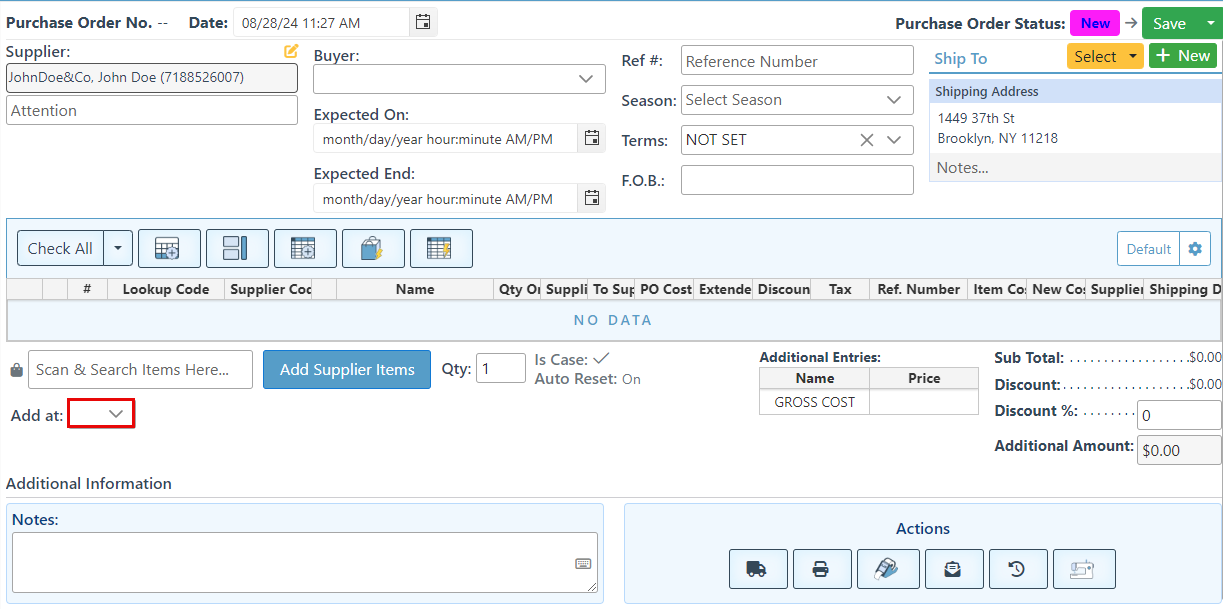
Select "Show Add at Selection" to add the “Add At” dropdown field, where a specific location at which to add the next scanned item, such as First, Last, After selection, etc, can be selected.
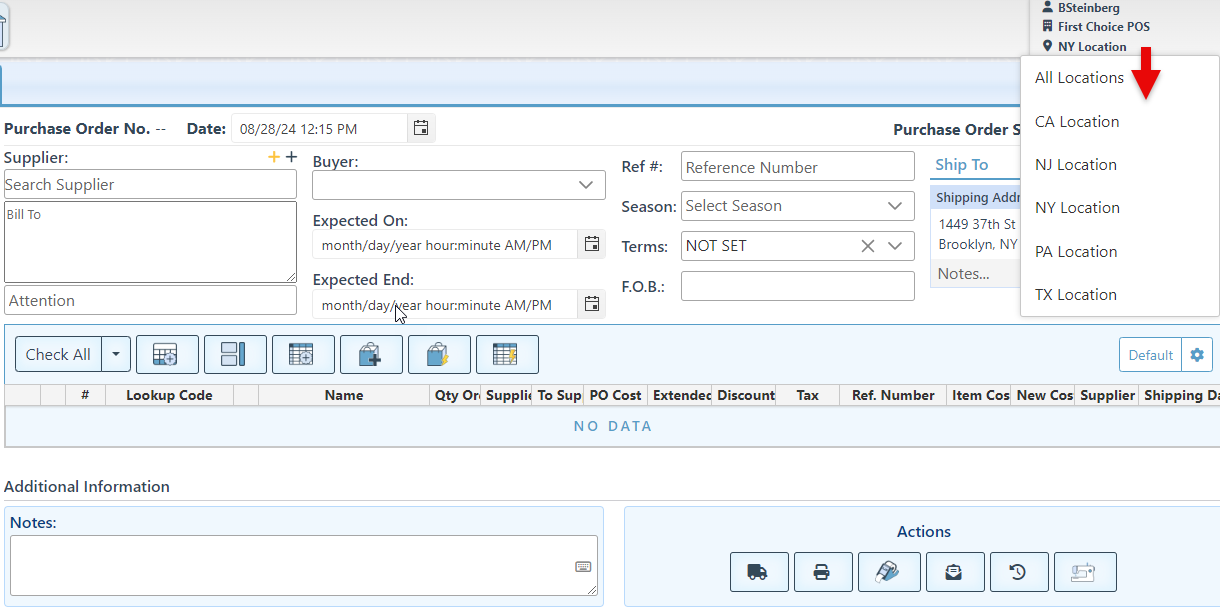
Select “Always Prompt Location On Create” to set a location selection popup to appear when creating a new purchase order.
Select “Sort By Receiving” to set the items grid to update and sort automatically, according to the items already received/ supplied.
Select “Hide Change State” to remove the Purchase Order state selection dropdown from the Purchase Order Page layout.
Select the “Over Supplying Warning” checkbox to set a popup to appear if items are oversupplied. This happens in the event that the amount of items delivered exceeds the amount ordered.
Enter a grid layout name in the “Default Entries Grid View” to set the user’s purchase orders to open to a specific grid view by default.