Invoice/ Purchase Order Printout Layout
Below is a guide on the Invoice/ Purchase Order Printout Layout Configurations. For details on how to access the configurations shown below, see Printout Layouts:
The configurations shown below may vary depending on the specific layout selected.
The various printout layout options are designed to meet the diverse needs of different businesses. Selecting all options for one printout may lead to overflow in different fields.
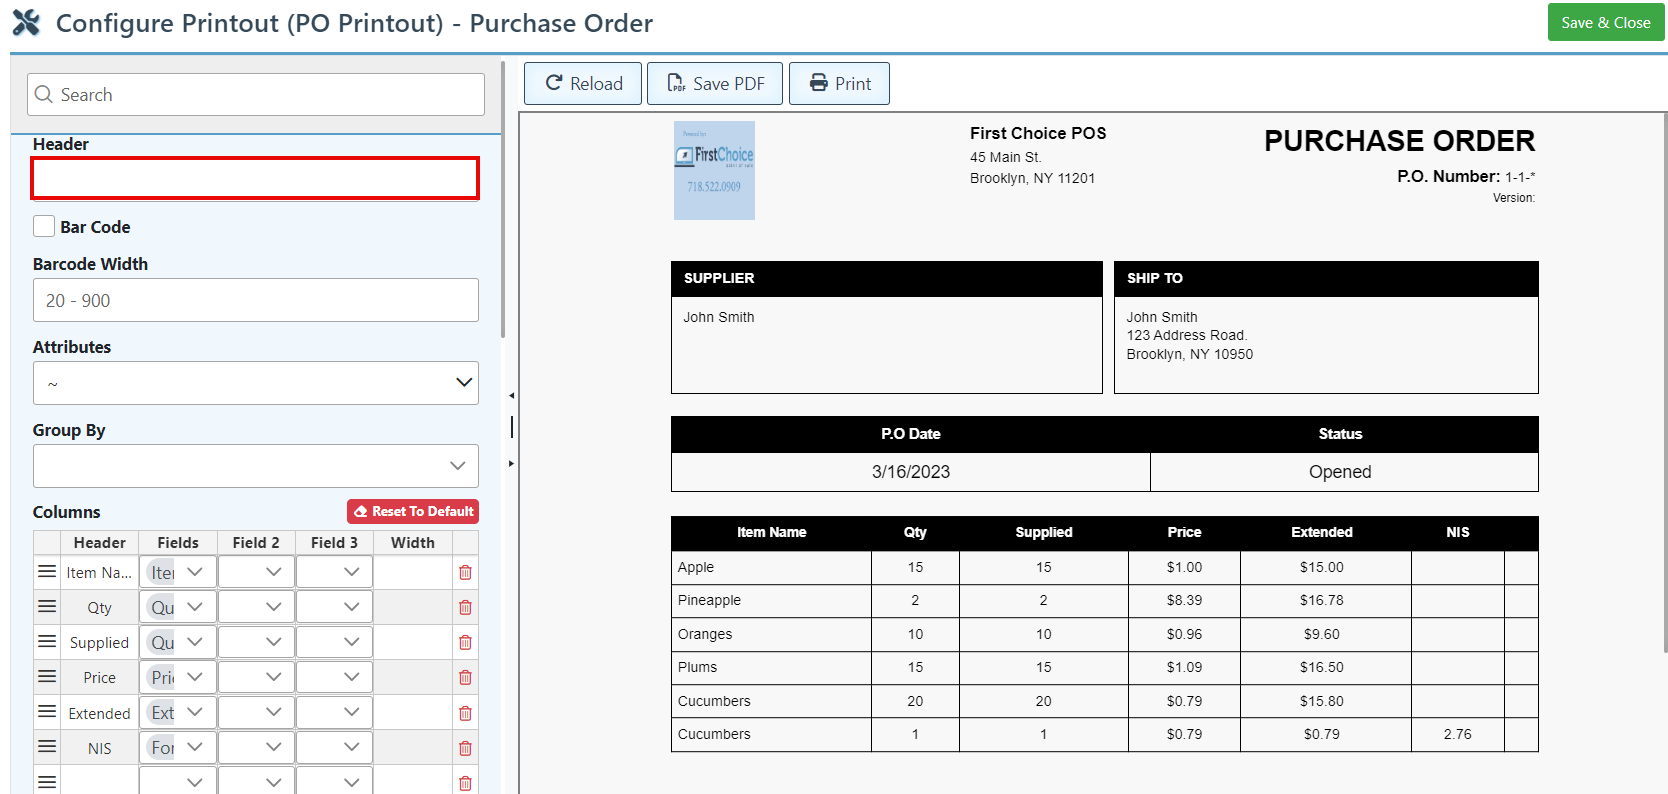
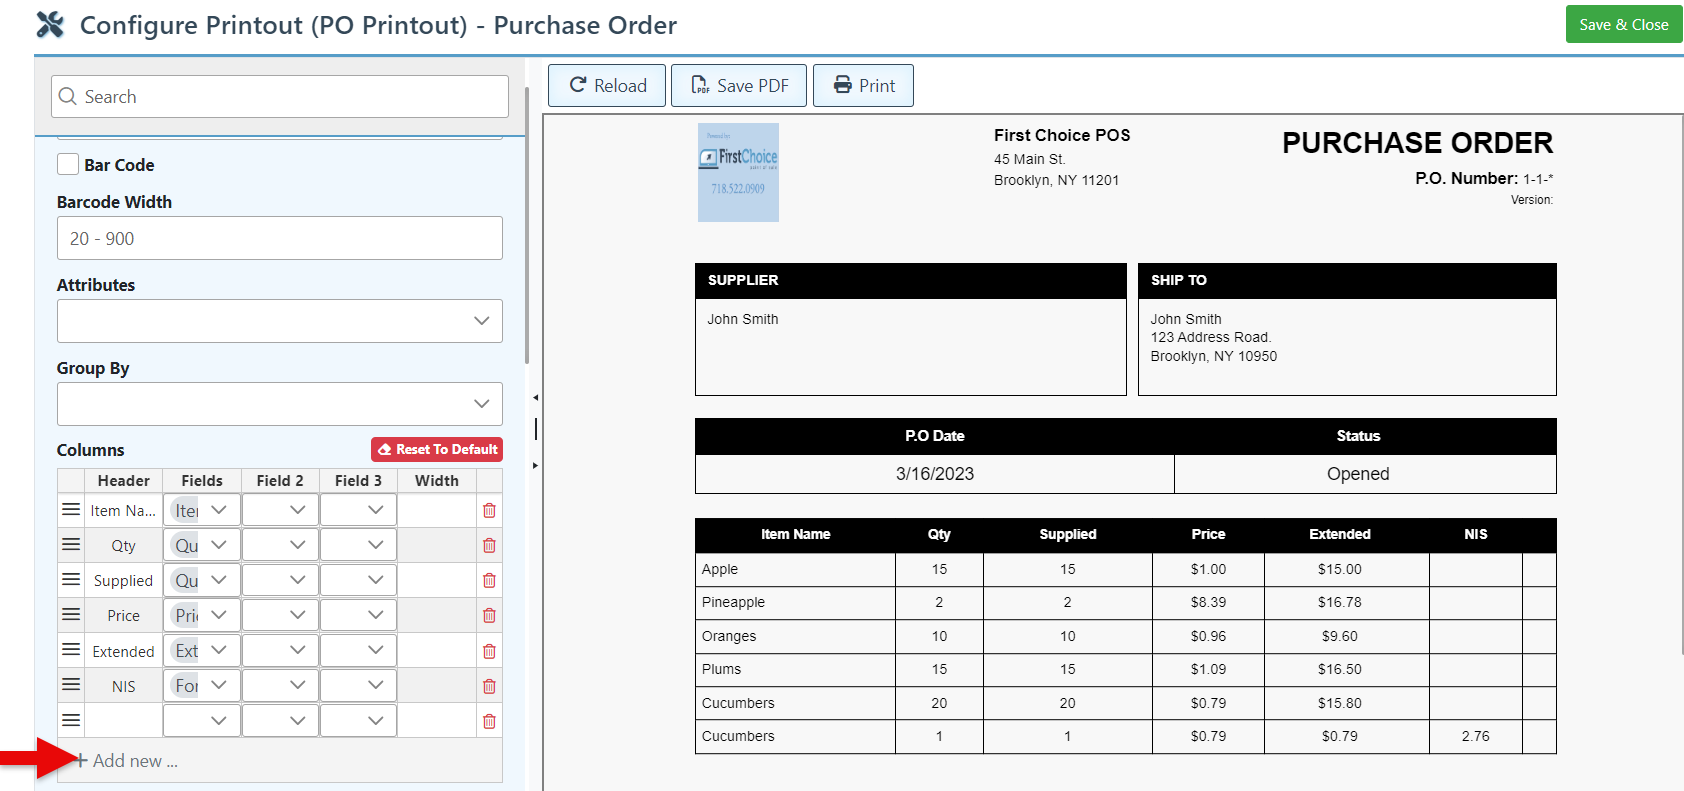
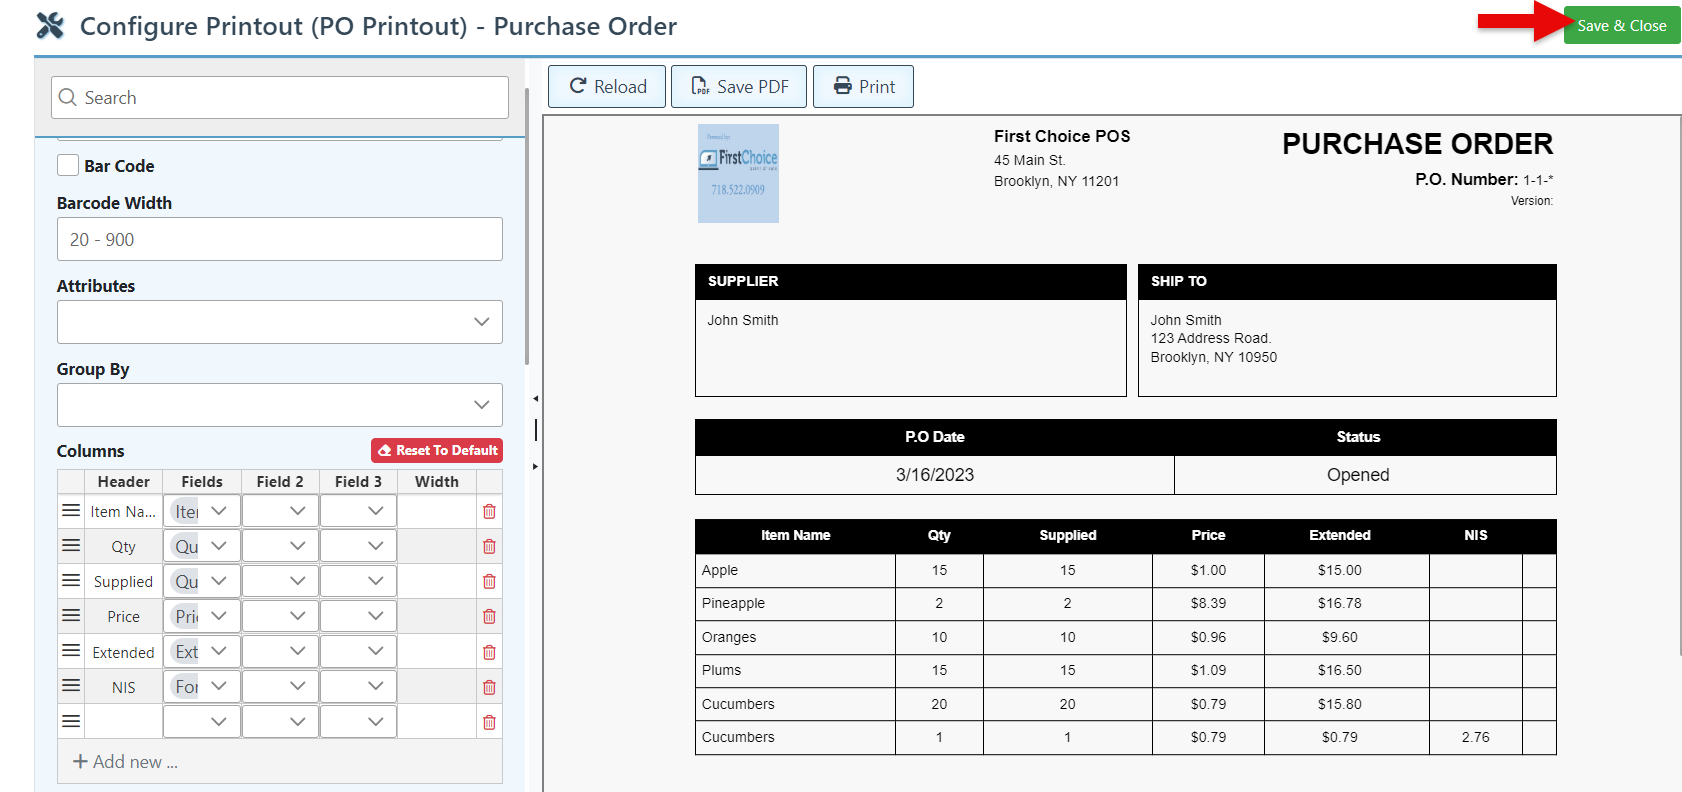
Enter text in the “Header” bar to change the Invoice title.
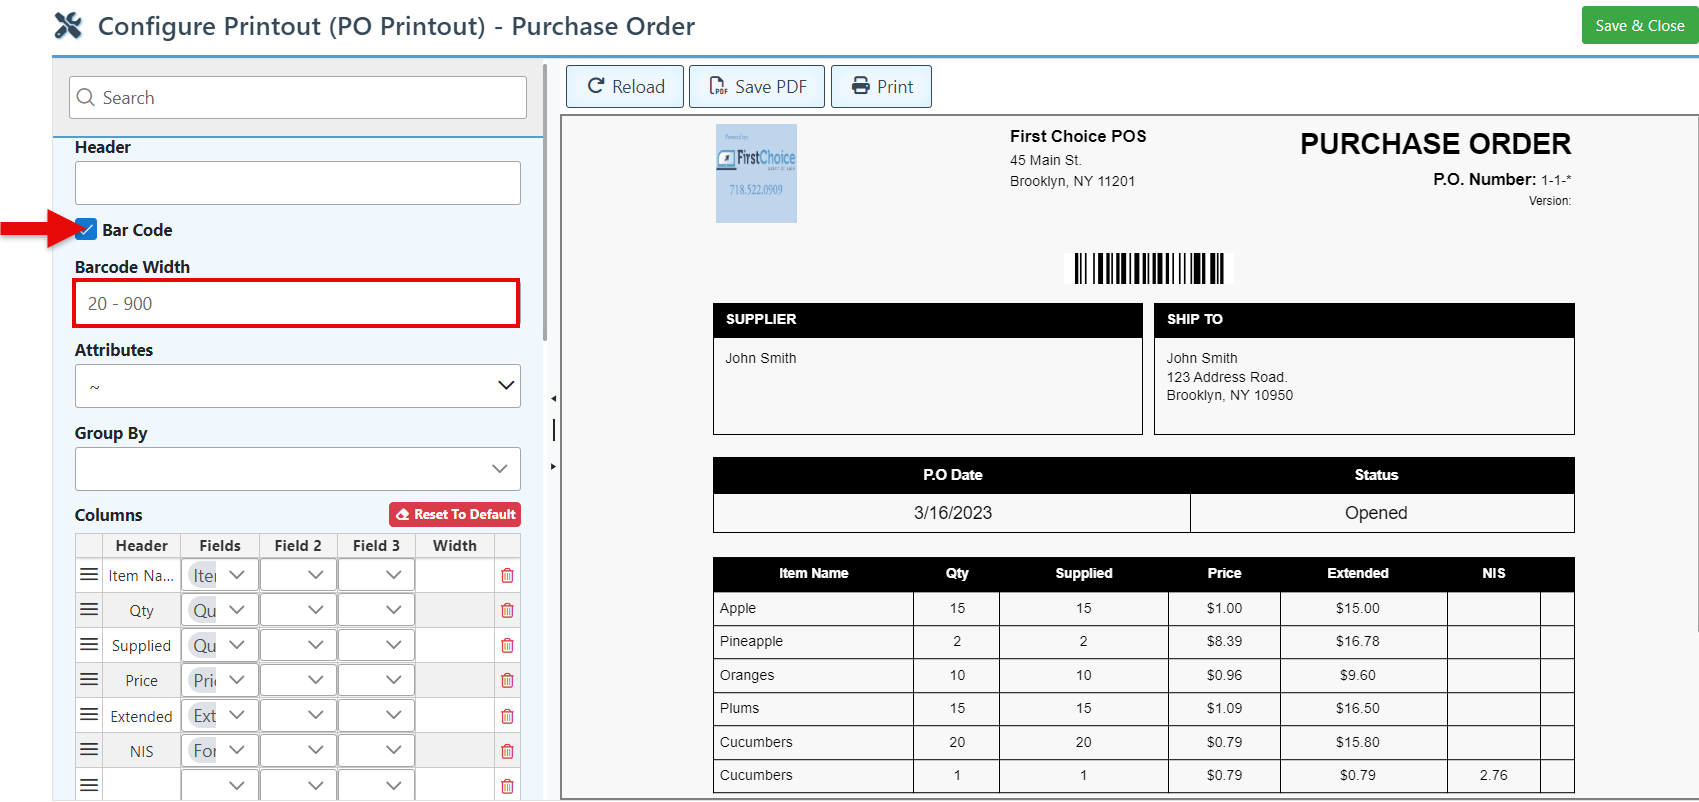
Check the “Bar Code” checkbox to add a barcode to the printout header, and adjust the width in the bar below, if necessary.
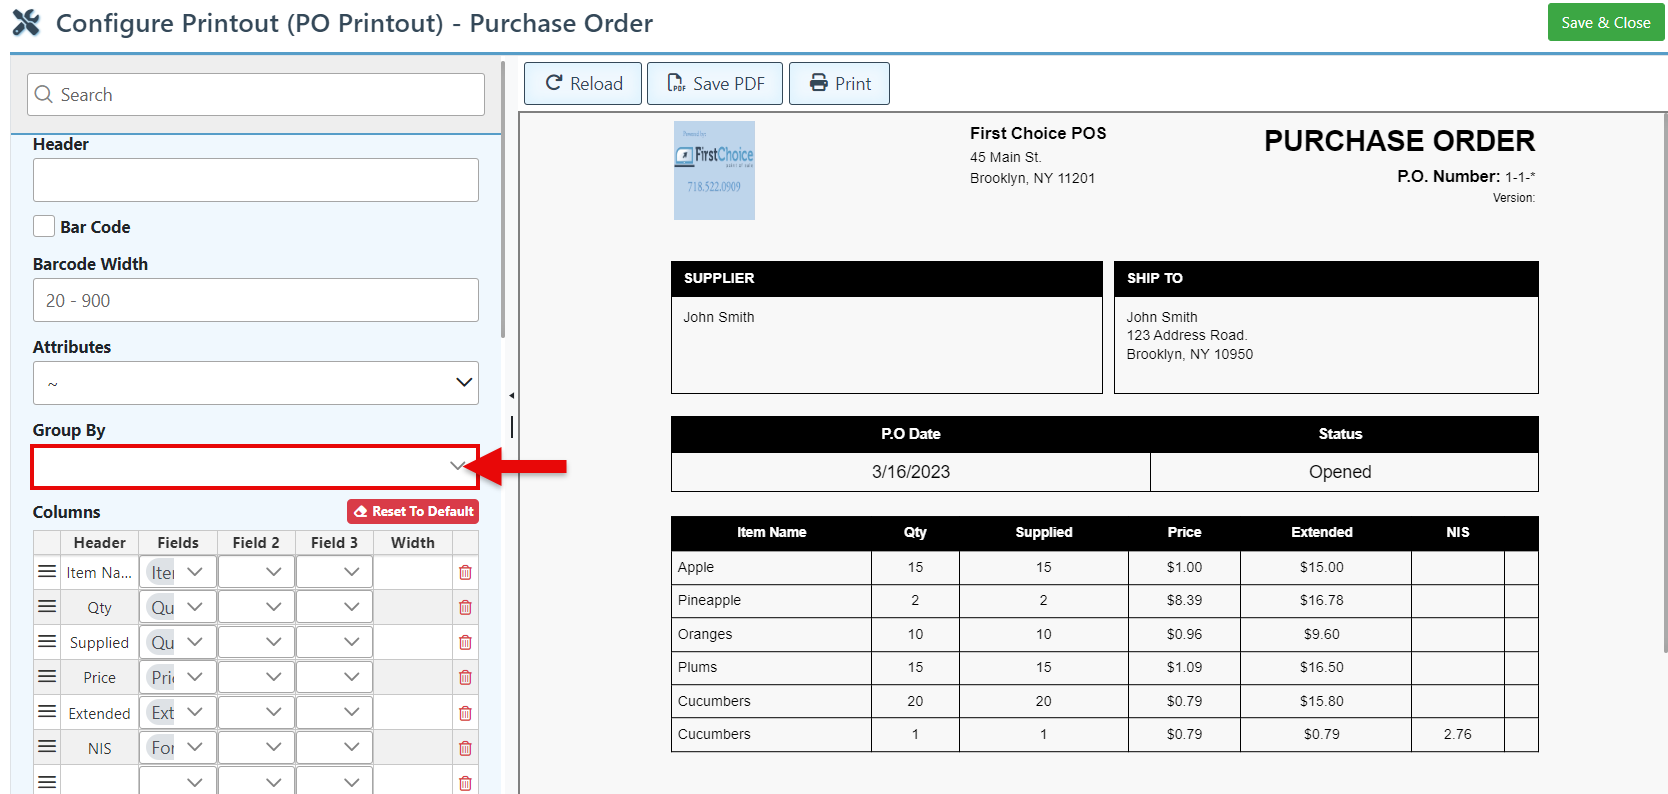
Select a header in the “Group By” dropdown to group the items accordingly.
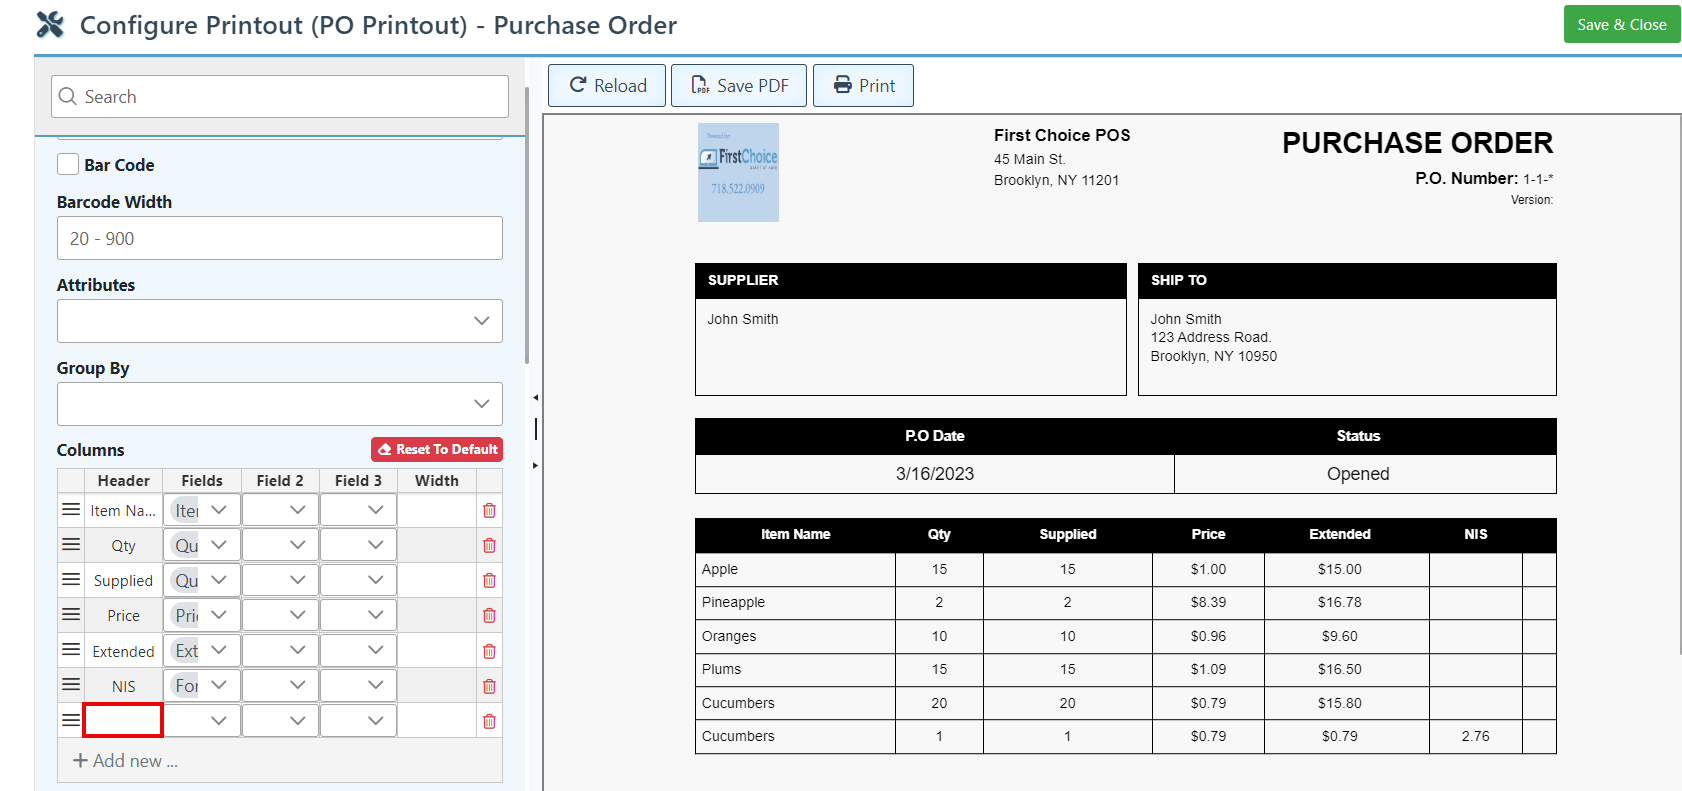
To add a new column to the invoice, click “Add New” and select a Column type in the “Feilds” dropdown menu. To add more than one item detail per column, select an option in field 2 or fields 2 and 3.
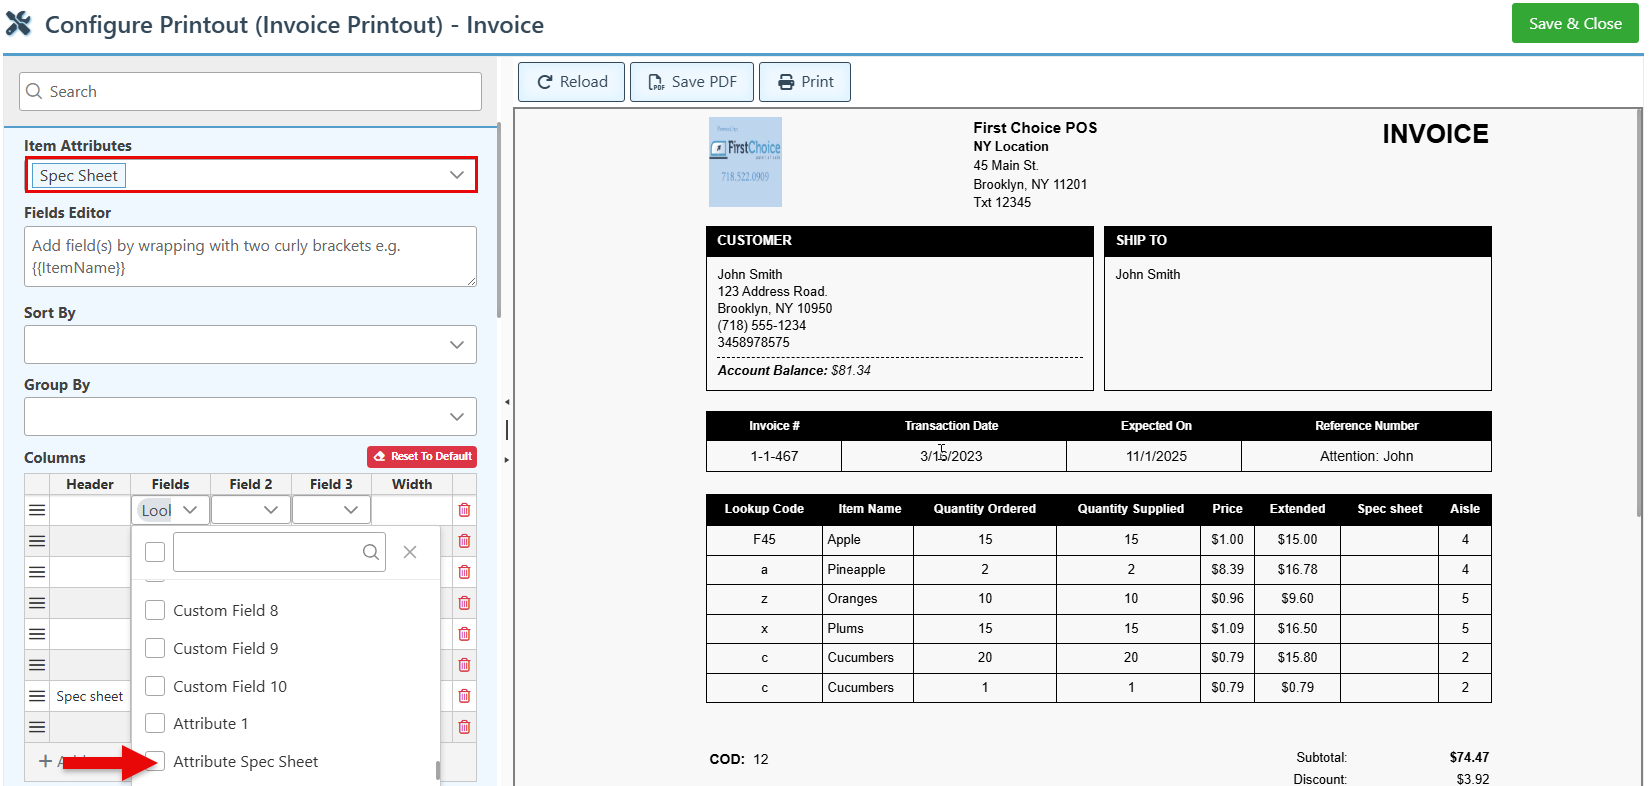
The Fields dropdown menu features the default printout layout fields. To add a specific item attribute to the dropdown, select it in the “Item Attributes” field, click “Save & Close,” and reopen the page. The selected attributes will now appear in the Entries Fields dropdown menu prefixed by the word "attribute" (e.g., Attribute + Your attribute).
To edit or change the column header name, enter text in the header space.
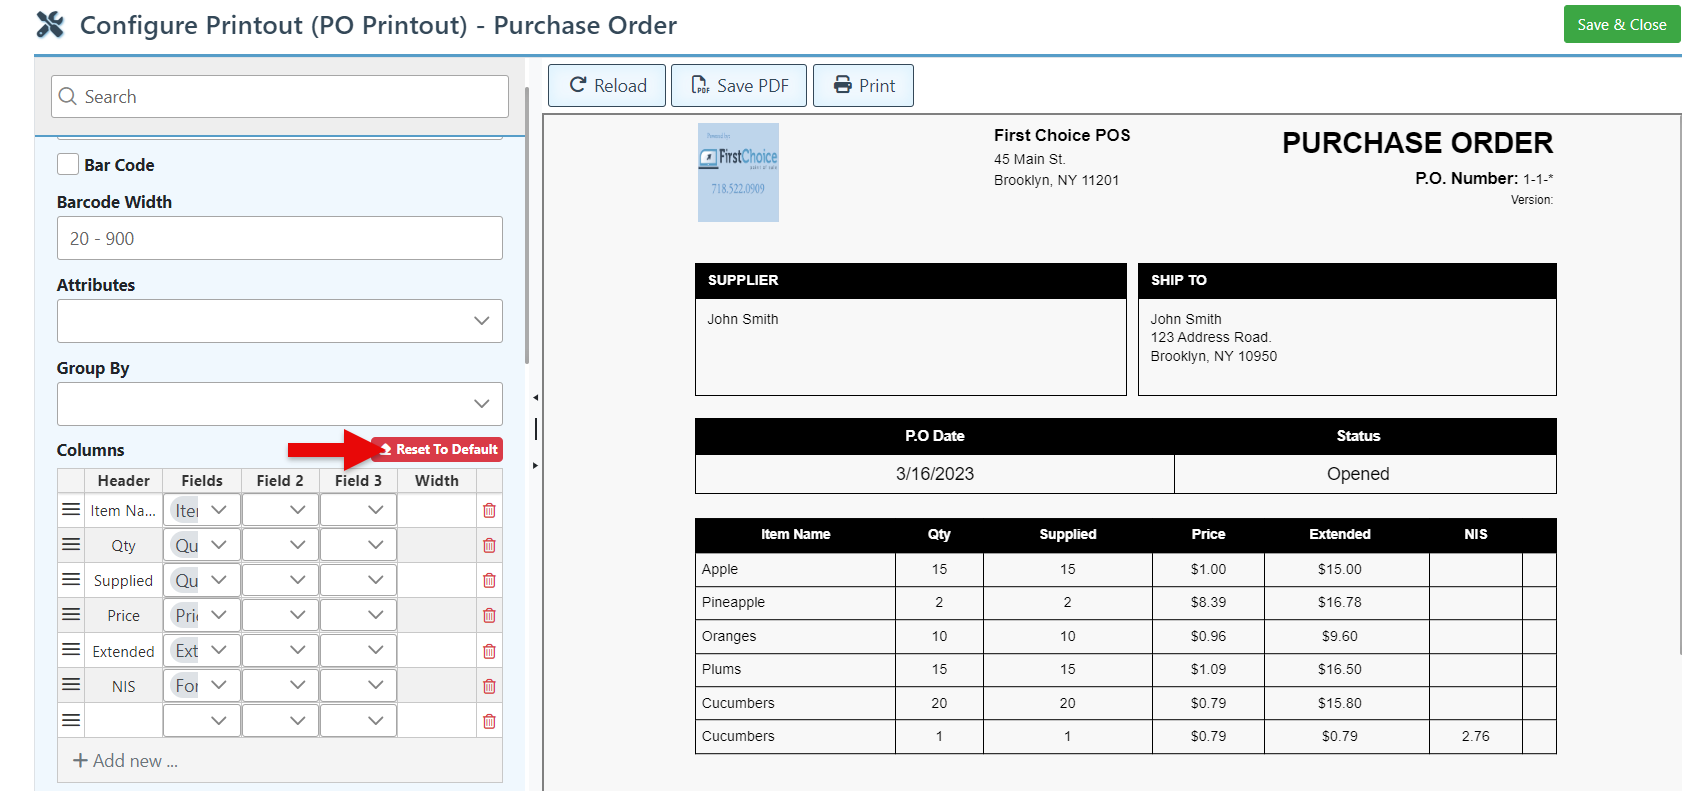
Click “Reset to Default” to clear all changes made and revert to the original layout.
Click “Save & Close” at the top right to save changes.
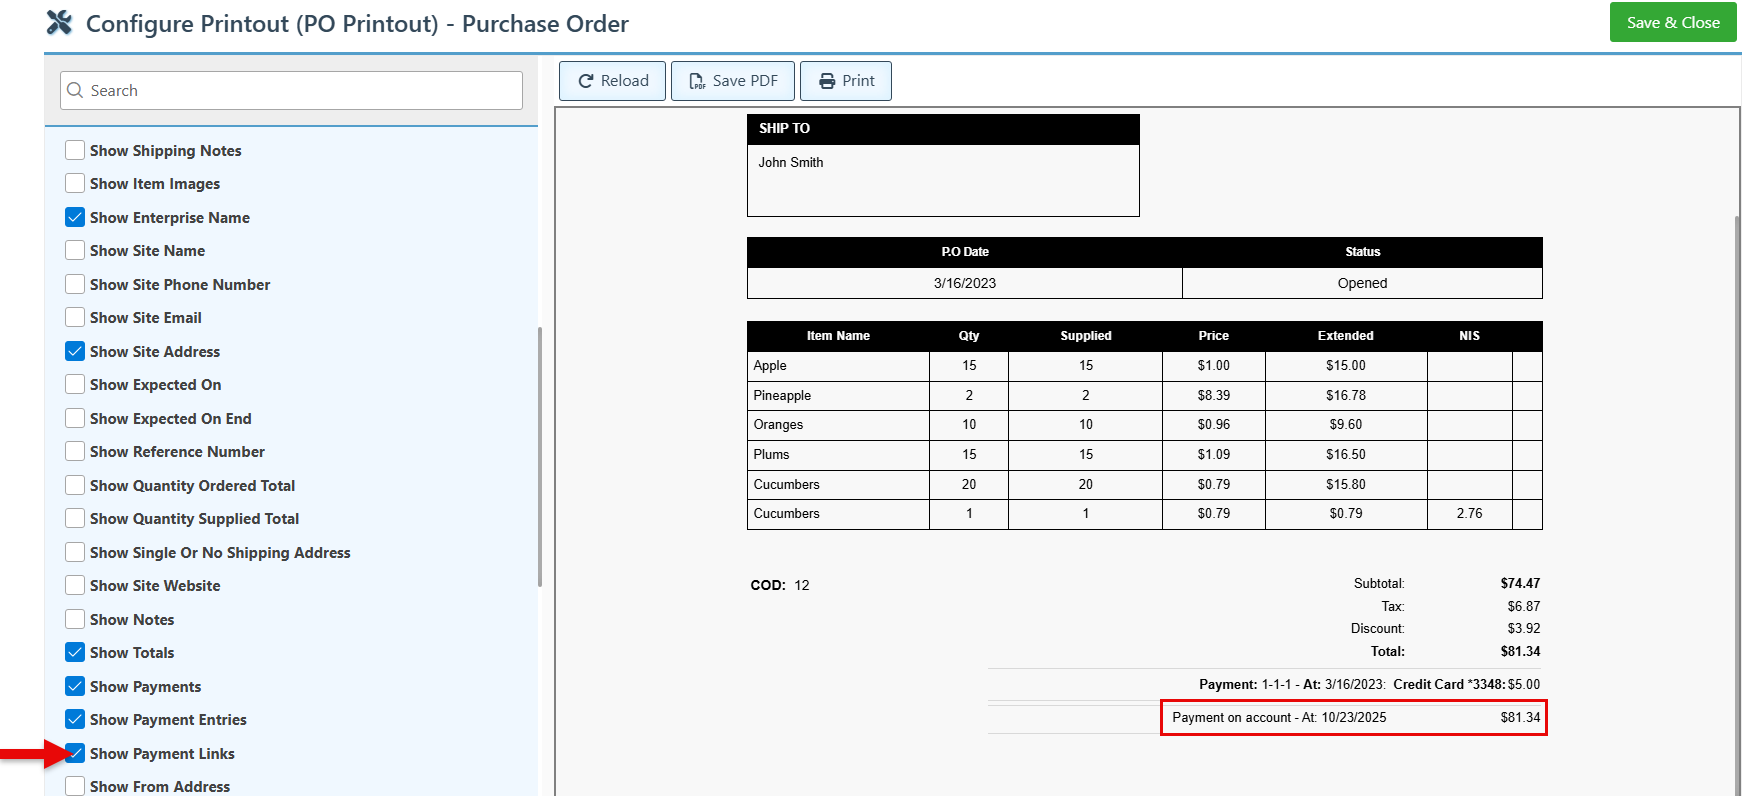
Select the “Show Payment Links” configuration to include any payments linked to the purchase order on the printout.