Checkout Guide
Follow the steps below to complete a POS Sale:
The Frontend homepage displays many buttons, panels, and configurations that can be customized to make it unique and convenient based on specific enterprise needs. For more on how to set the frontend configurations, click here.
Click on the POS icon on the taskbar to access the Front-end.
Enter username and password, and click “Sign In” to log in to the station.
To prevent the POS from restarting and requiring a login, search “Configurations” in the Main Navigation menu, select “Station Keys” in the Level dropdown, then search for and enable “POSRestartTimeIgnoreUI.”
To add or view transaction notes at any point during checkout, click “Ctrl+ N.”
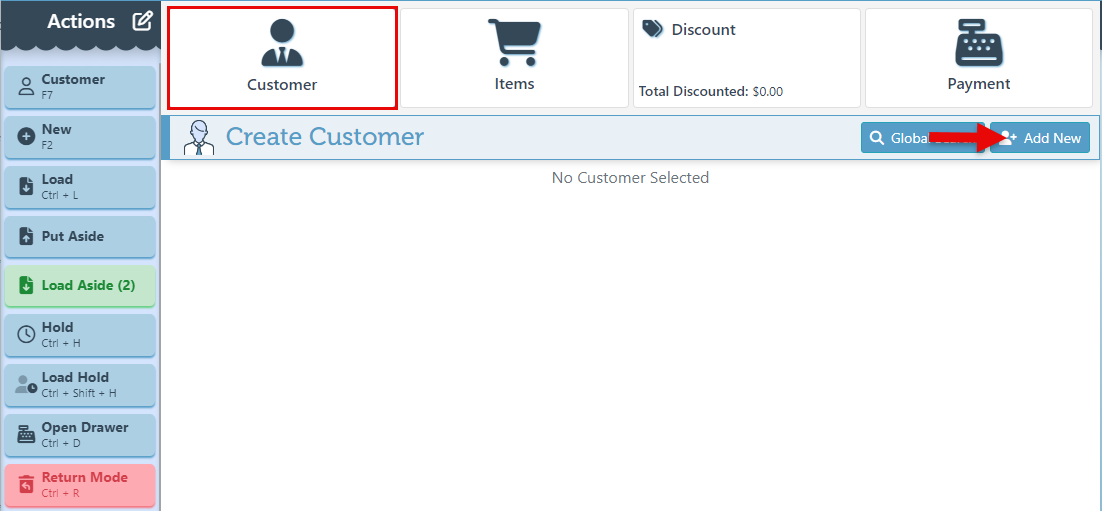
Navigate to the customer card at the top left and enter a mobile number to select a customer. To add a new customer, click the “Add New” icon on the right to access the Create Customer page.
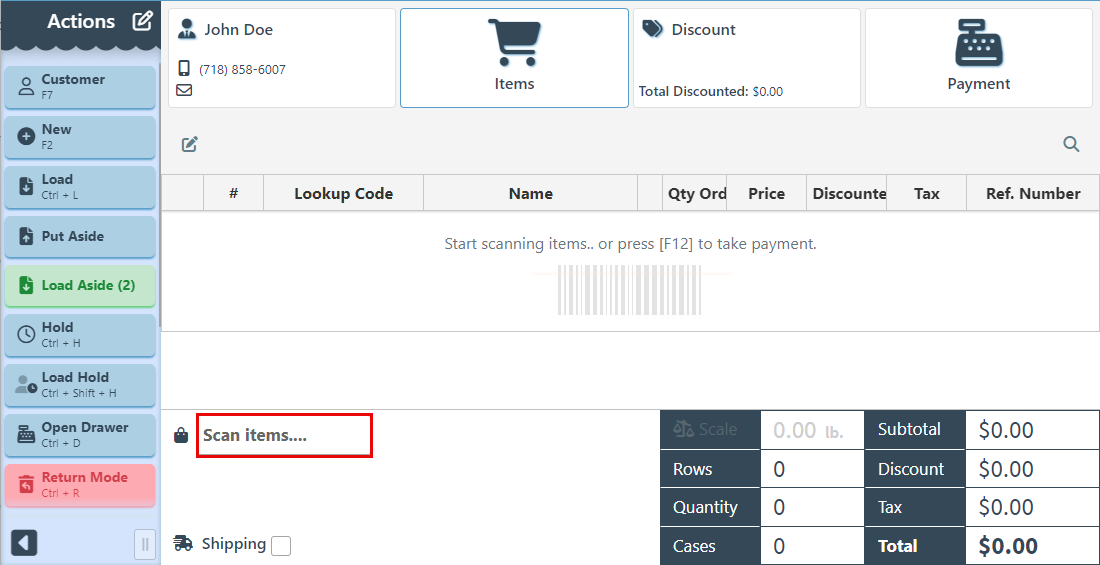
Navigate to the “Items” tab and scan or manually enter item barcodes to add items. The order total will be displayed in the bottom right corner, while the items and their details will be listed in individual rows above.
To remove tax from the checkout transaction, press the "F5" key on the keyboard.

Miscellaneous or manually priced items can be added to a transaction by entering their price in the scan and search bar and pressing the “Enter” key.
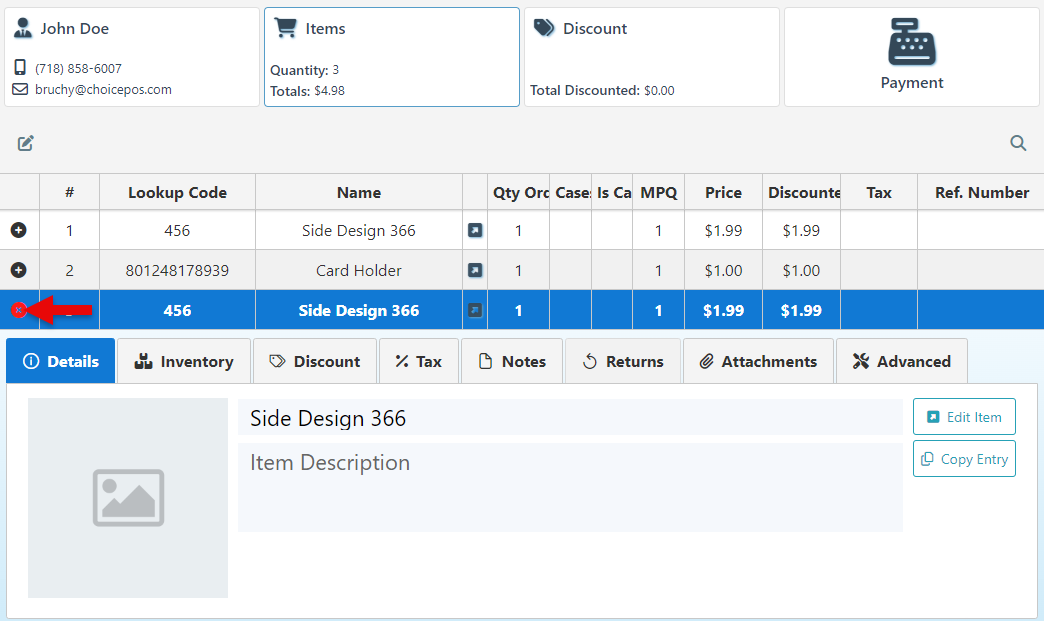
To view or apply details for an item, such as entry discounts, inventory status, taxes, specific notes, and to print item labels, click the (+) icon on the right side of the item row to expand the details tab.
To open and focus on a specific item tab more conveniently, enable the “Focus Item Expanded Tab” button.
To apply a discount to the sale, navigate to the “Discount” tab in the page header.
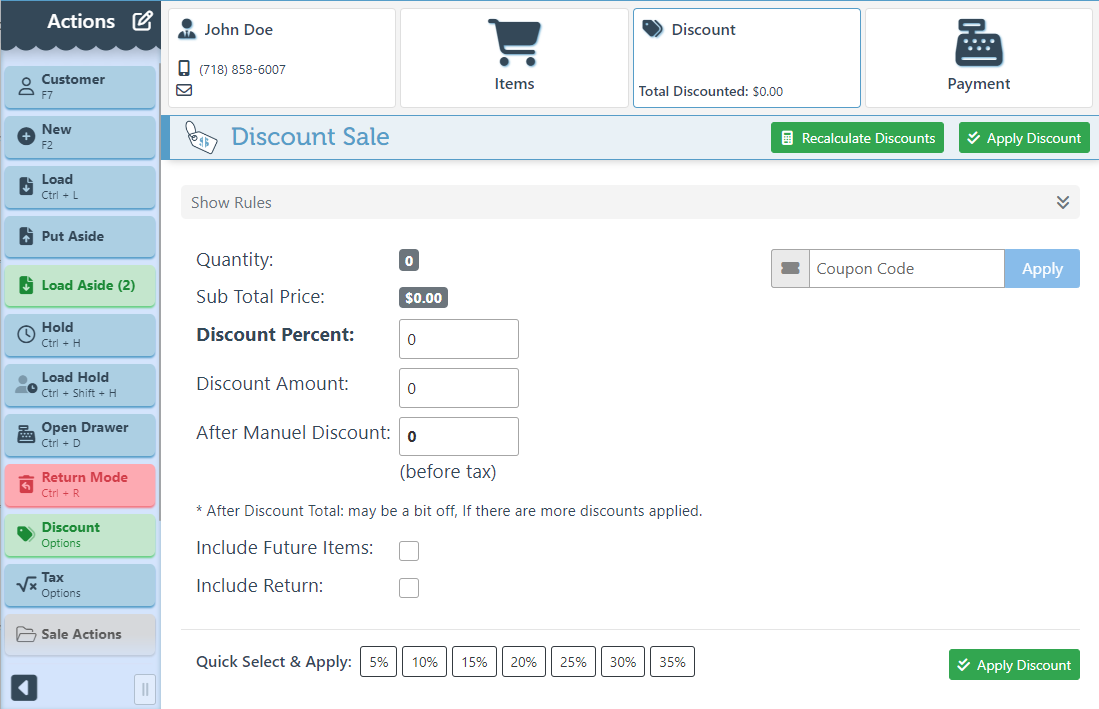
To quick-add a discount, select a percent value and then click the “Apply Discount” button on the right.
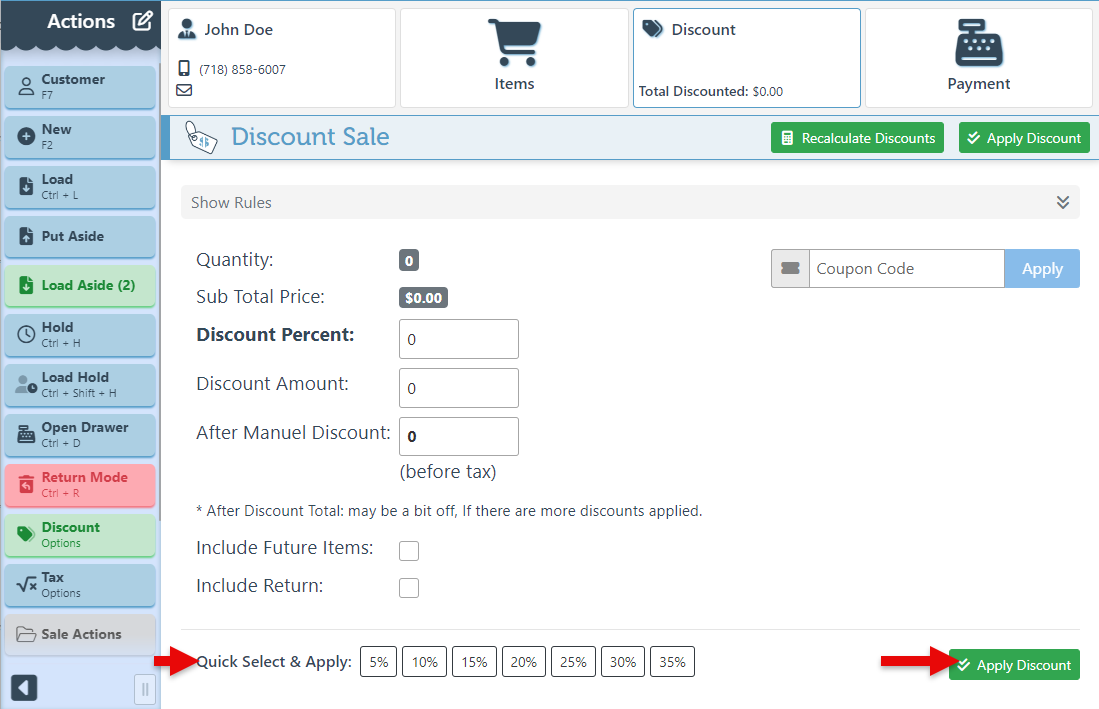
Alternatively, a specific discount percent or amount can be manually entered in the bars provided. Click “Apply Discount” to apply the selected discount.

To apply the discount to items added to the Txn in the future, Select the "Include Future Items" checkbox.
To apply the discount to returned items, select “Include Return.

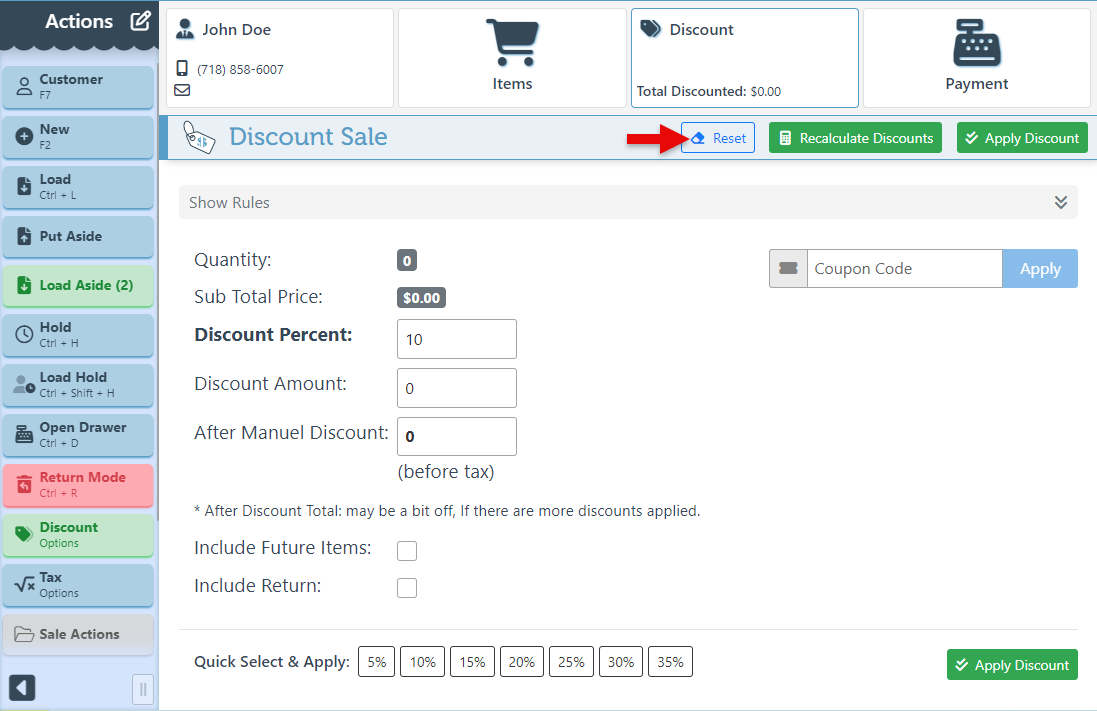
To remove applied discounts, click the "Reset" button on the ribbon. For more information on preset and automatically applied discounts, Click here.
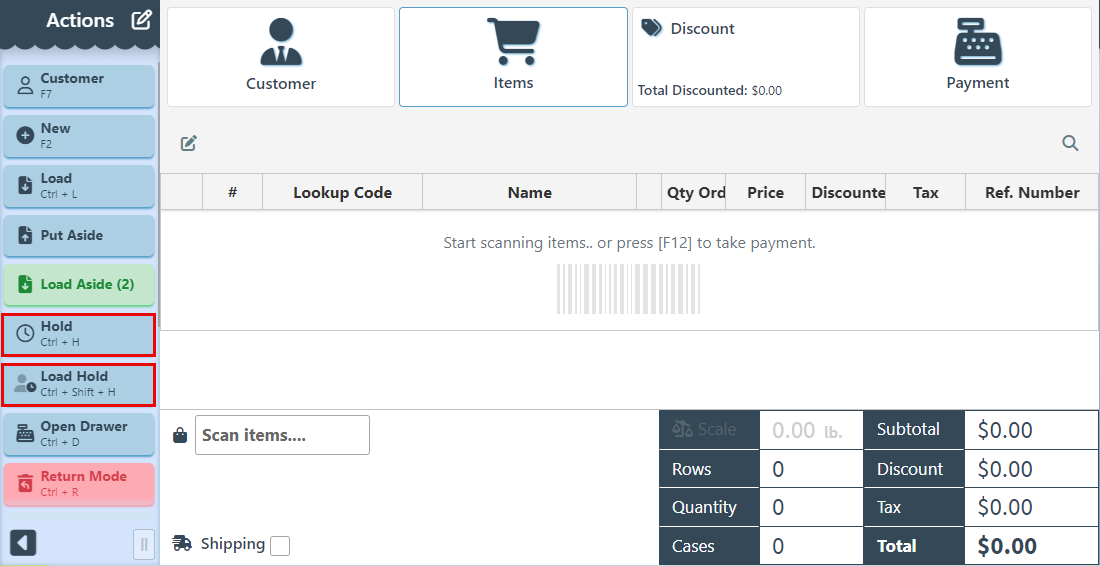
To place a sale on hold, click the "Hold" button. To reopen the sale, click the "Load Hold" button. A sale put on hold will be saved on the server and can be retrieved at any time.
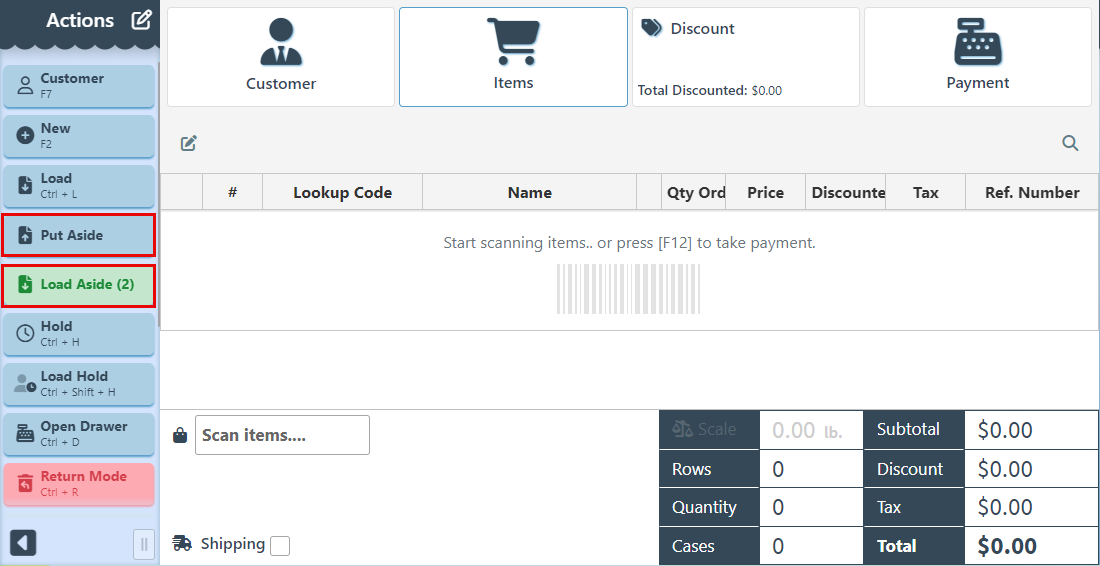
Click the “Put Aside” button to temporarily set aside a sale. To load the sale set aside, click the “Load Aside” Button. A sale set aside is only saved on the computer and might, therefore, get lost when the computer is shut off or restarted.
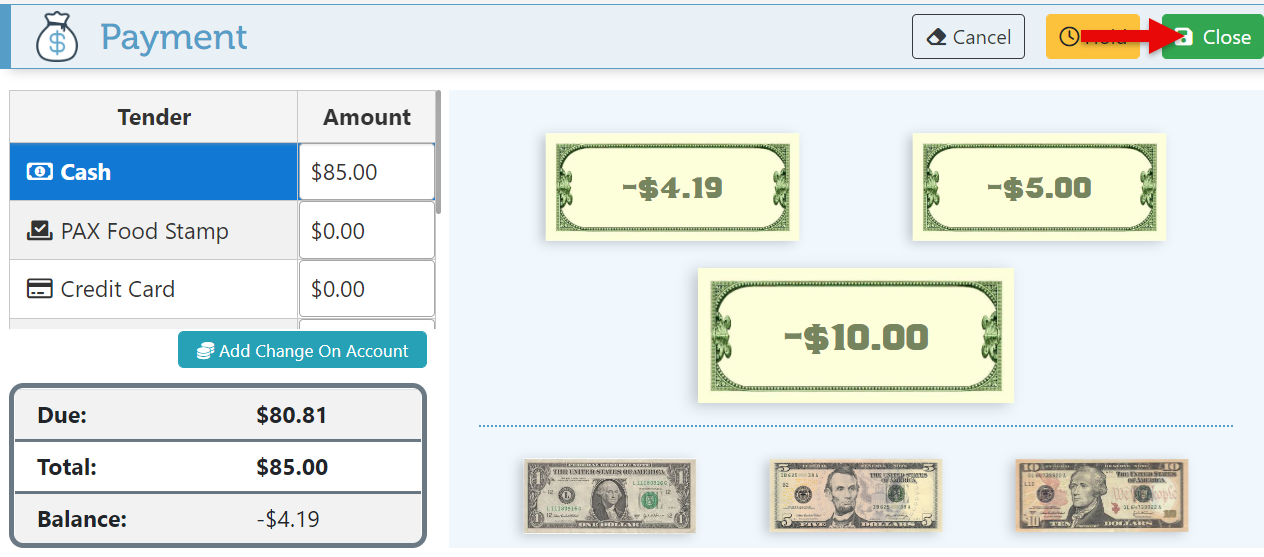
Navigate to the “Payment” tab on the page header. Select a payment method and enter the amount given in the designated space.
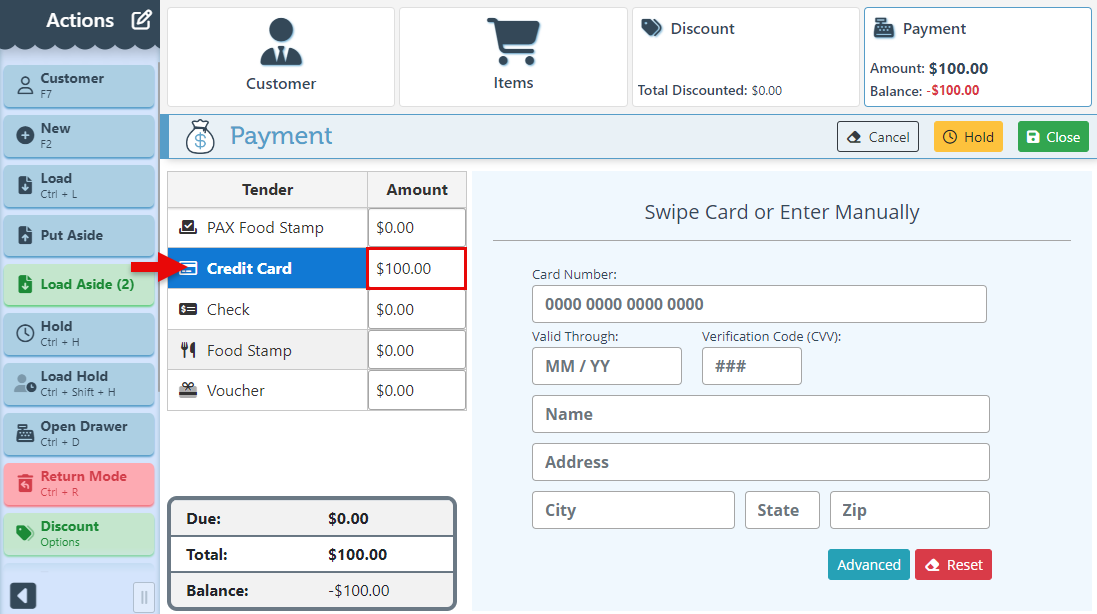
To disregard a declined card, click “Reset.”

To use multiple cards for a transaction, enter card information and click the “Enter” key to create an additional credit card tab.
This will only work if “Multiple Entries” is allowed for the tender. For more information on tender settings, click here.
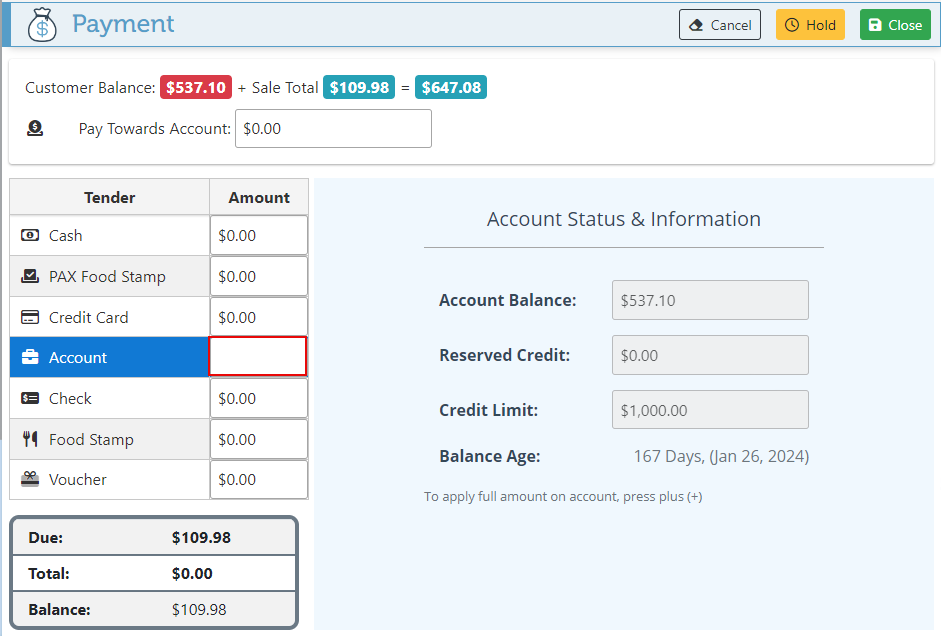
The account balance will be displayed below the payment tab. To pay towards the account balance, enter an amount in the “Pay Towards Account” bar on the header.
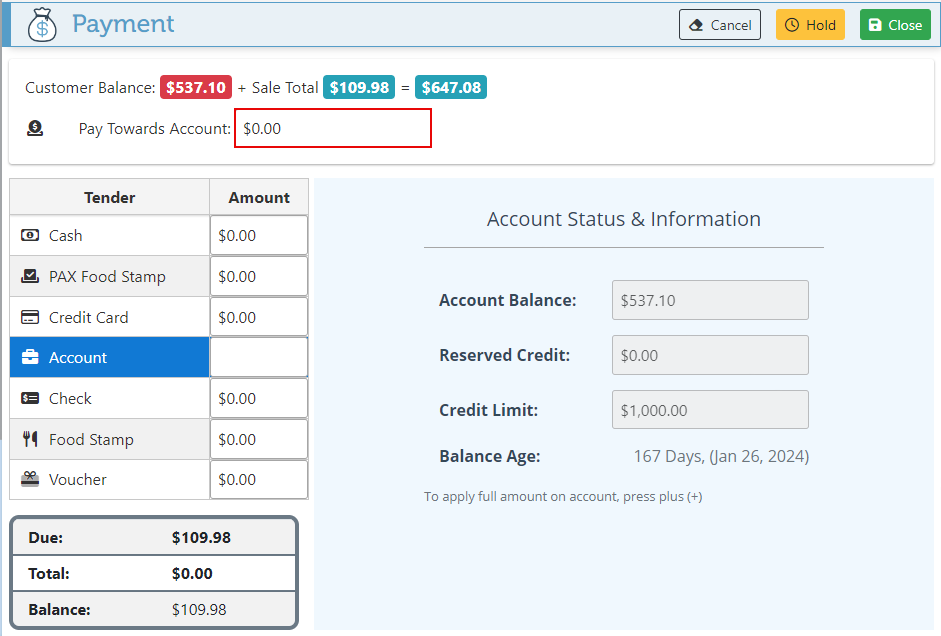
To pay on account, select the “Account” tender and enter the amount to put on account in the designated space.
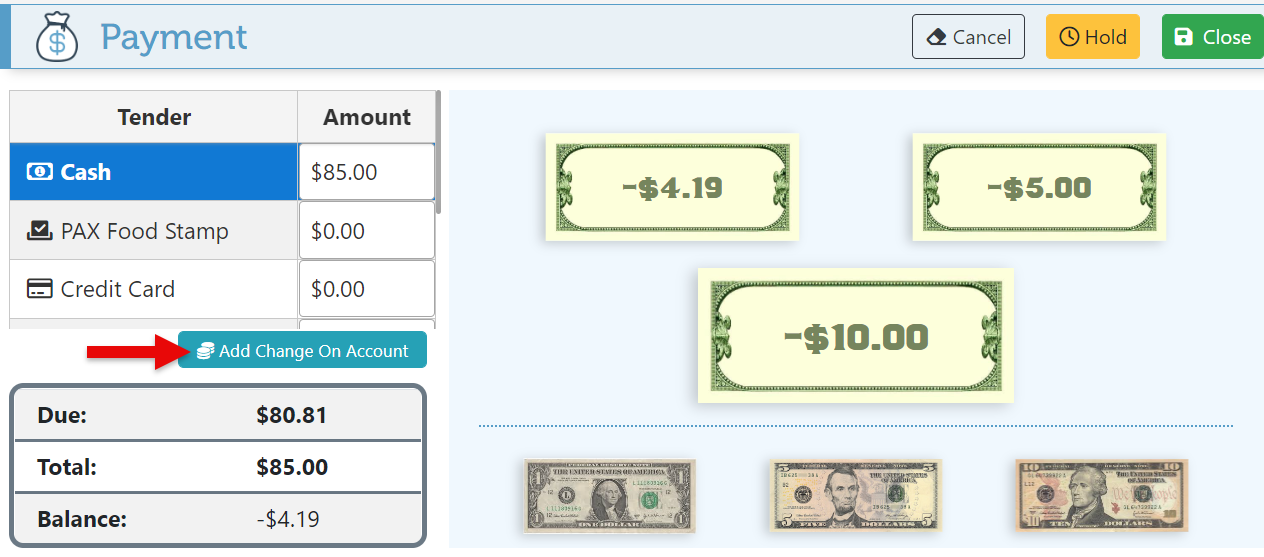
To add cash change as a credit to the account, click “Add Change On Account.” Alternatively, change can be added to the account by clicking the “+” key on the Account tender.
Click “Close” to complete the sale.
Upon completion of the transaction, a pop-up window will appear, displaying the change amount and a range of options for selecting a receipt method.