Txn Custom Fields
Custom fields can be added to the POS checkout screen or the side panel of invoices, enabling their use on both the front and back end. The usage of Txn custom fields allows for the entry of notes, reference numbers, and other transaction details on the transaction. Below is a guide on how to configure these custom fields, followed by instructions for displaying the fields in both the front and back end.
Txn Custom Feilds in the Frontend
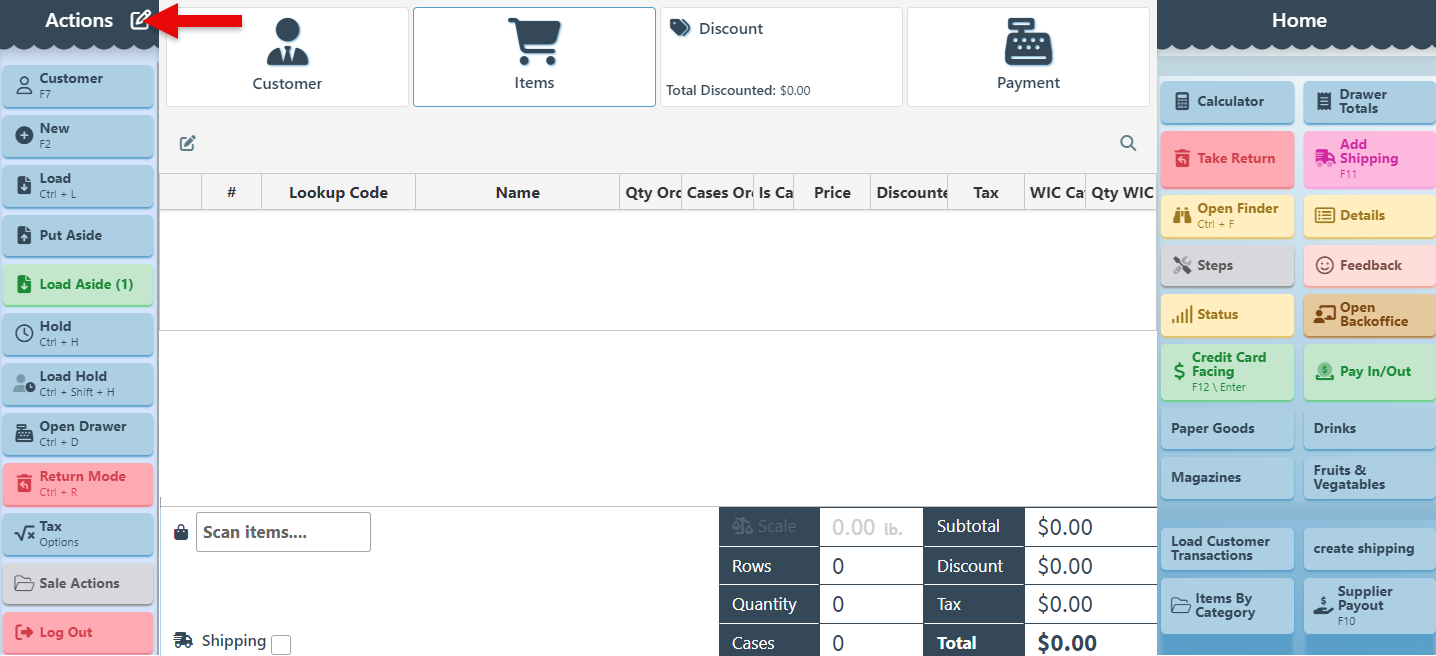
Open the POS.
Click the Panel Editor button to open the panel configurations.
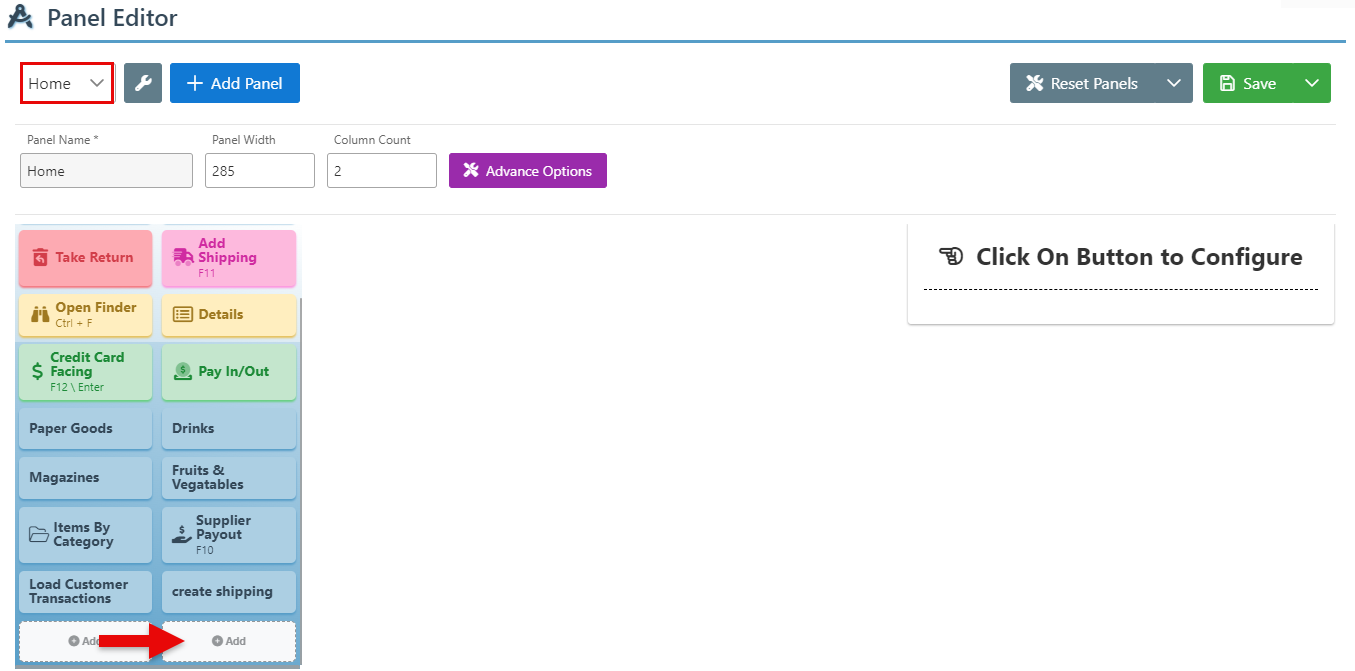
Select the panel on which to add the custom fields and click a new button to configure.
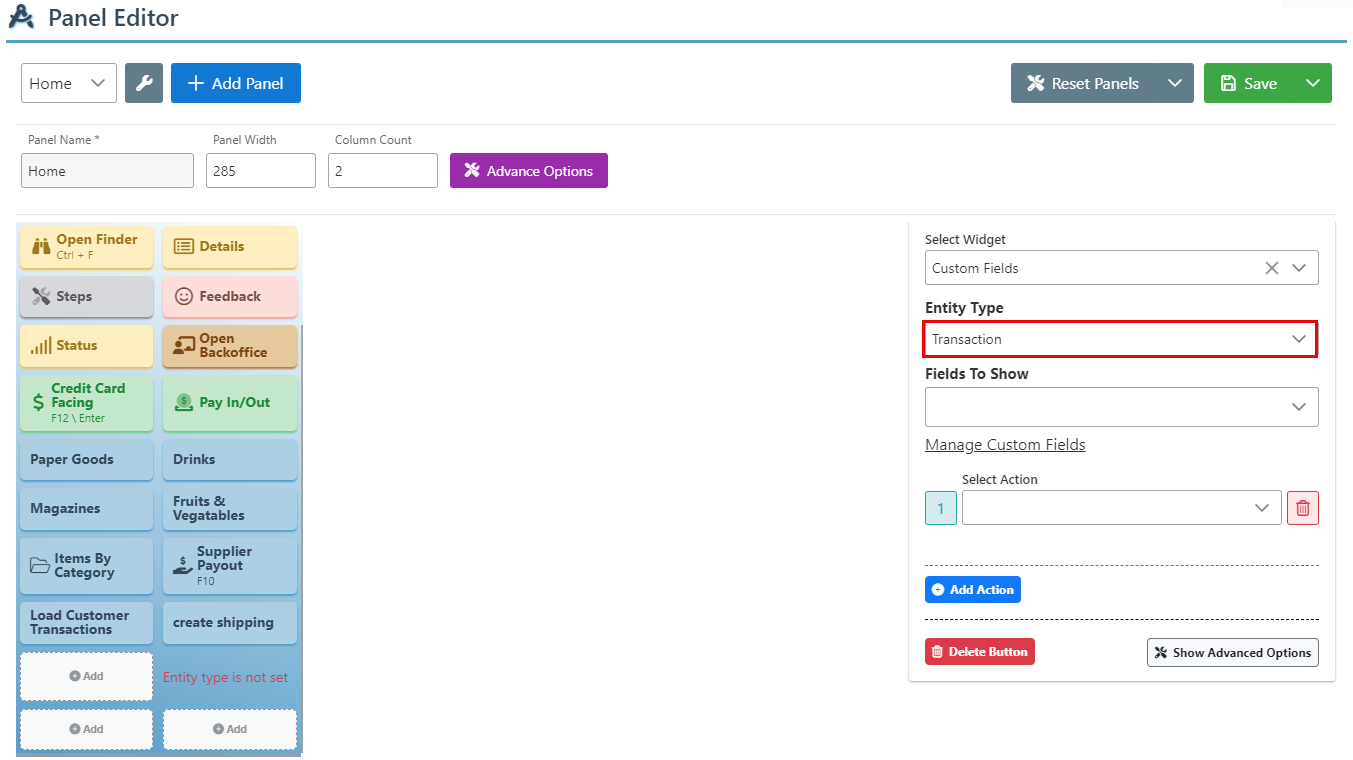
In the button fields that appear, select “Custom Feilds” from the widget dropdown.
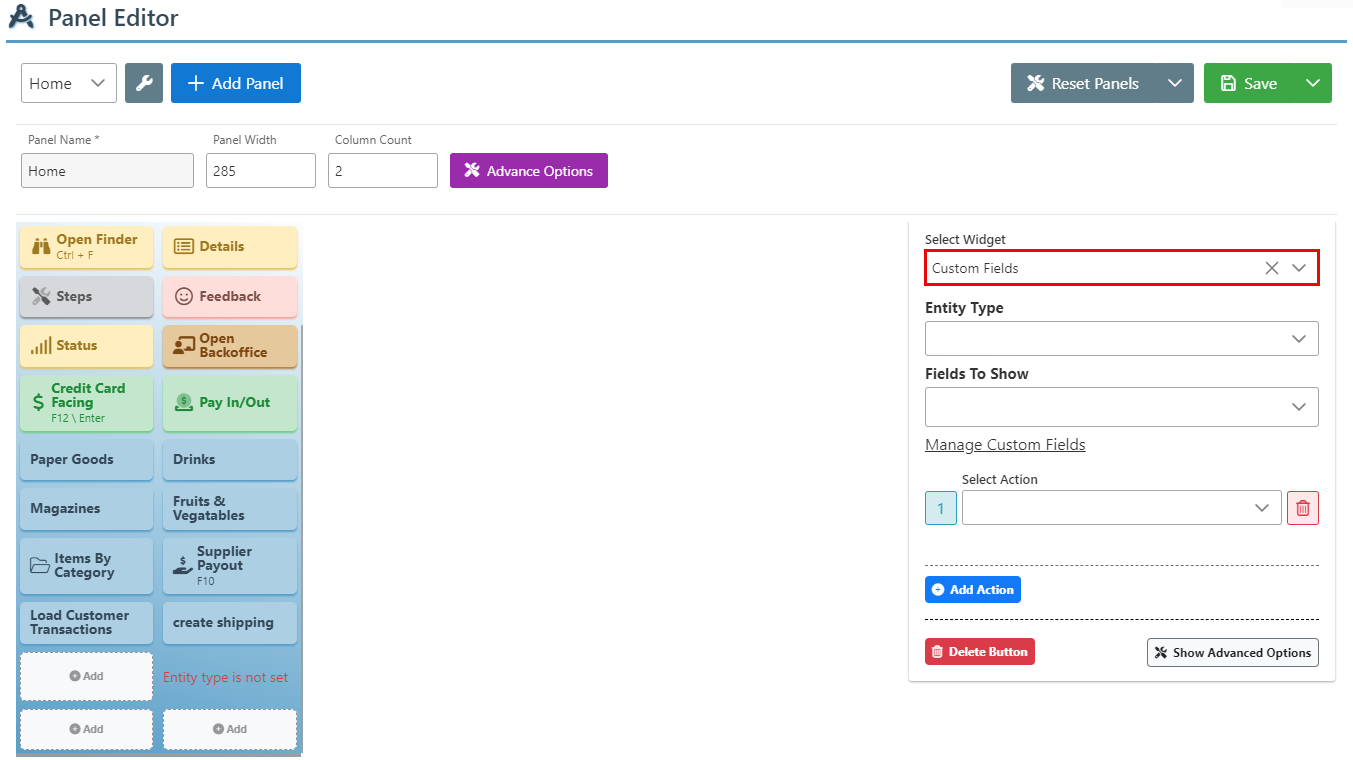
Select “Transaction” as the Entity type.
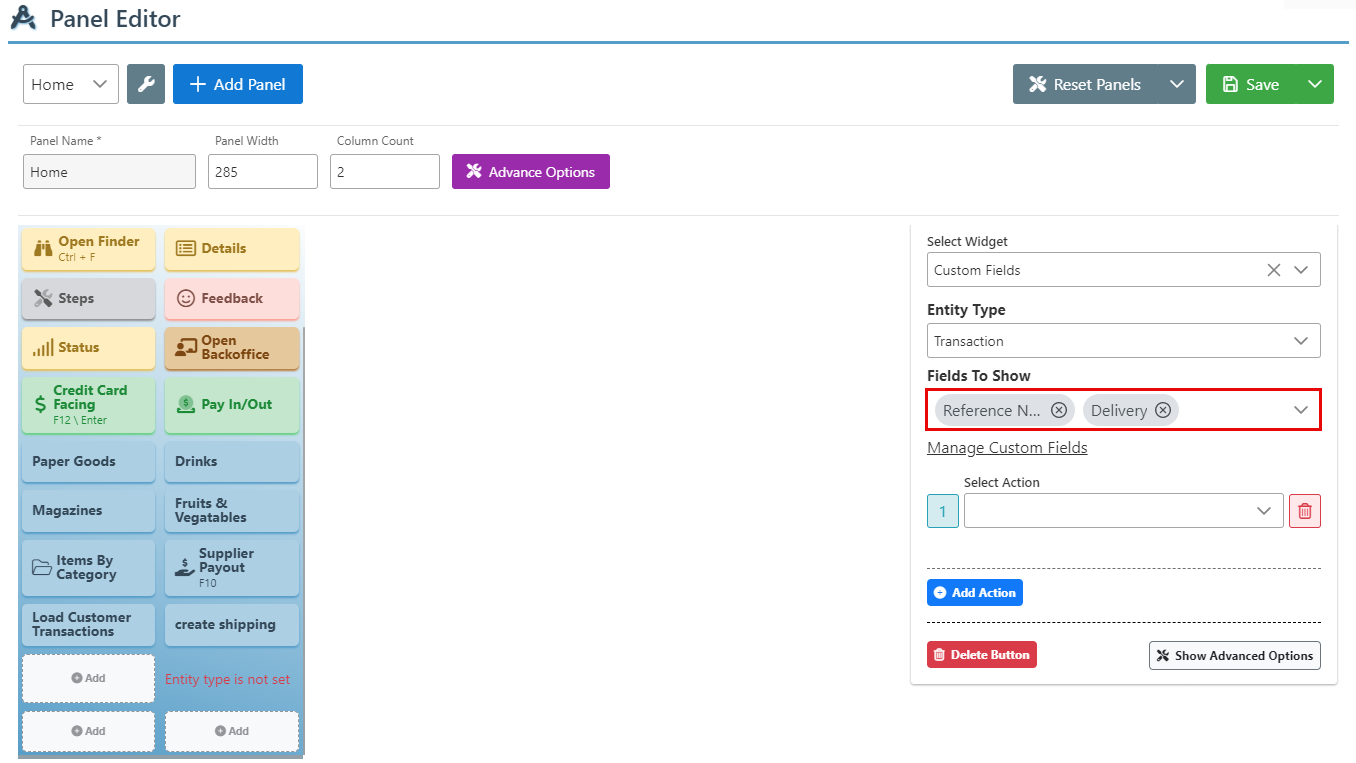
Select the specific custom fields to be displayed in the POS side panel, from the dropdown menu.
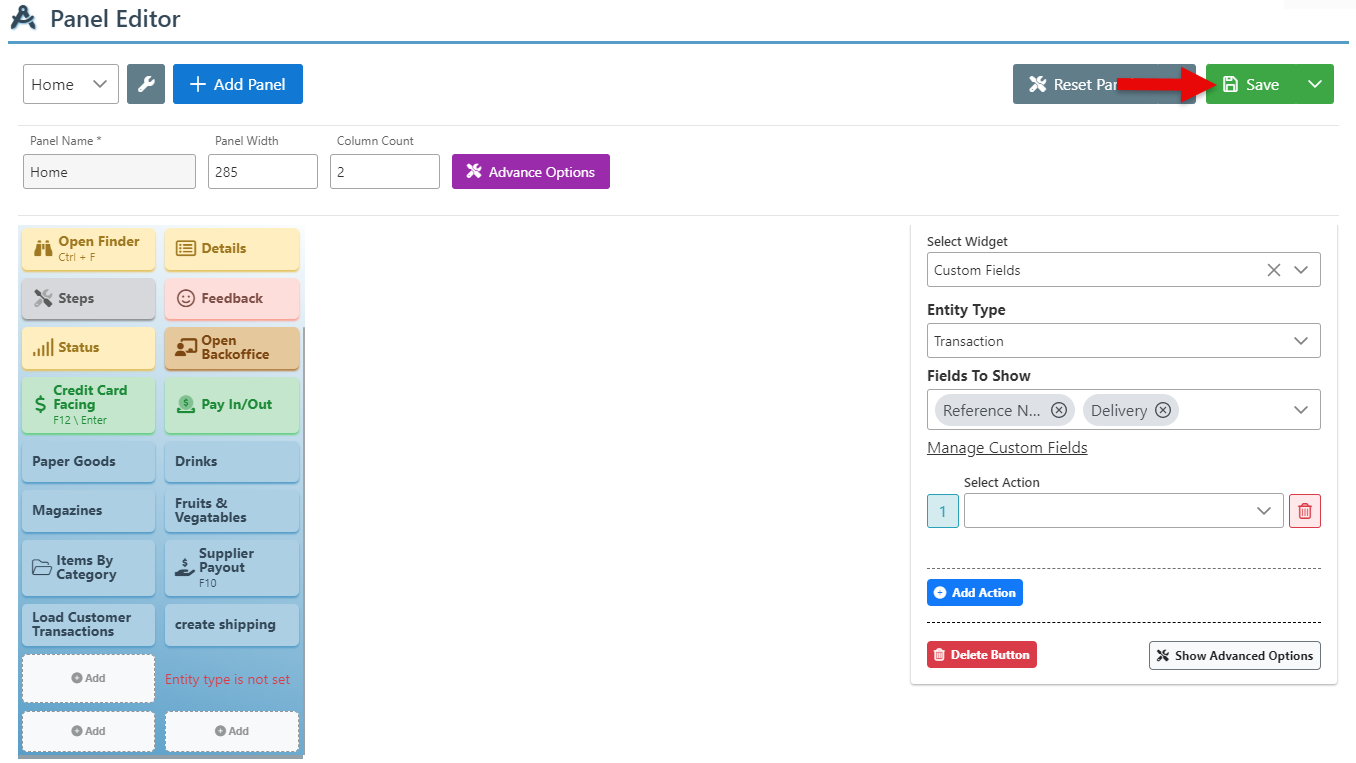
Click “Save” at the top right to save the widget configurations.
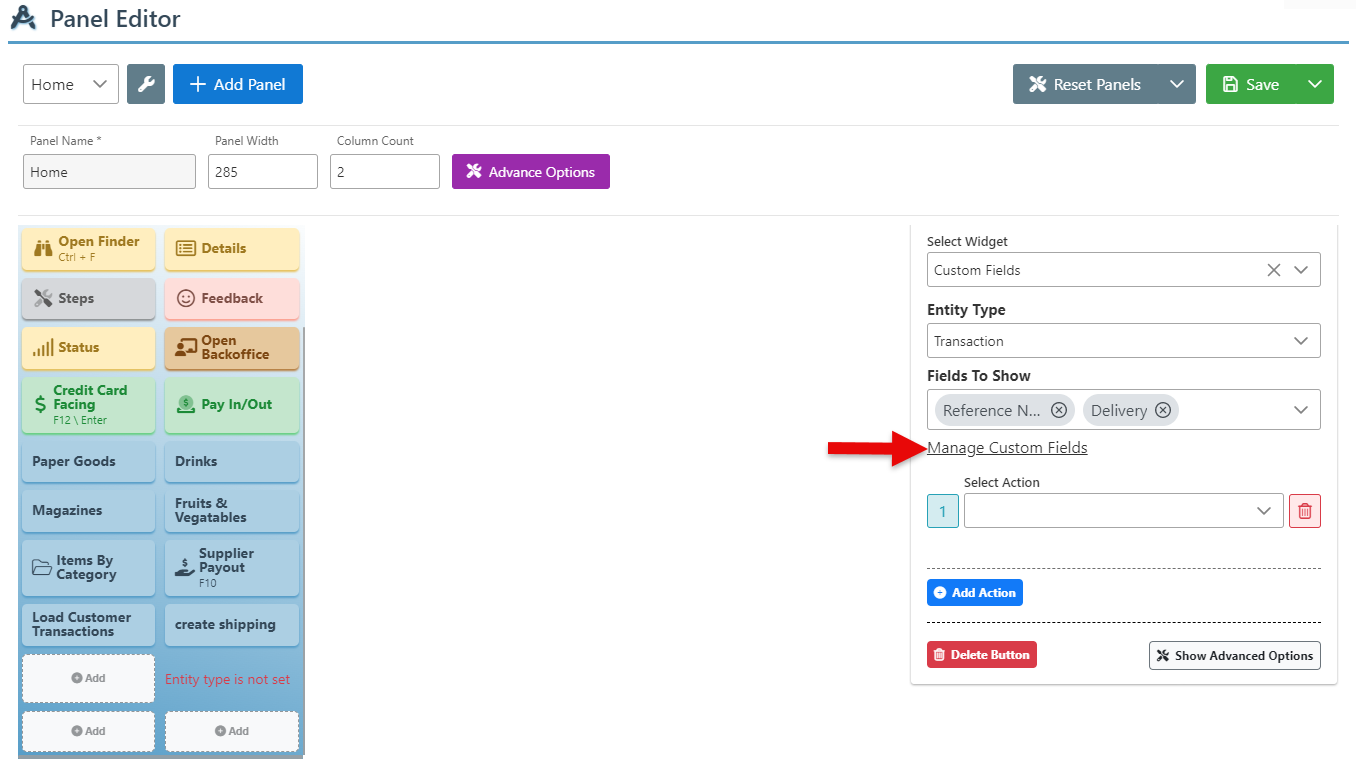
To access, configure, or edit the custom fields, click “Manage Custom Feilds” and follow the guide for configuring these fields outlined at the end of the document.
Txn Custom Feilds in the Backend
Open Backoffice.
Click “Transactions” in the Main Navigation menu and select “Create Invoice” from the scrollable dropdown menu.
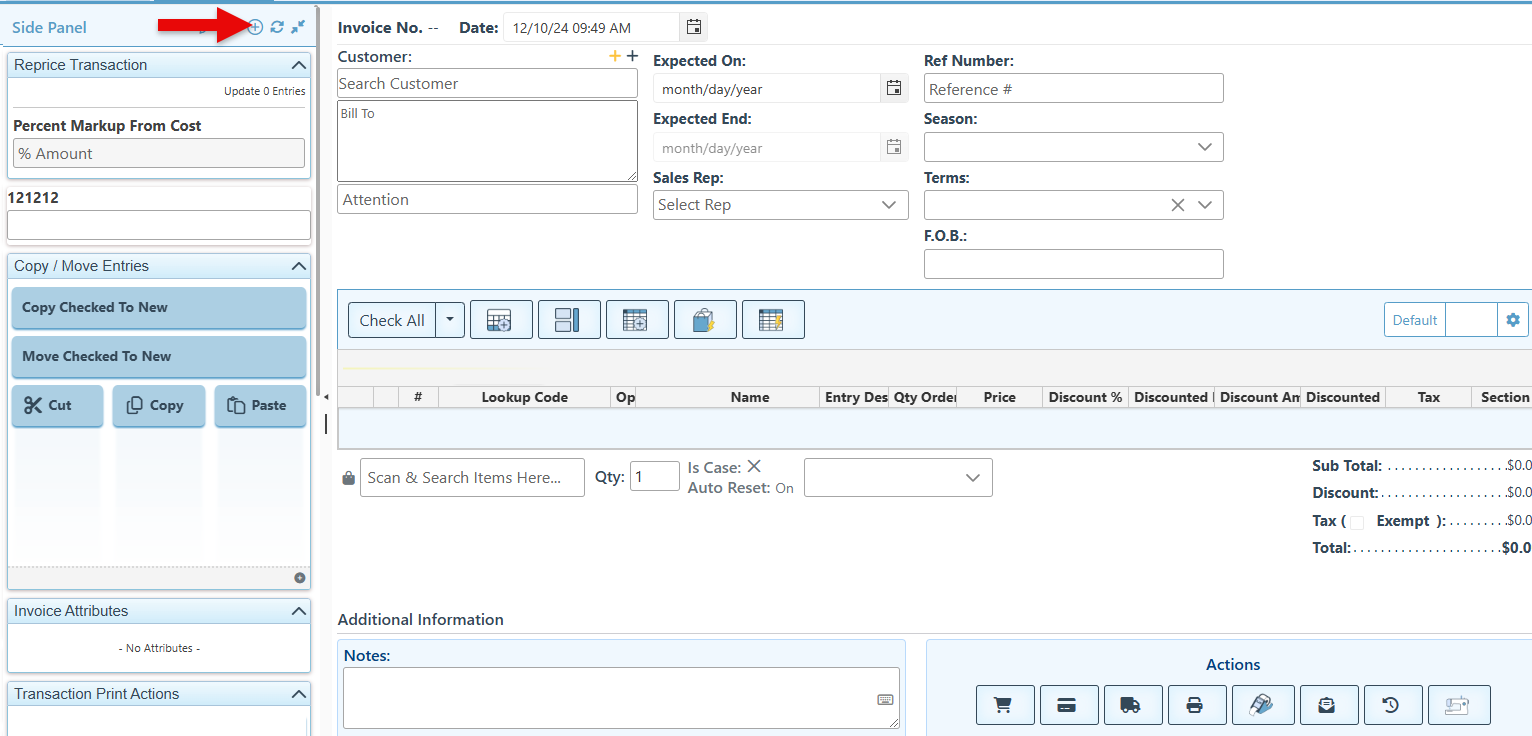
Click the + button in the side panel header to add a widget.
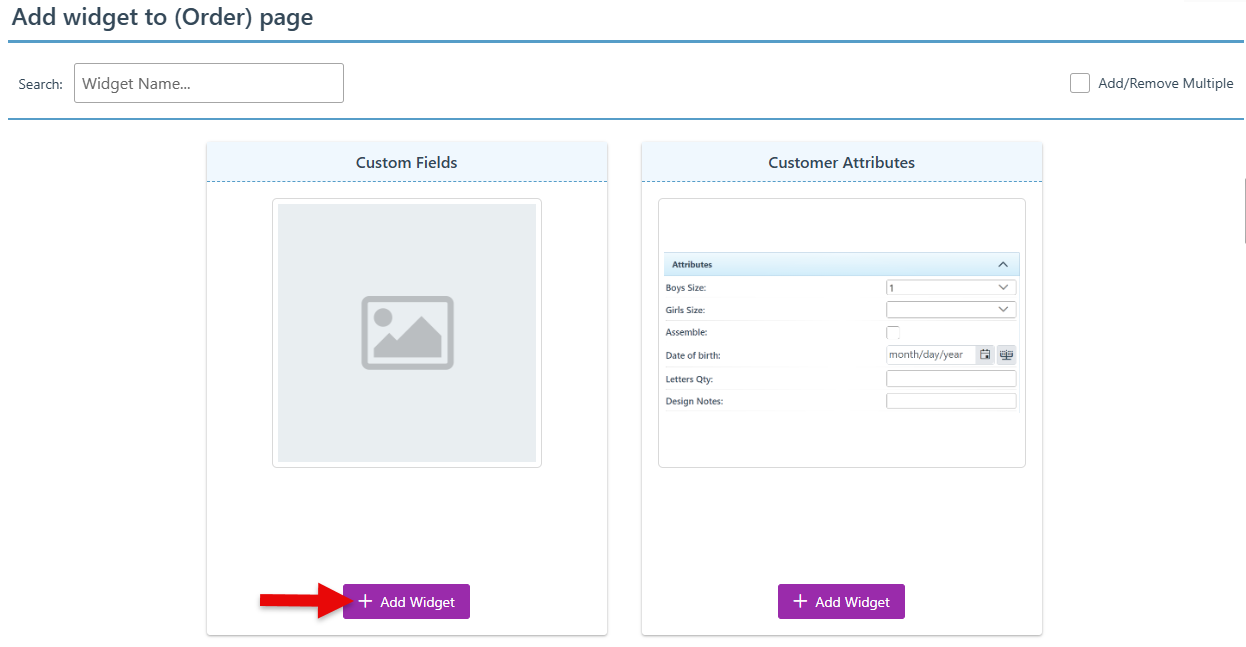
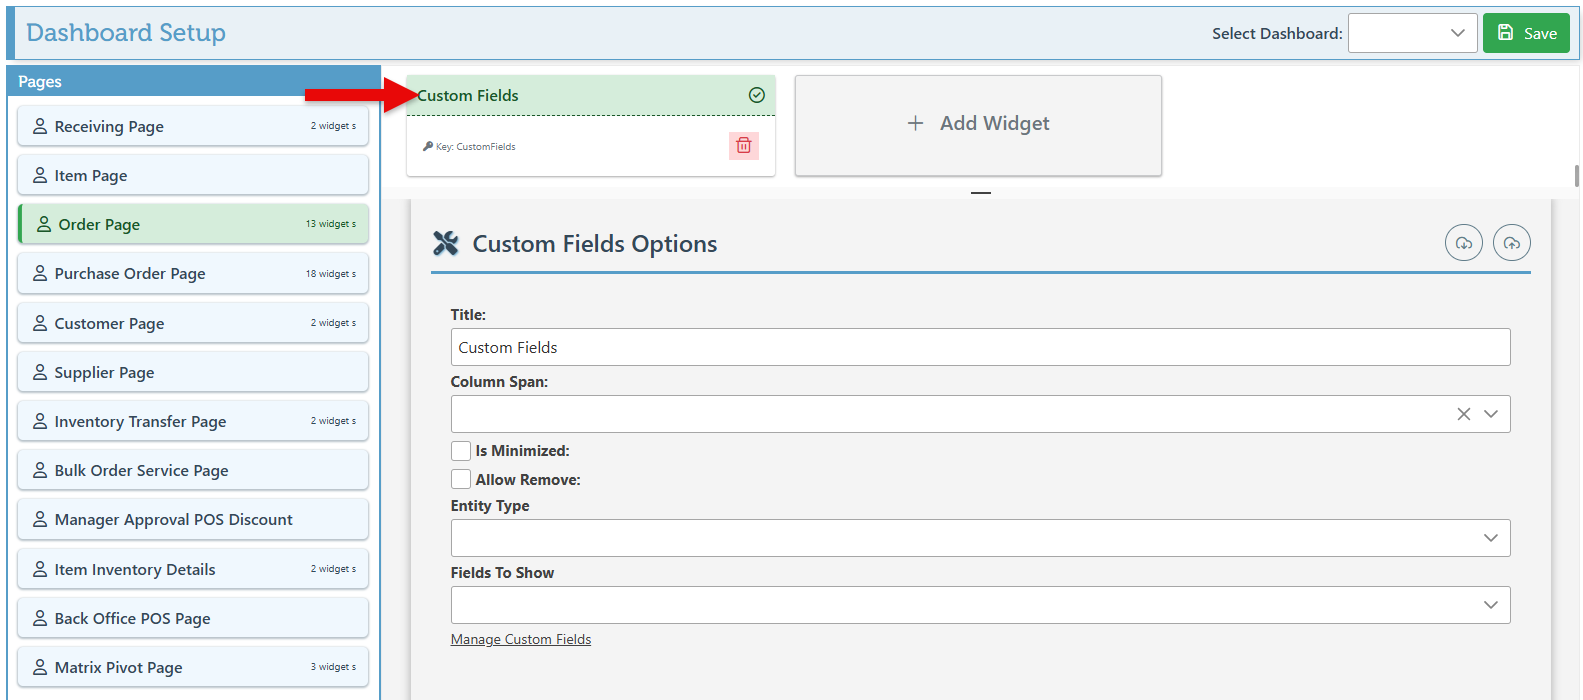
Click “Add Widget” on the Custom Feilds card to add the widget.
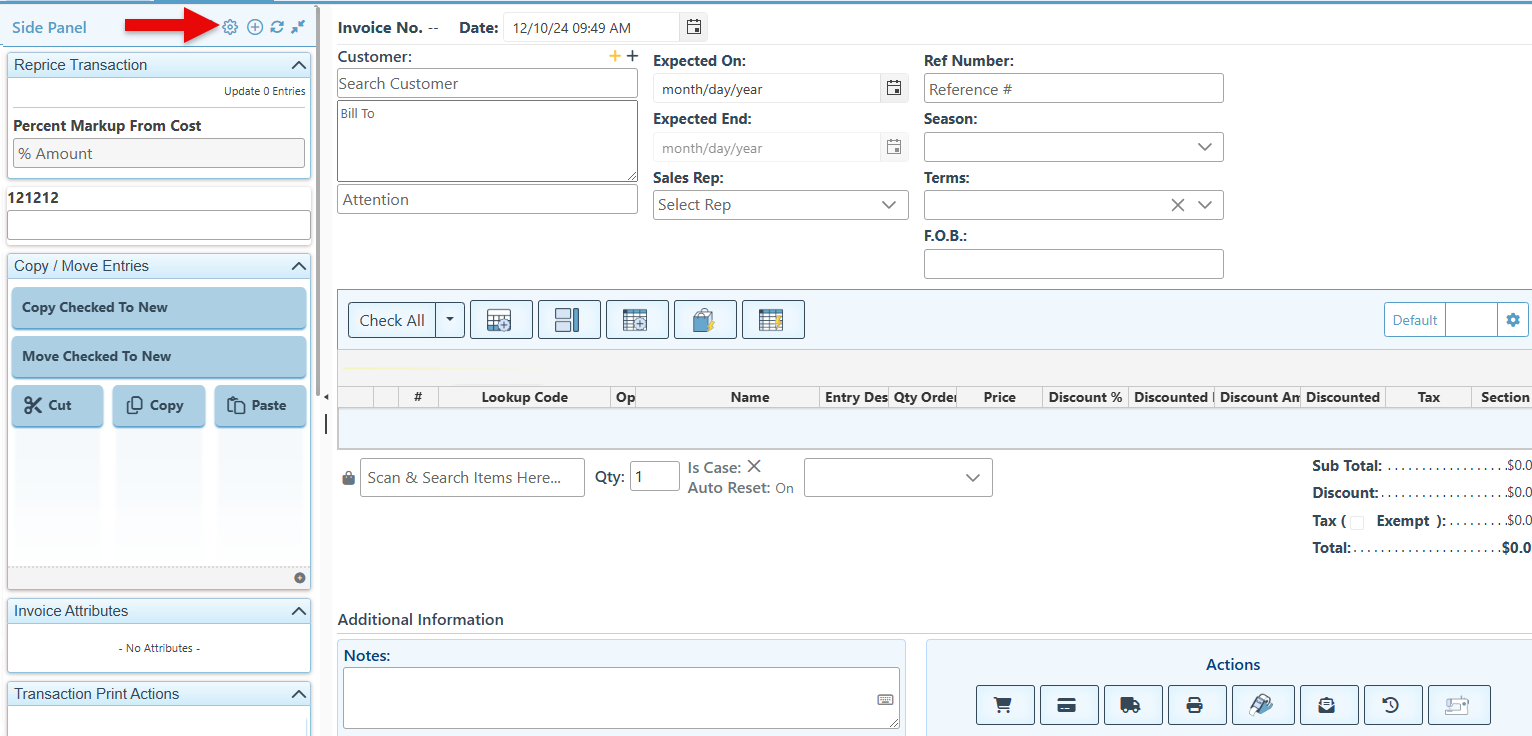
Return to the invoice page and click the settings button in the side panel header.
Scroll and click the “Custom fields” card to configure the widget further.
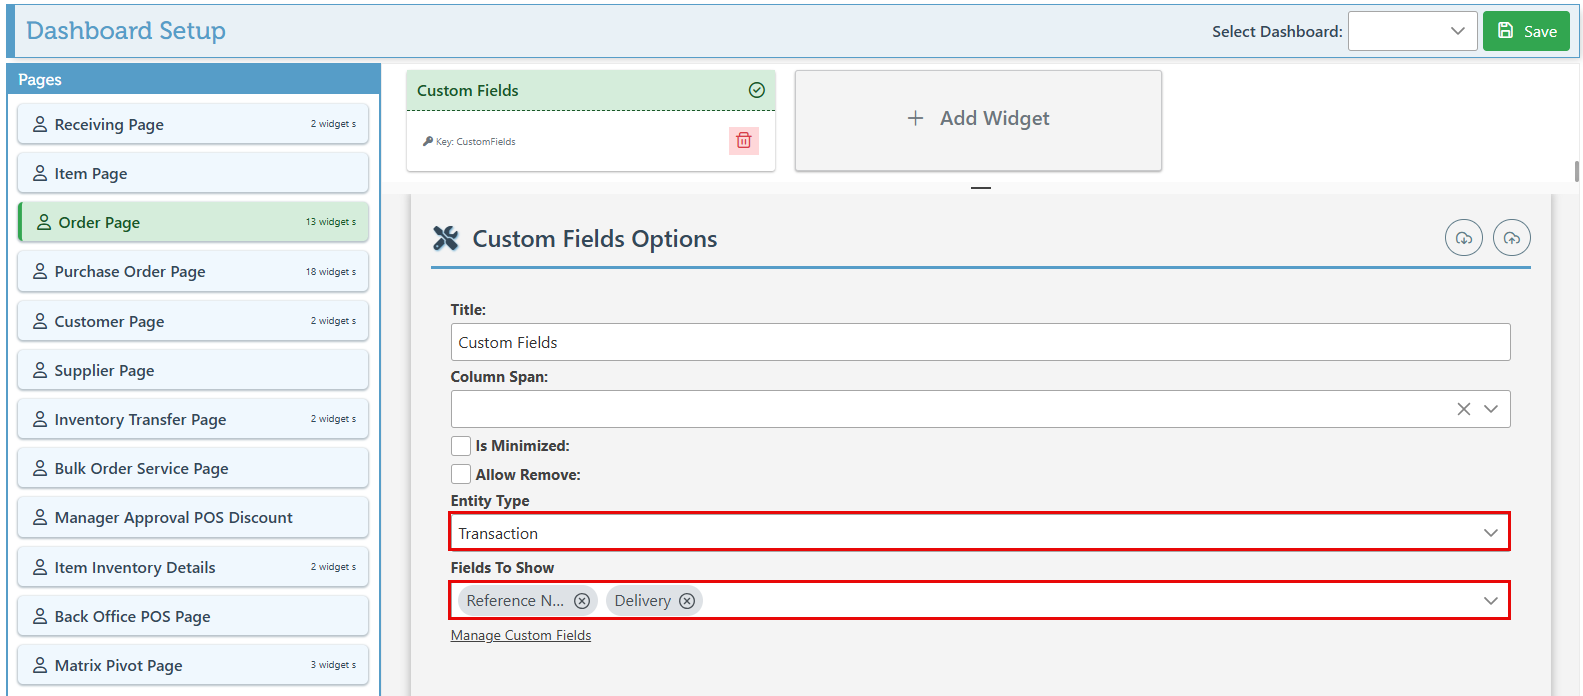
Select “Transaction” as the Entity Type and select the specific custom fields to be displayed in the invoice side panel from the “Feilds To Show” dropdown.
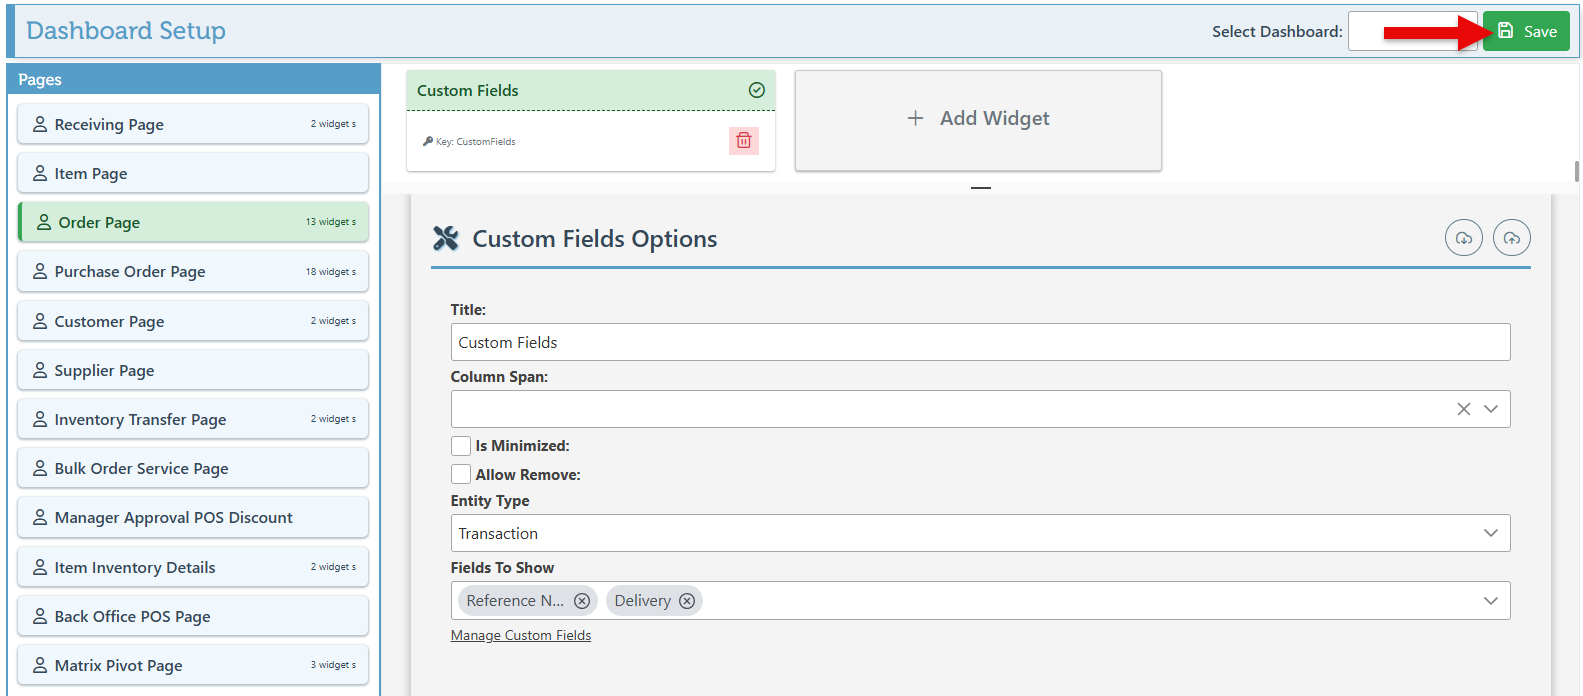
Click “Save” at the top right to save changes.
To access, create, or edit custom fields, click “Manage Custom Fields” and follow the guide for configuring these fields outlined at the end of the document.

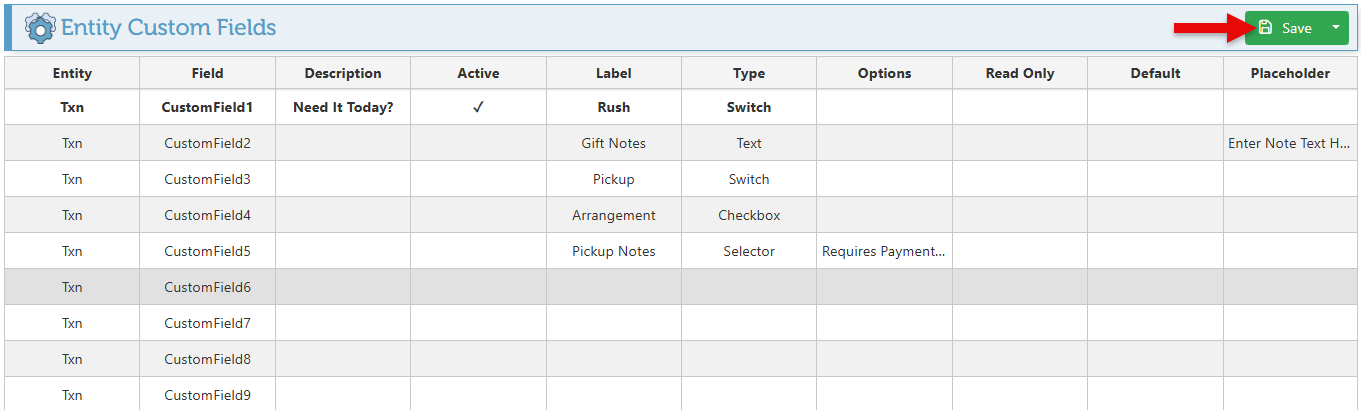
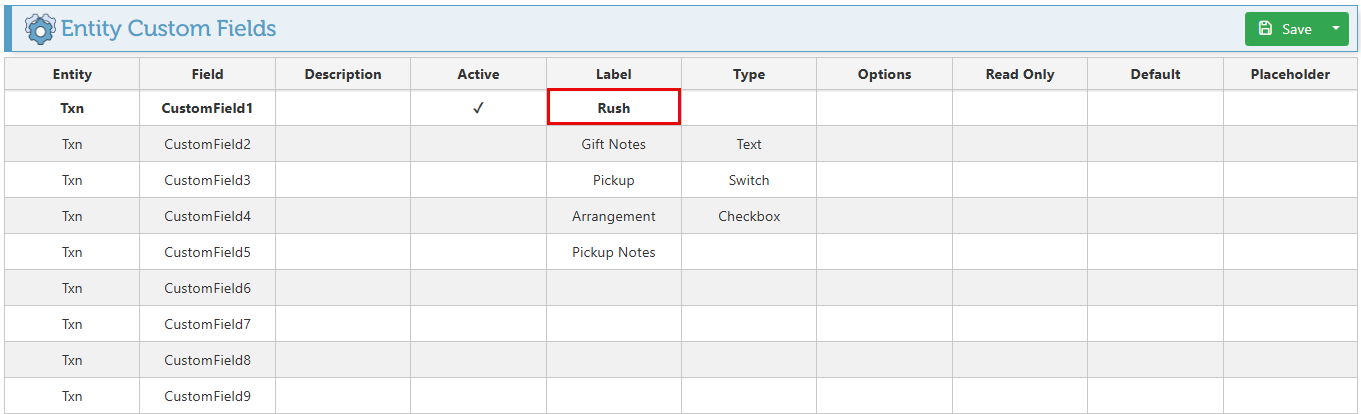
Configure Txn Custom Feilds
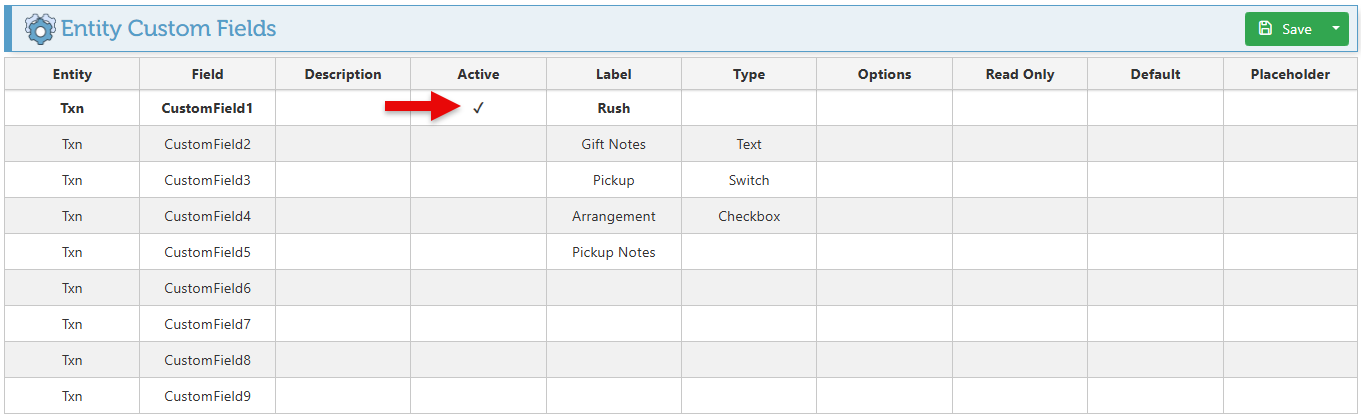
Enter the name/ title of the field in the “Label” space.
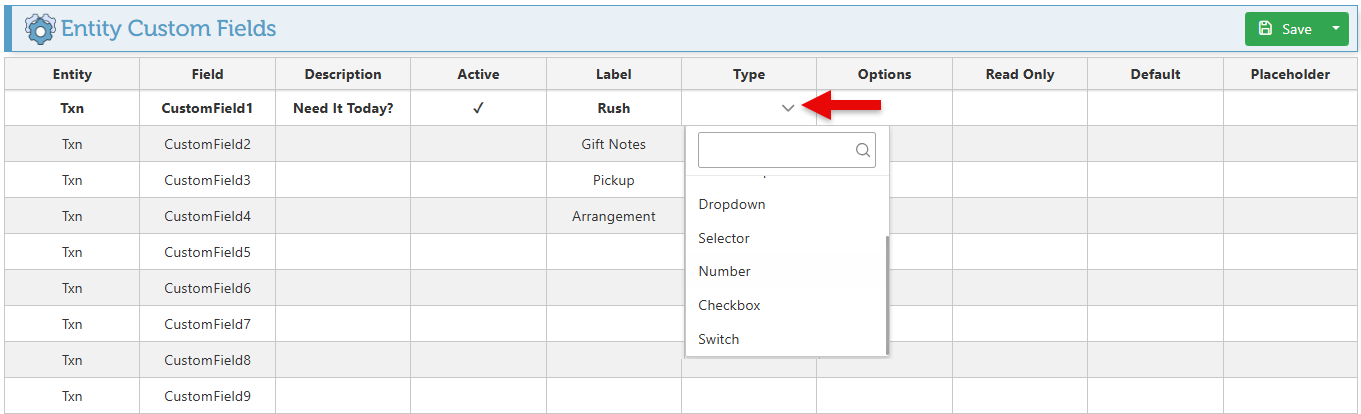
Enter text in the “Description” field to display a small message below the custom field.

Select the “Active” field to activate the custom field.
Select the field type from the designated dropdown menu. Options include “Text” for the usual text field, “Long Text” for displaying a larger text box to allow for longer text, a “Checkbox,” a “Switch” for a toggle switch, and more.
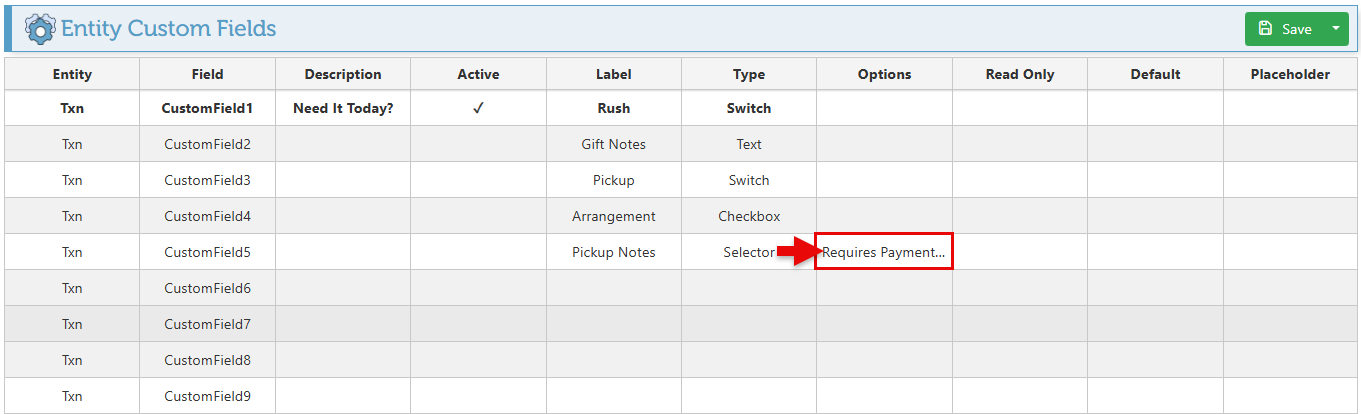
If the field type is set as a selector, enter the menu options in the “Options” field, separating multiple options with a comma.
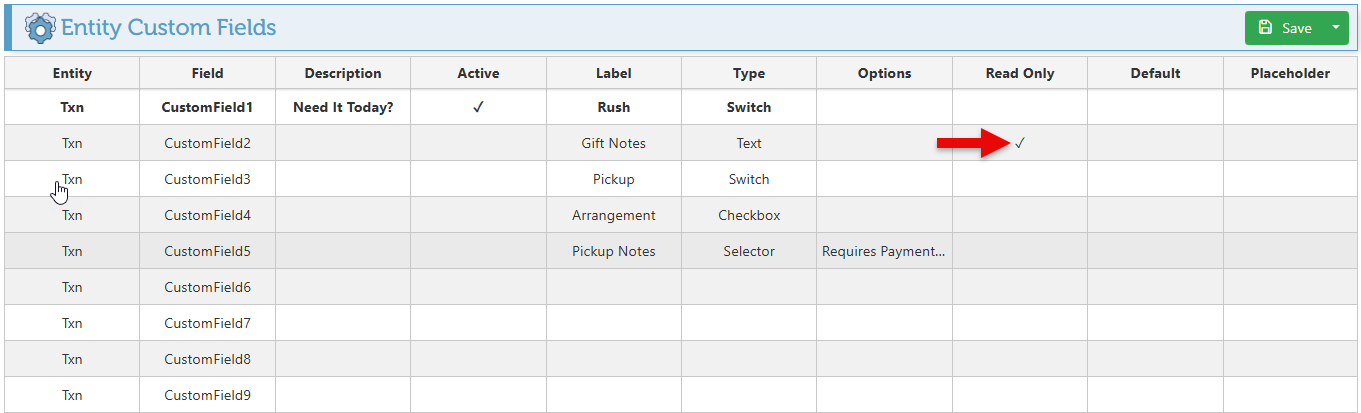
Select the “Read Only” space to set the field as uneditable.
To set a specific number or text to be entered in the field by default, enter the text/ number in the “Default” field.
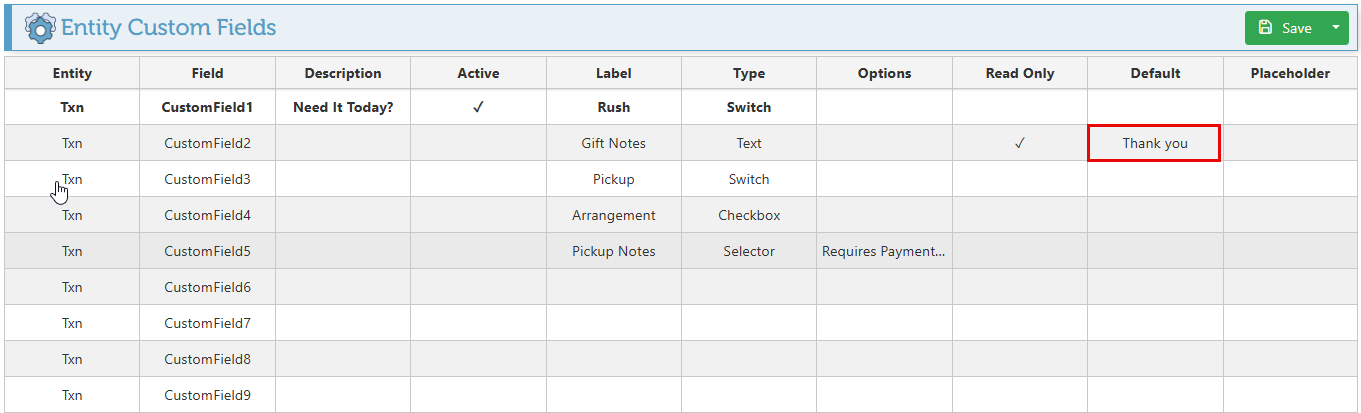
To enter text in the field as a placeholder, such as (Enter text here…) ( How much?), etc., input the placeholder text in the designated field.

Click “Save” at the top right to save configurations.