Create a Payment
Follow the steps below to create a payment:
Log in to app.firstchoicepos.com
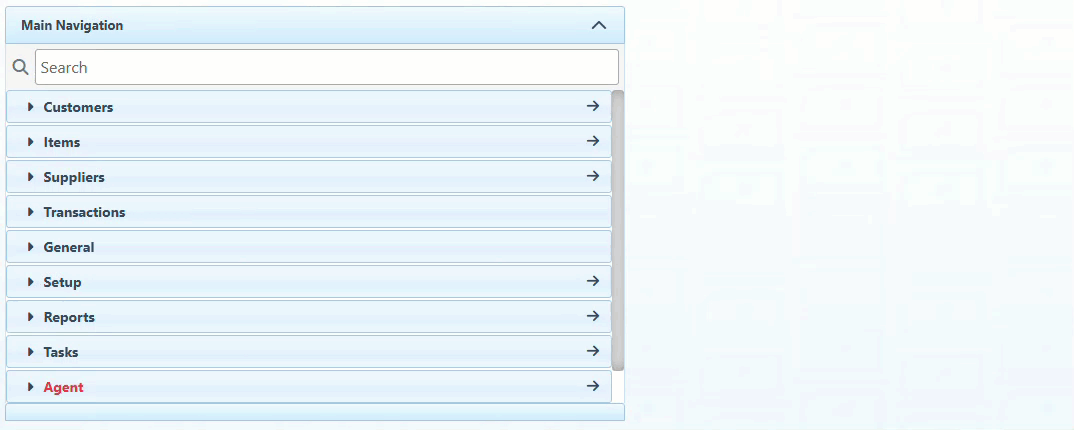
Click “Transactions” in the Main Navigation menu and select “Payments” in the scrollable dropdown.
Click “New” at the top right to create a new payment.

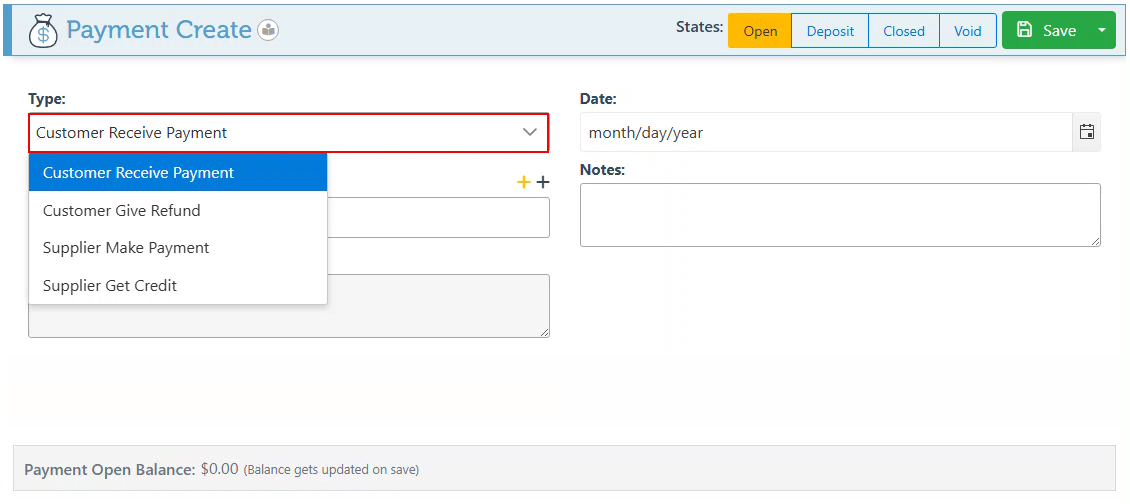
Select a payment type in the dropdown menu. Options include: “Customer Receive Payment”- accept payment from the customer; “Customer Give Refund”- Give money to the customer as a refund; “Supplier Make Payment'- Give money to a supplier as a payment; “Supplier Get Credit”- Receive money from the supplier as credit.
When accessing the payment page from an invoice or PO, this field will be automatically selected.
Search for and select a supplier/customer account.
To later change the customer account associated with the payment, return to the “Open” state and edit the Supplier/Customer field.
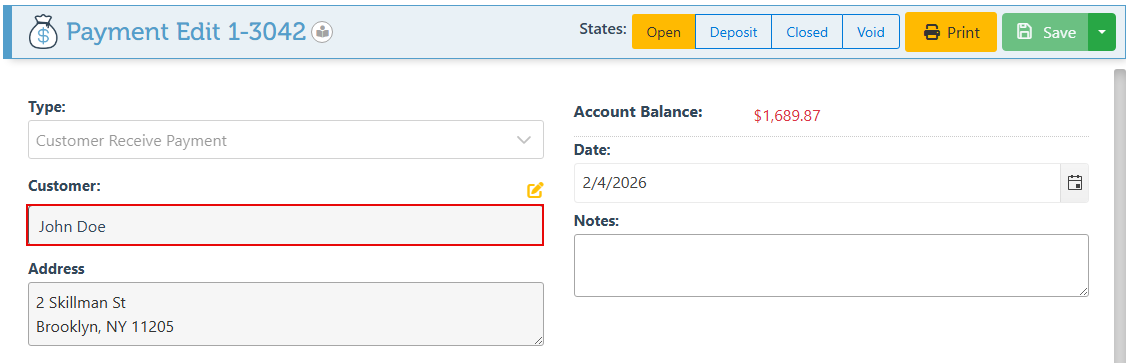
After selecting an account, available credit entries will be displayed on the page to ensure payment accuracy.
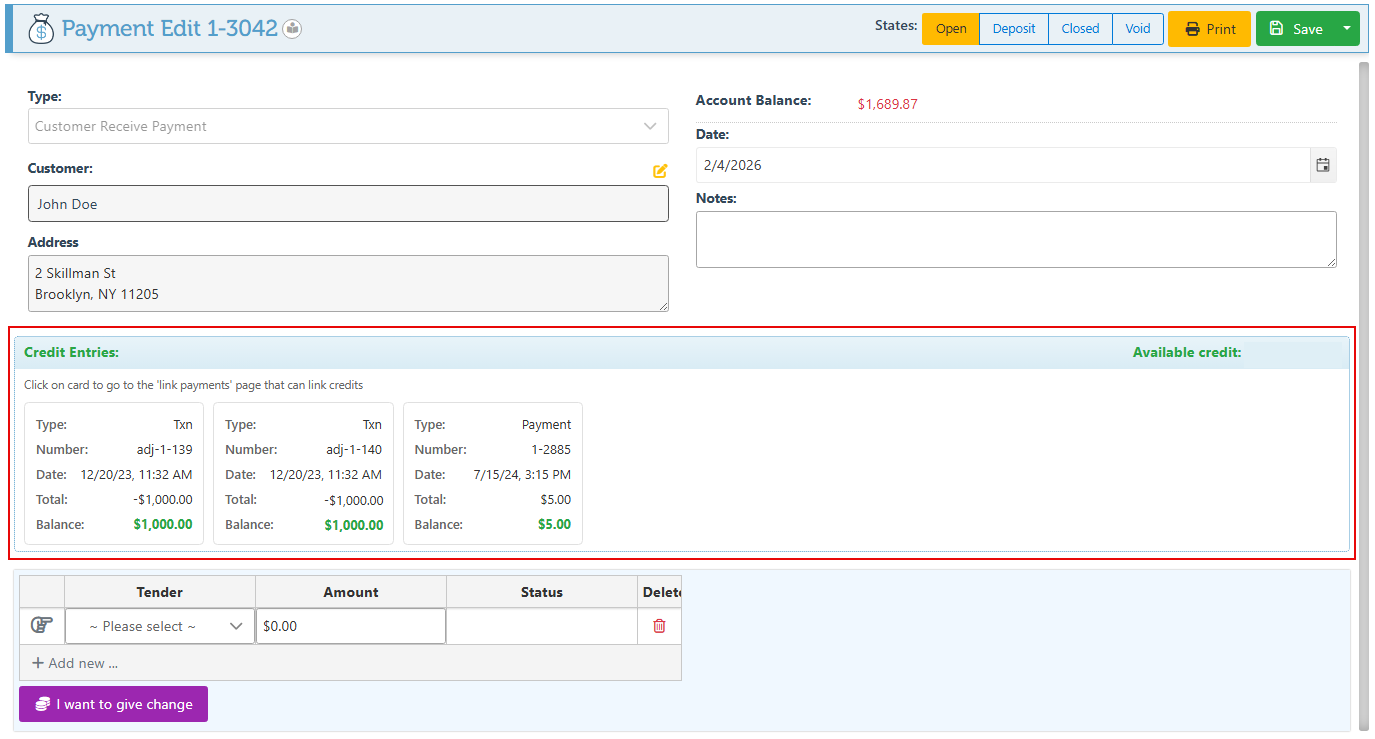
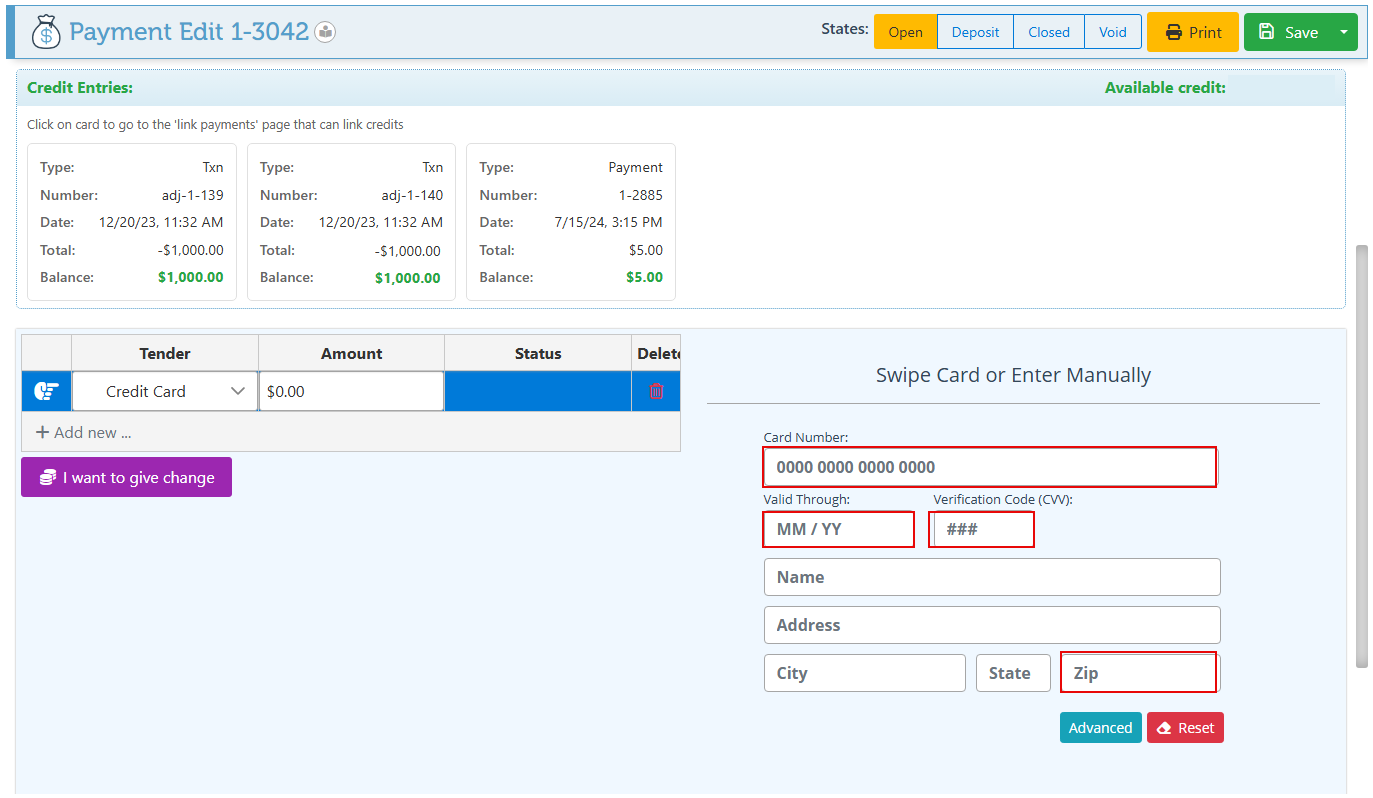
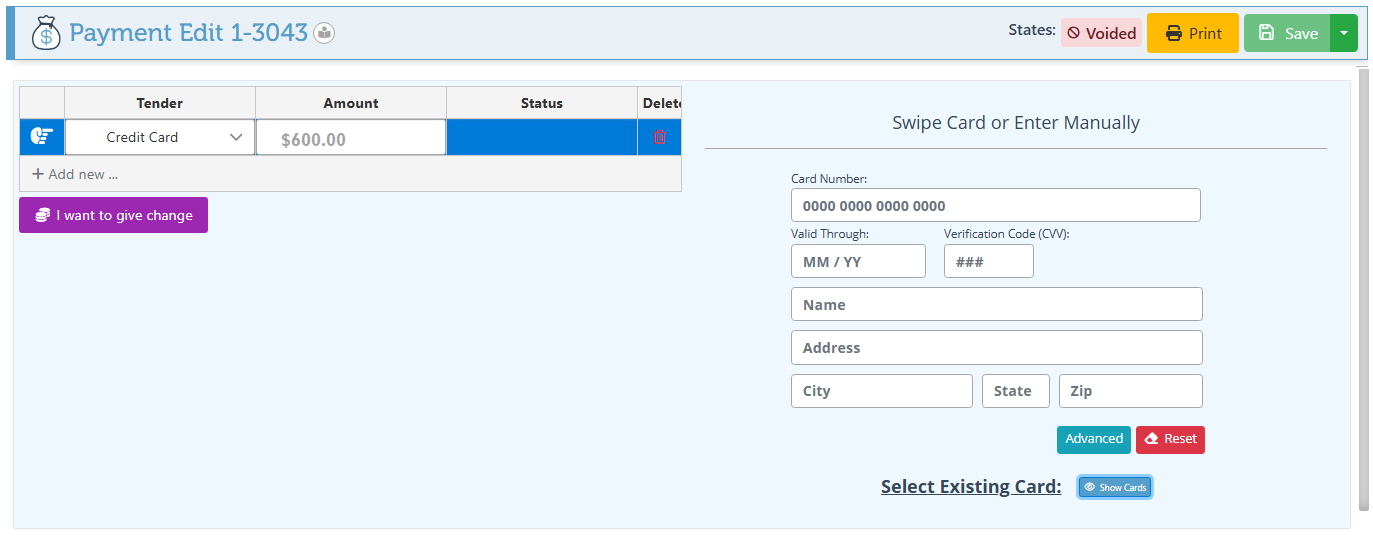
Select a payment method in the tender dropdown and enter the payment amount.
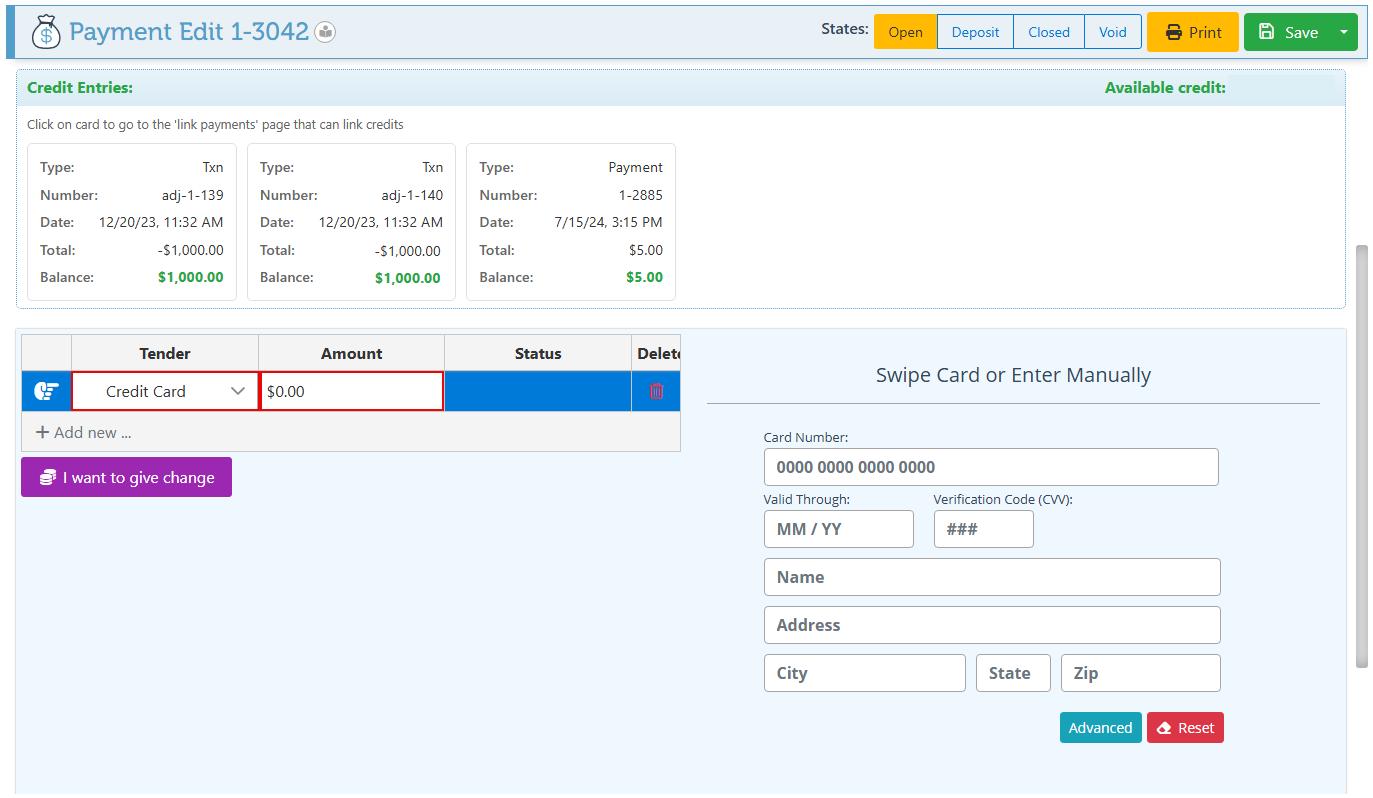
Depending on the tender selected, fill in the appearing fields.
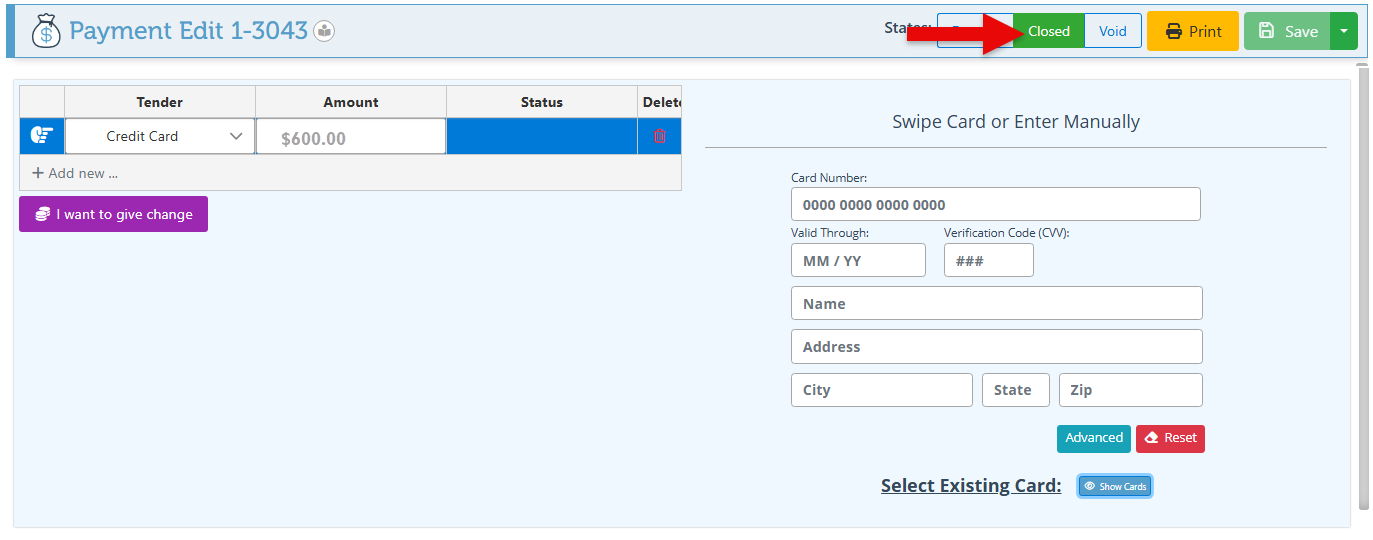
To save and process the payment, change the payment state to “Closed”.
To void a payment, change its status to “Void” by clicking on it. Payments made by credit or debit card can only be voided within a few minutes of the transaction’s completion. After this period, you will need to process a return for the transaction.
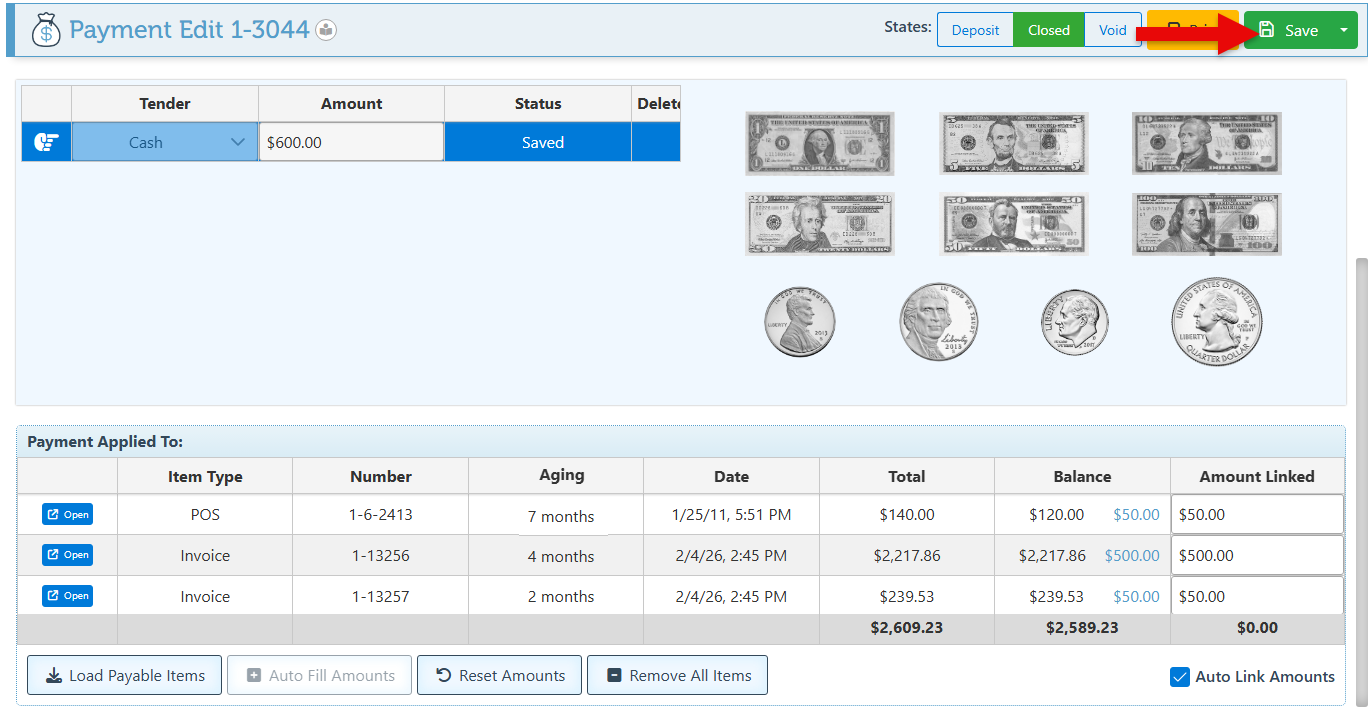
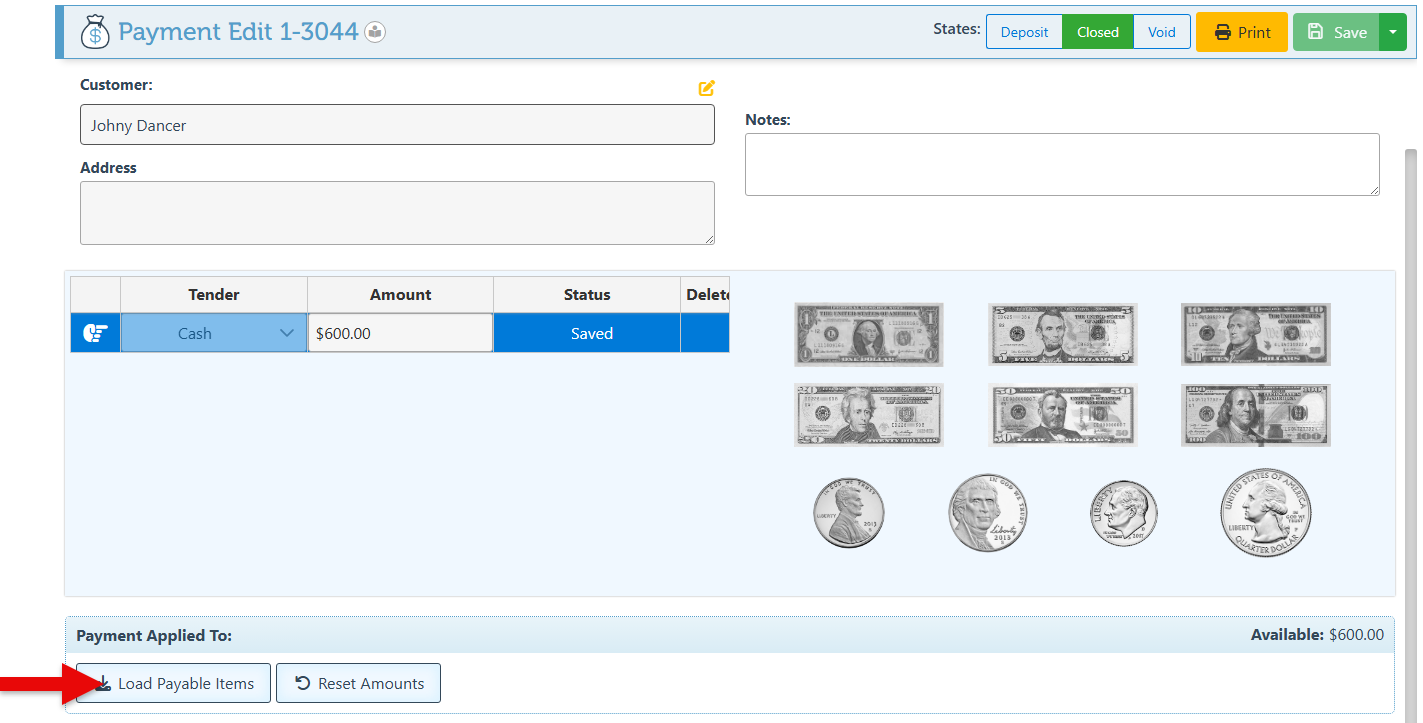
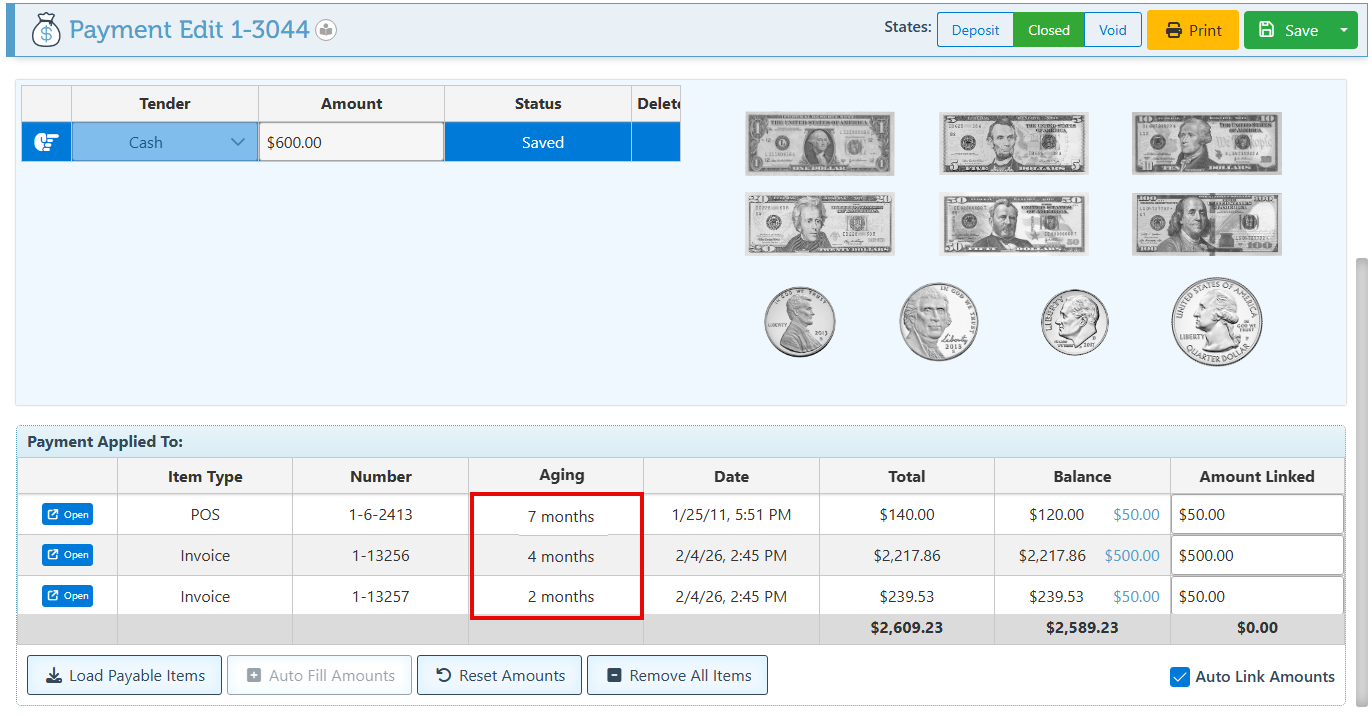
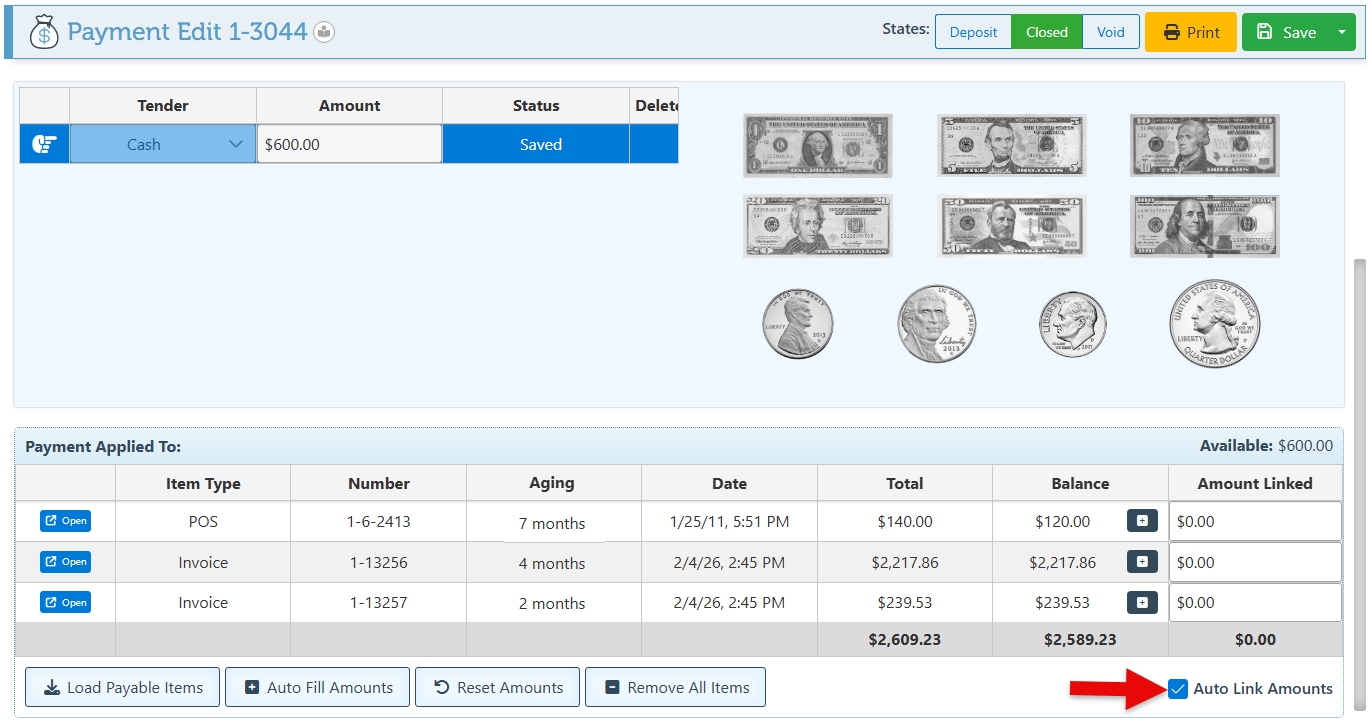
To link the payment to a transaction, navigate to the footer of the page and click “Load payable Items.”
All transactions with an open balance will appear. To link the complete payment amount to a specific transaction, click the + icon on the transaction row.
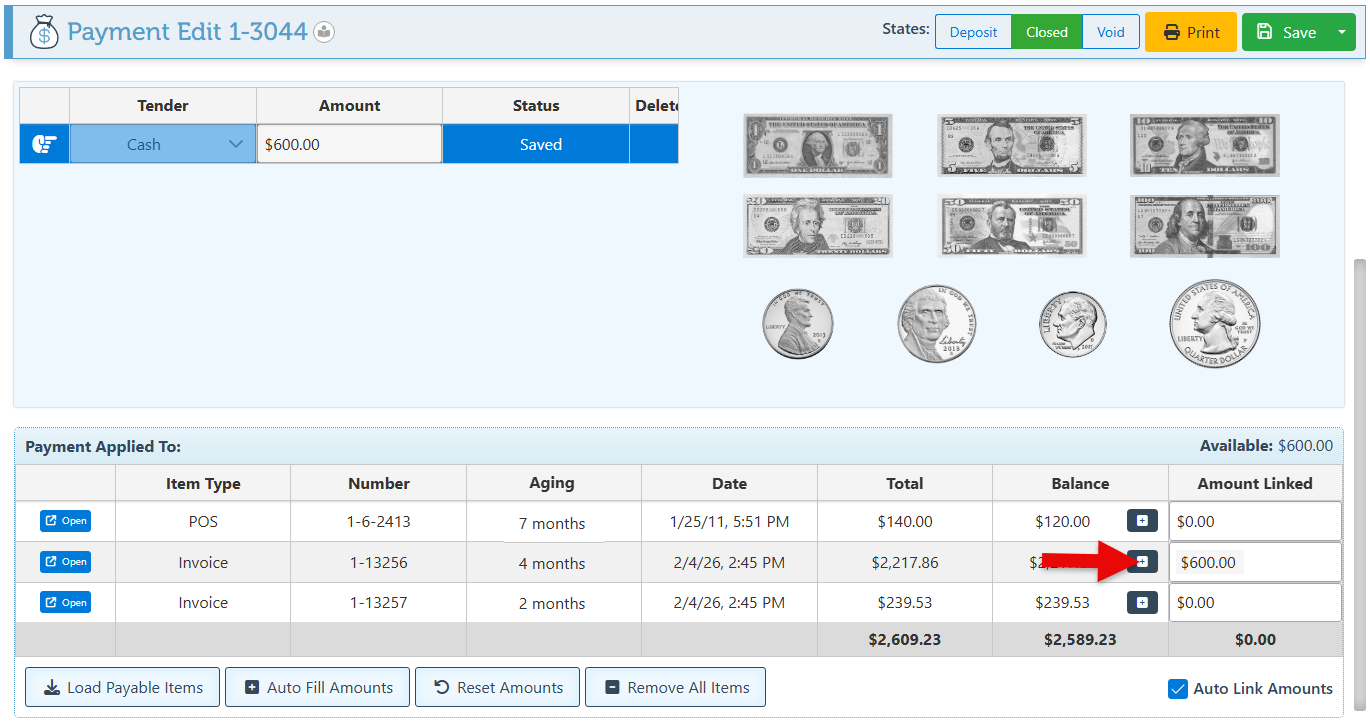
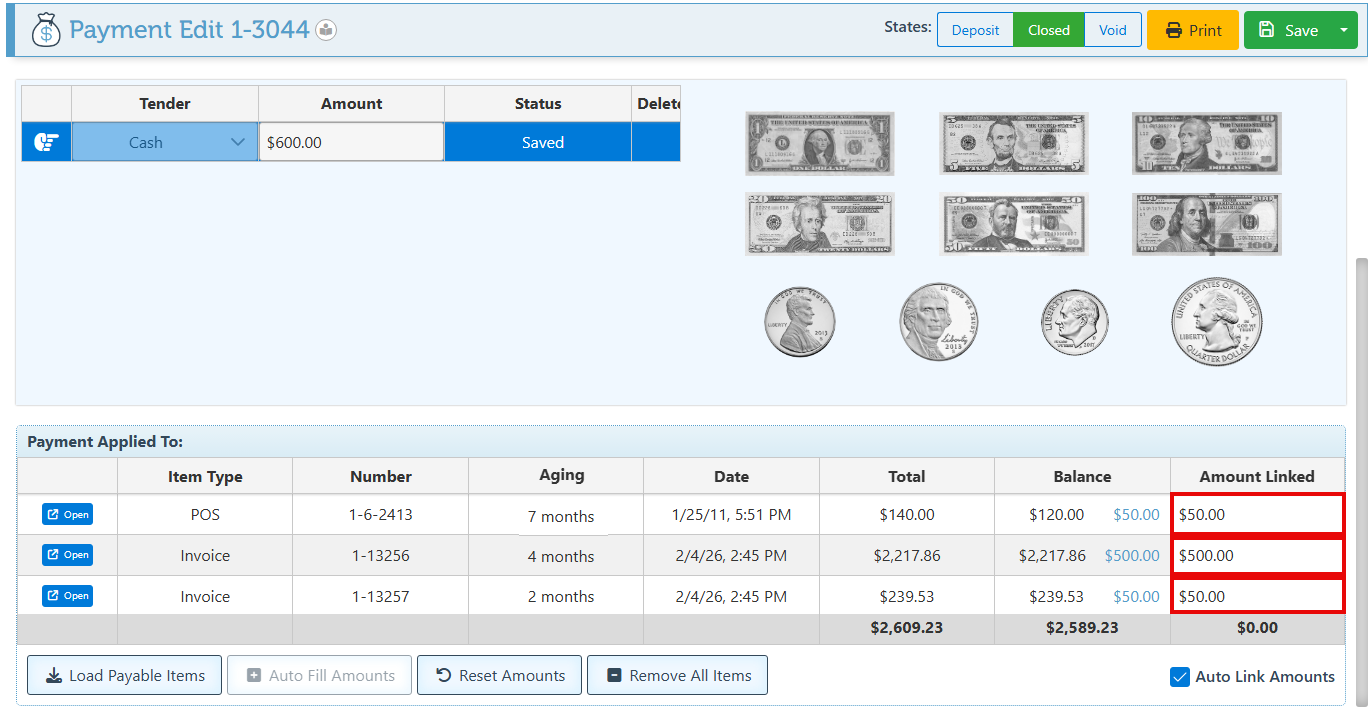
To link the payment to multiple entries, specify the amount in the “Amount Linked” field on the transaction row.
Refer to the "Aging" field to determine the invoice's age, for enhanced clarity when selecting which invoices to process for payment.
To Autolink payment to debit entries according to the date of transactions (Oldest-Newest), select the “Auto Link Amounts” checkbox.
Click “Save” at the top right to save the payment link.