Link Purchase Order to Invoice
Below is a guide on enabling the linking of purchase orders to invoices, along with instructions on how to use the feature on the invoices.
Open Backoffice.
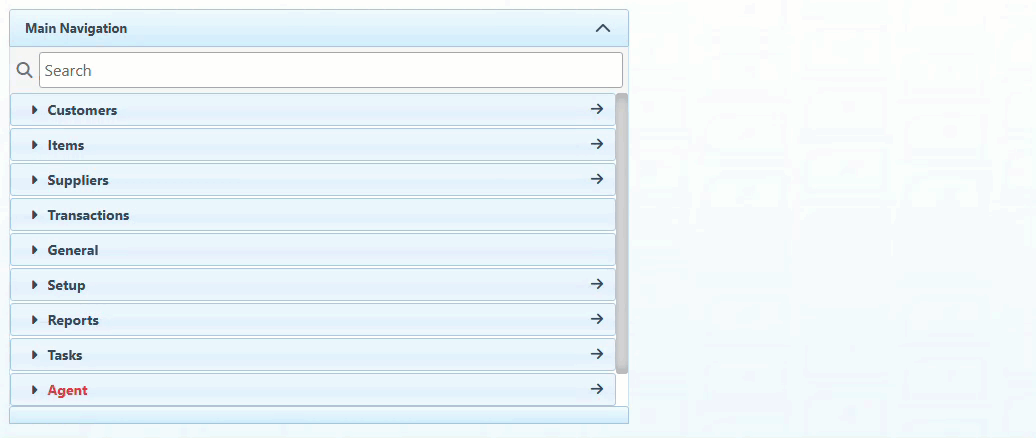
Click “Agent” in the Main Navigation menu and select “Configurations” from the scrollable dropdown.
Select “ Enterprise Keys” in the Level dropdown menu.

Use the Name header to search for the “LinkedPurchaseOrderEnabled” configuration and select the Value checkbox to enable it.

Click “Save” at the top right.

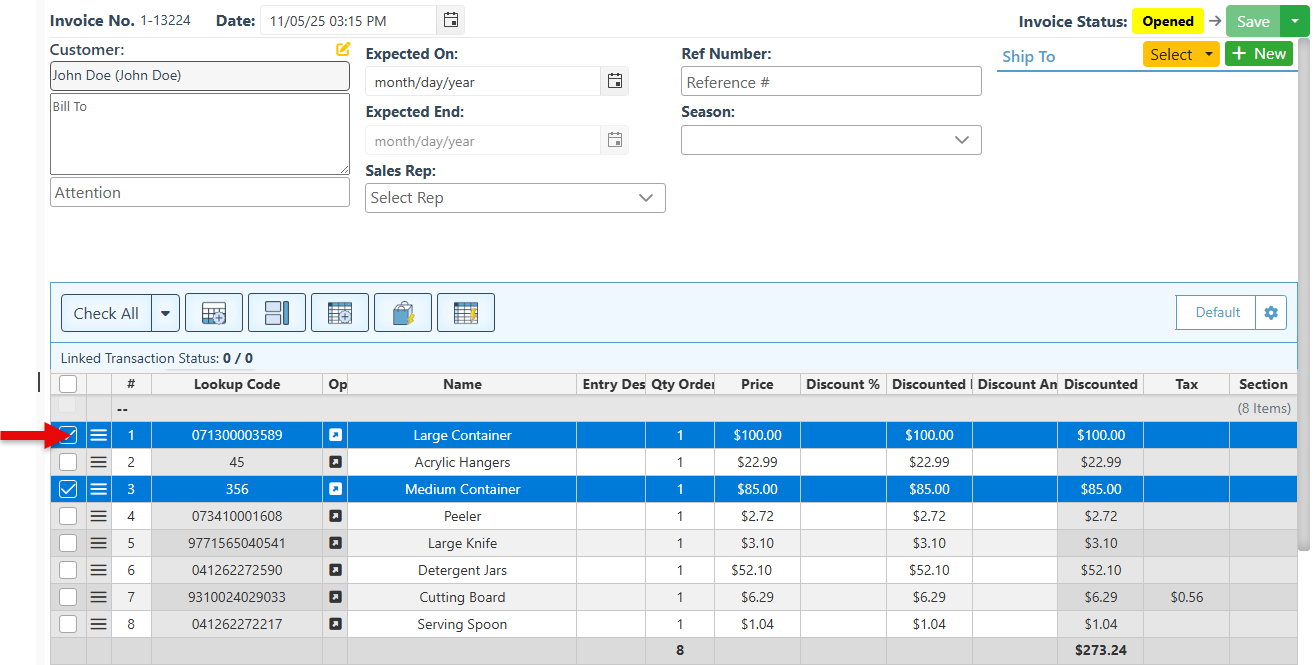
Navigate to the invoice page where the “Create PO” button will now be enabled.
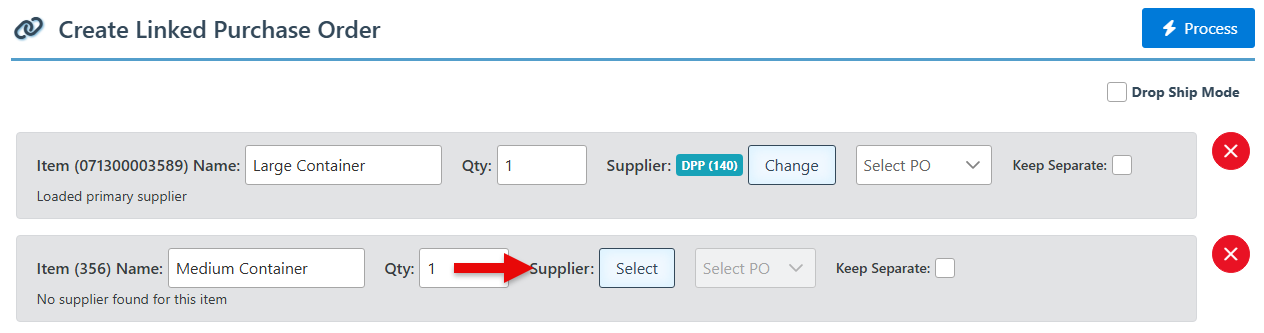
Select entries for which to create or link a PO.
Click the arrow button in the header to expand the dropdown menu, and select “Create New PO.”
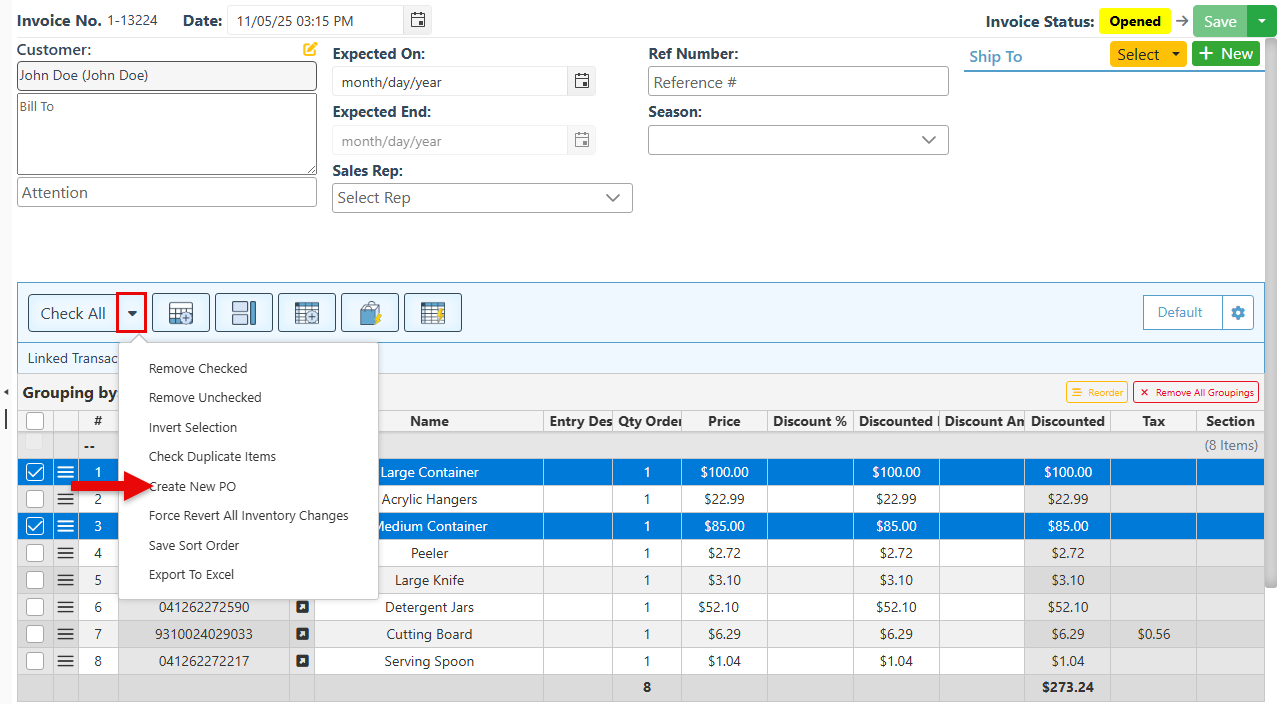
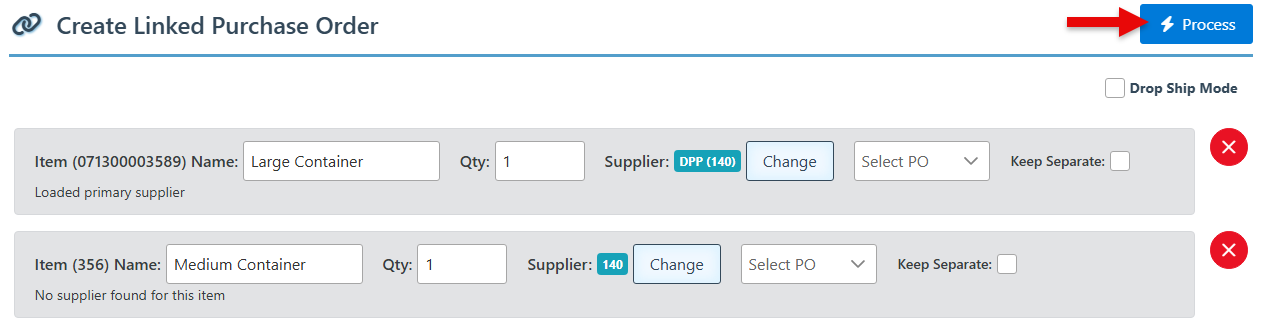
A pop-up featuring the selected entries will appear. For items with a default supplier, the supplier will be automatically selected. Otherwise, use the “Select” button to select the item supplier manually.
To create a new PO(s) for the items, click “Process.” This will automatically create separate POs according to the supplier.
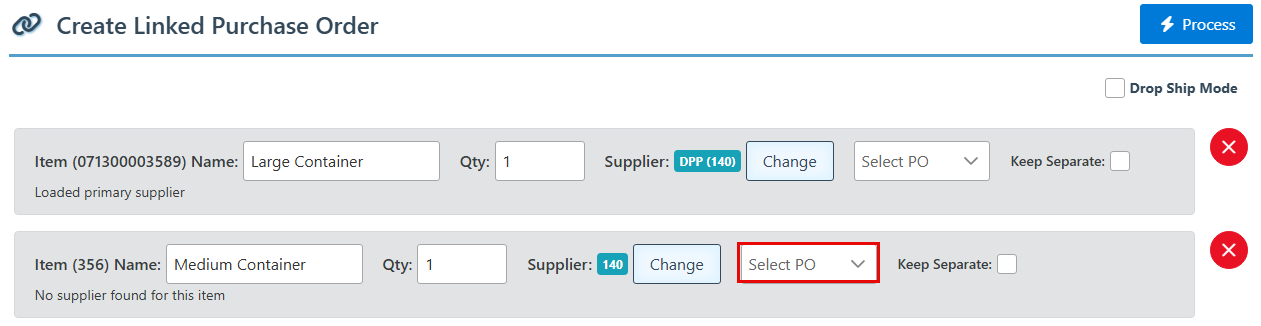
To link the items to an existing PO, use the “Select PO” dropdown to select the relevant PO and click the “Process” button.
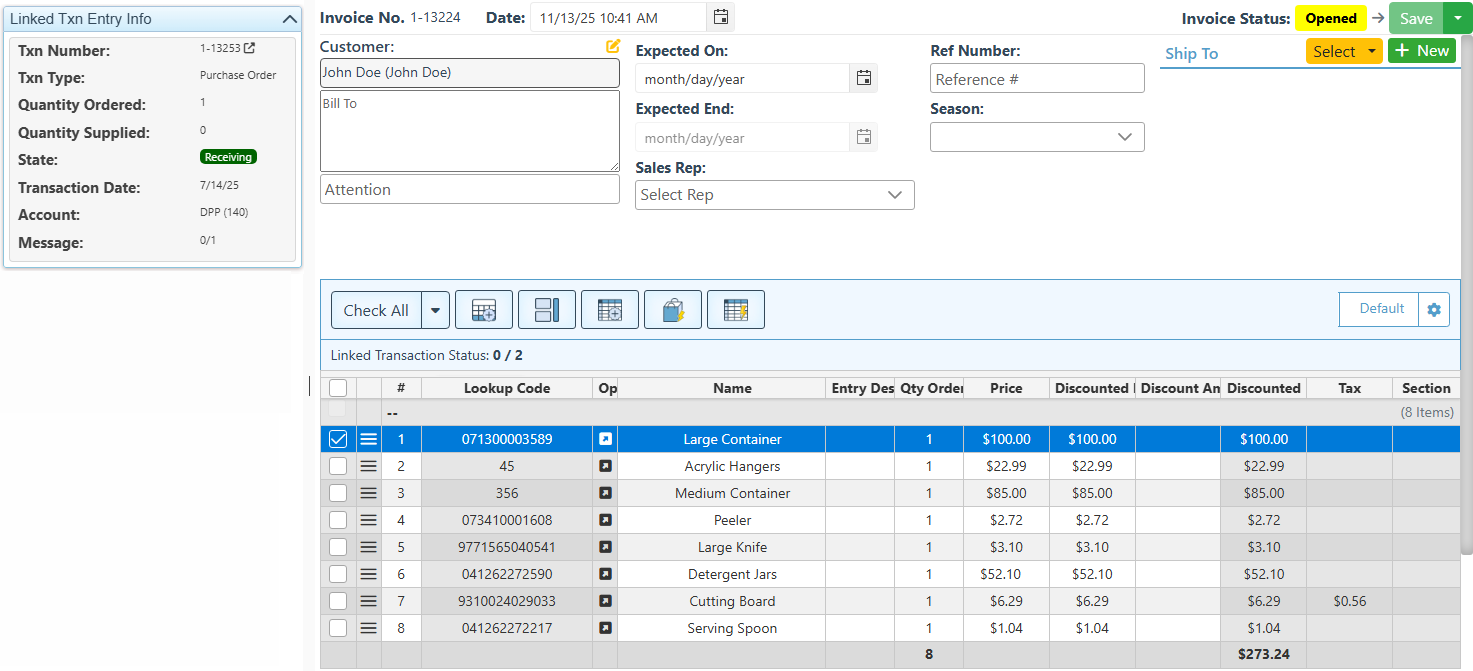
When selecting an entry linked to a purchase order, the details of the linked purchase order will be displayed in the “Linked Txn Entry Info” widget.