eWic in the Frontend
Below is a guide on adding the Wic widget and special columns to the checkout screen, followed by instructions on using the Wic tender and its features during checkout.
Adding the Wic Widget and Columns
Open the Frontend Station.
Click the edit button in the actions header to open the panel editor.

Select the panel on which to add the widget.

Click a new button to configure.
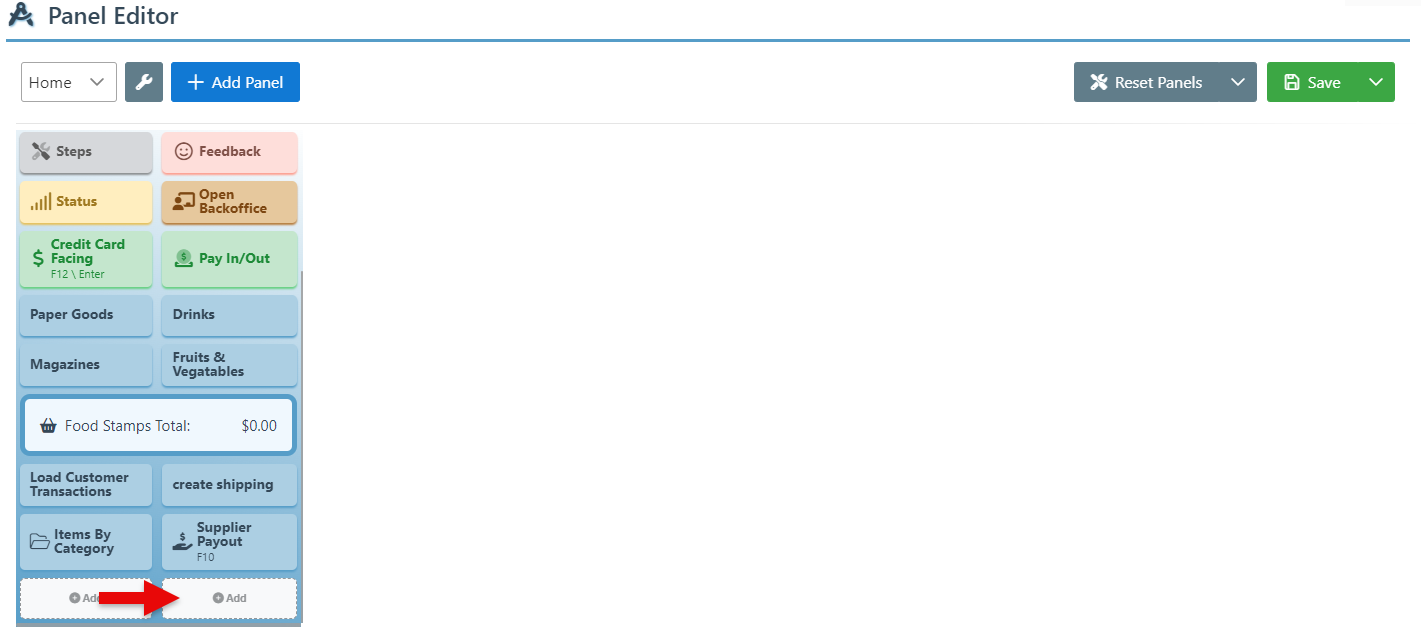
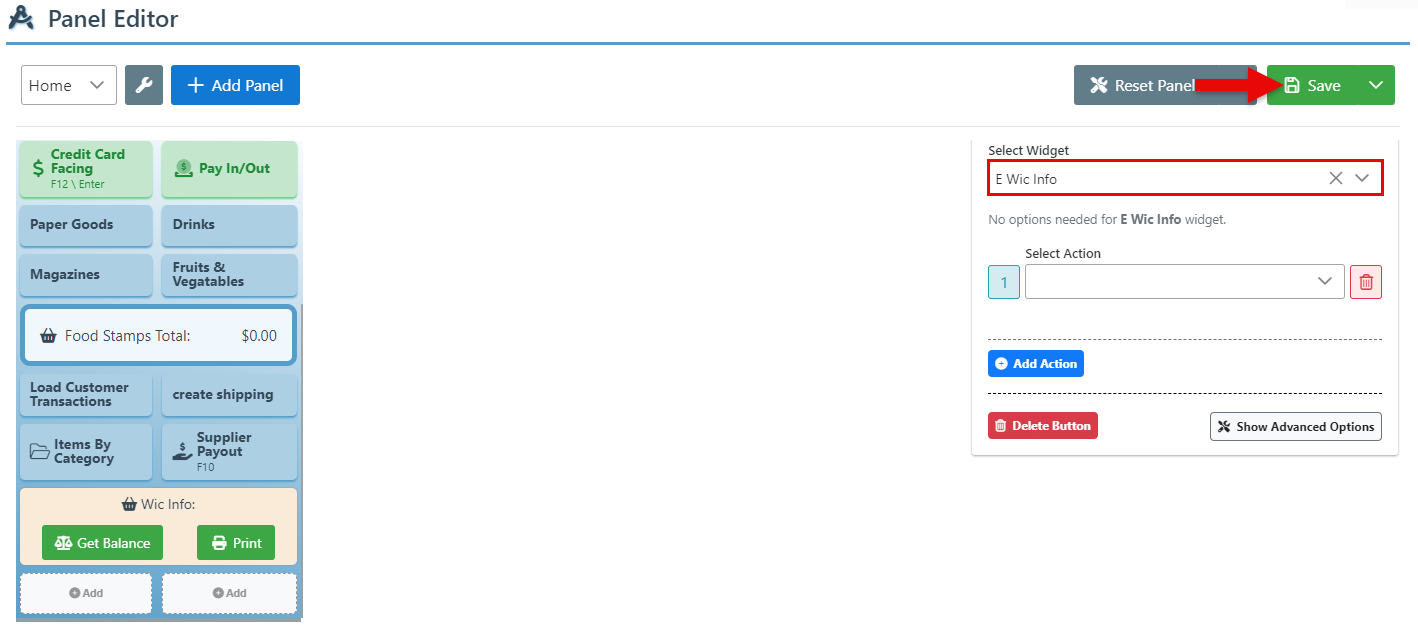
In the appearing button configuration fields, select “eWic Info” from the widget dropdown and click save.
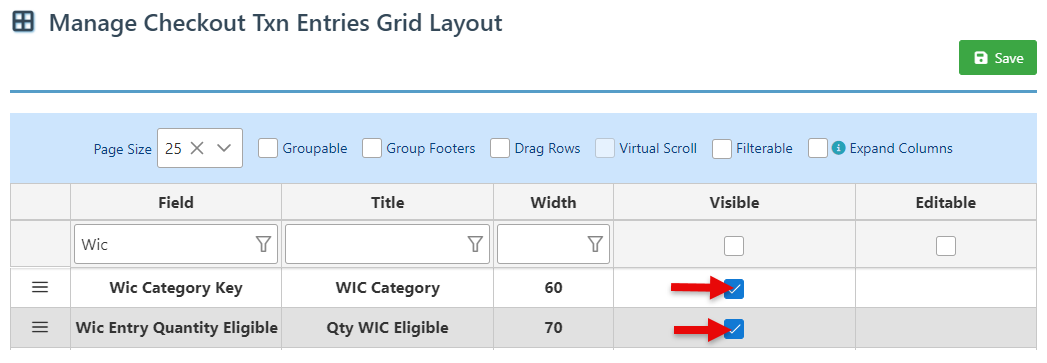
Click the Edit Columns icon to open the grid configurations.
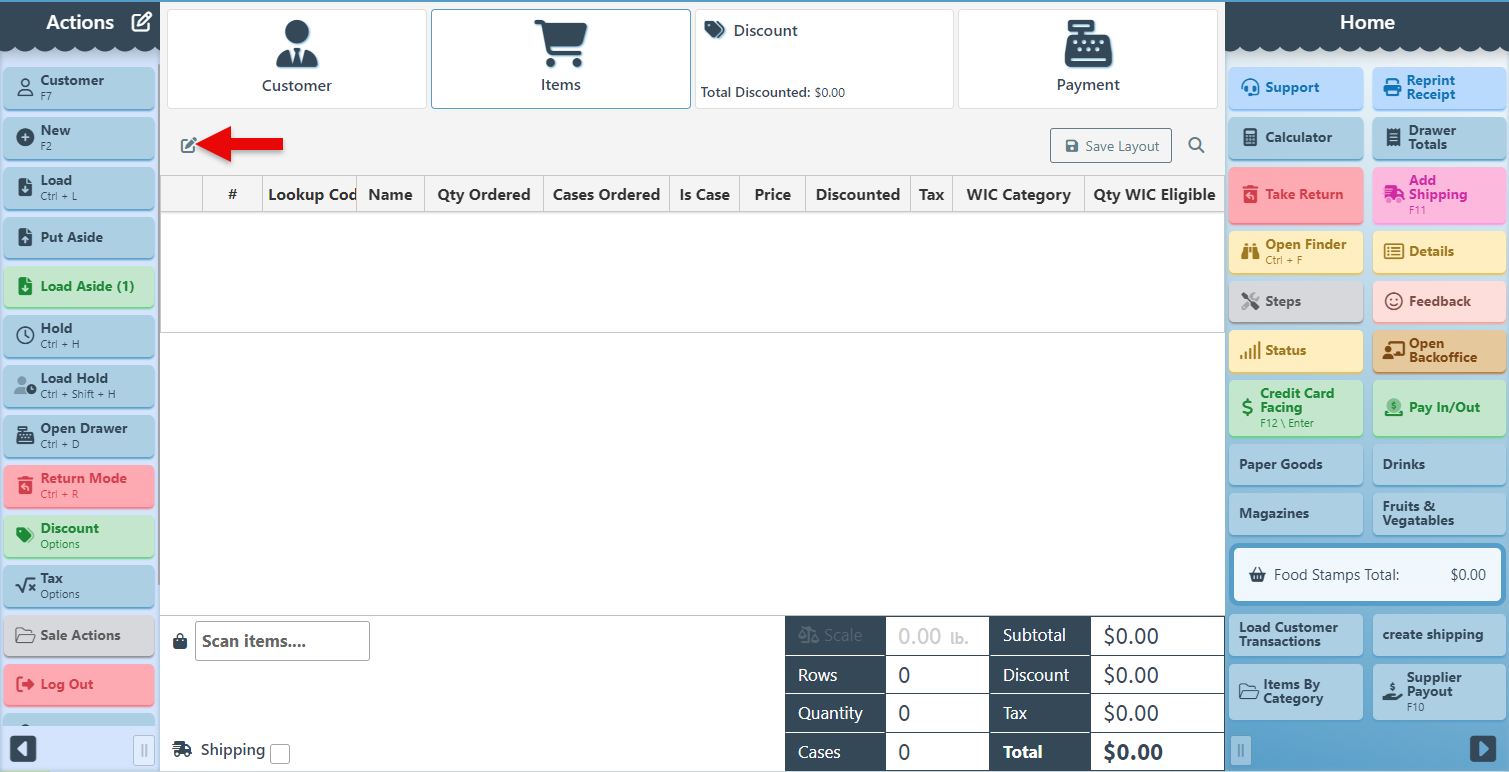
Search and select the Visible checkbox for the “Wic Category Key” and “Wic Entry Quantity Eligible” Columns and click Save to add them to the grid layout.
To accommodate the different uses of WIC, the system was developed to allow different checkout flows depending on the way the WIC is being used.
Speed Checkout in which any items approved and covered by WIC are paid for using the WIC card, and the remaining balance is paid using any alternative payment tender;
Complete WIC Checkout featuring a widget allowing the customer to see the WIC balance for each category and the updated balance as items are scanned.
Complete WIC Checkout
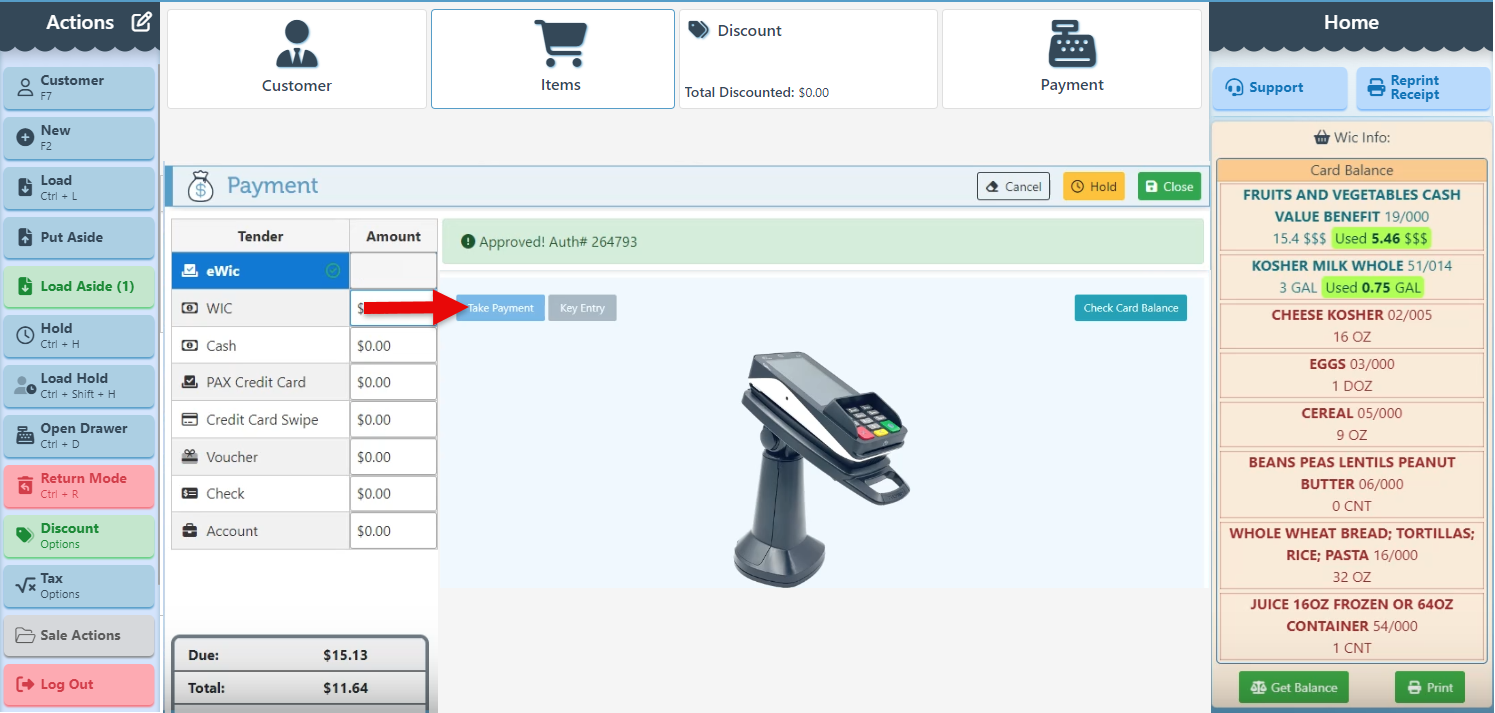
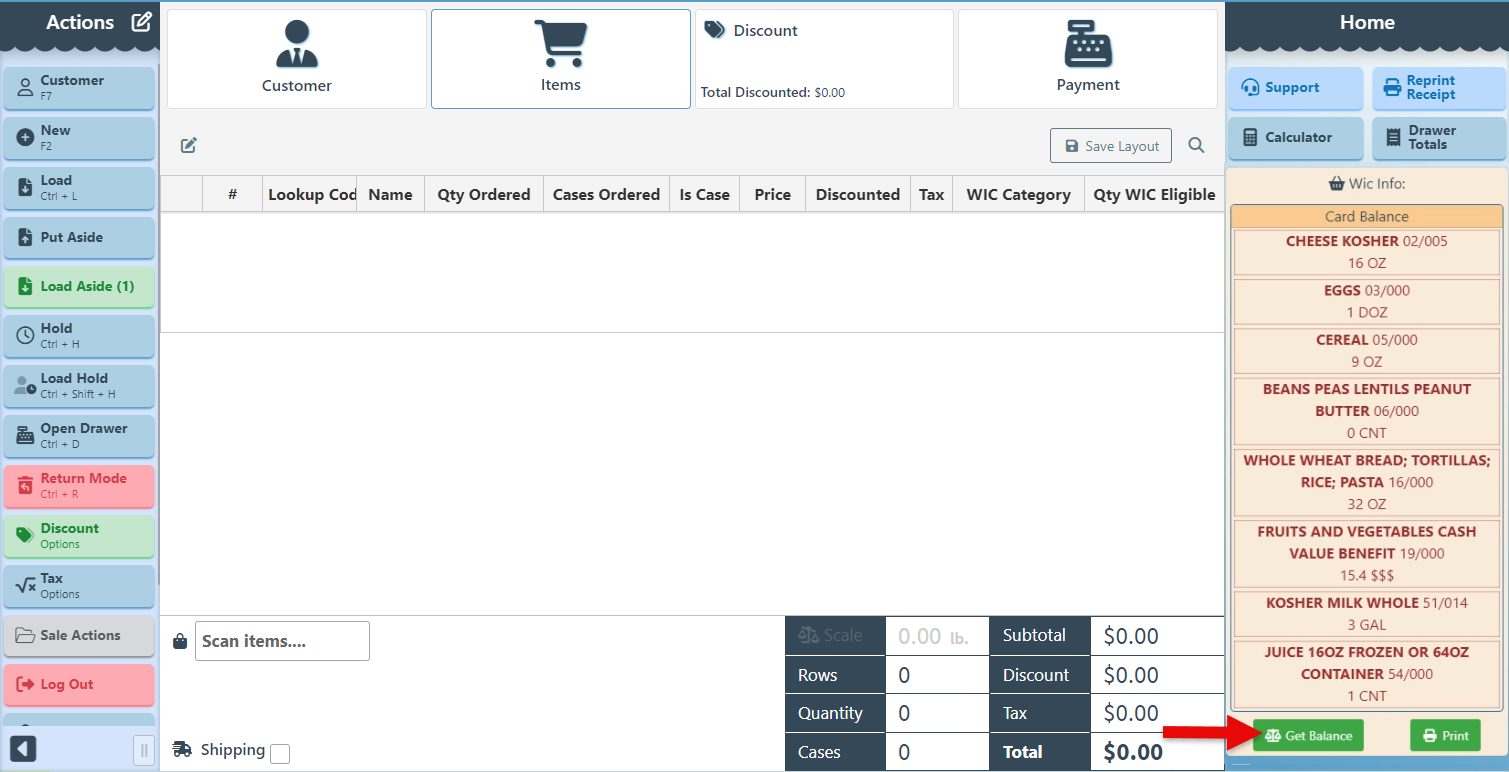
Select a customer and click the “Get Balance” button on the WIC widget to load tabs displaying each WIC category name, number, and the customer’s remaining balance for the category. For example, In the first tab, "Cheese Kosher" is the category name, "02,005" is the category/subcategory number, and "16 oz." is the balance for the category, which indicates how much cheese WIC will pay for.
New Feature Coming Soon… The total WIC funds available will be displayed in the widget header.
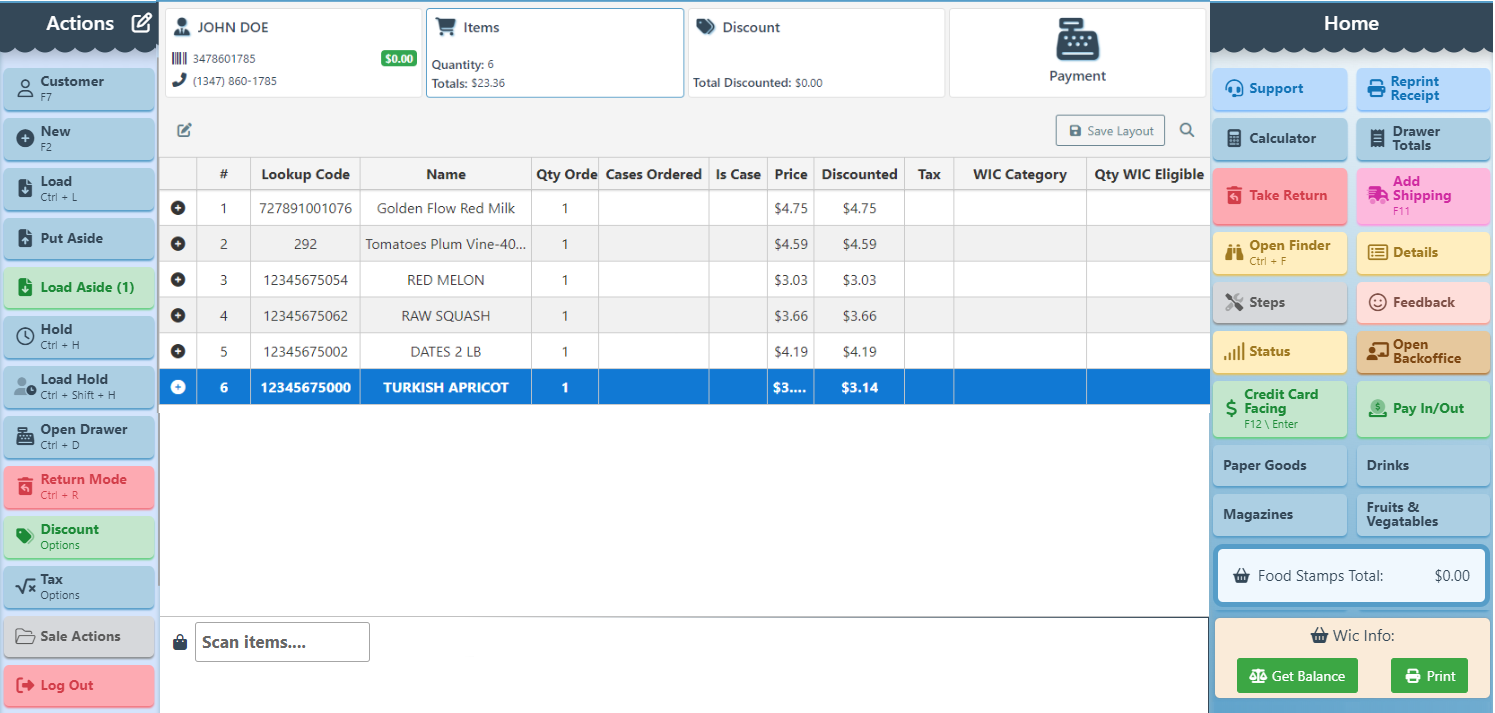
As items are scanned, the available WIC funds per category, displayed in the side panel widget, will update automatically, and the amount used will appear on a highlighted background.
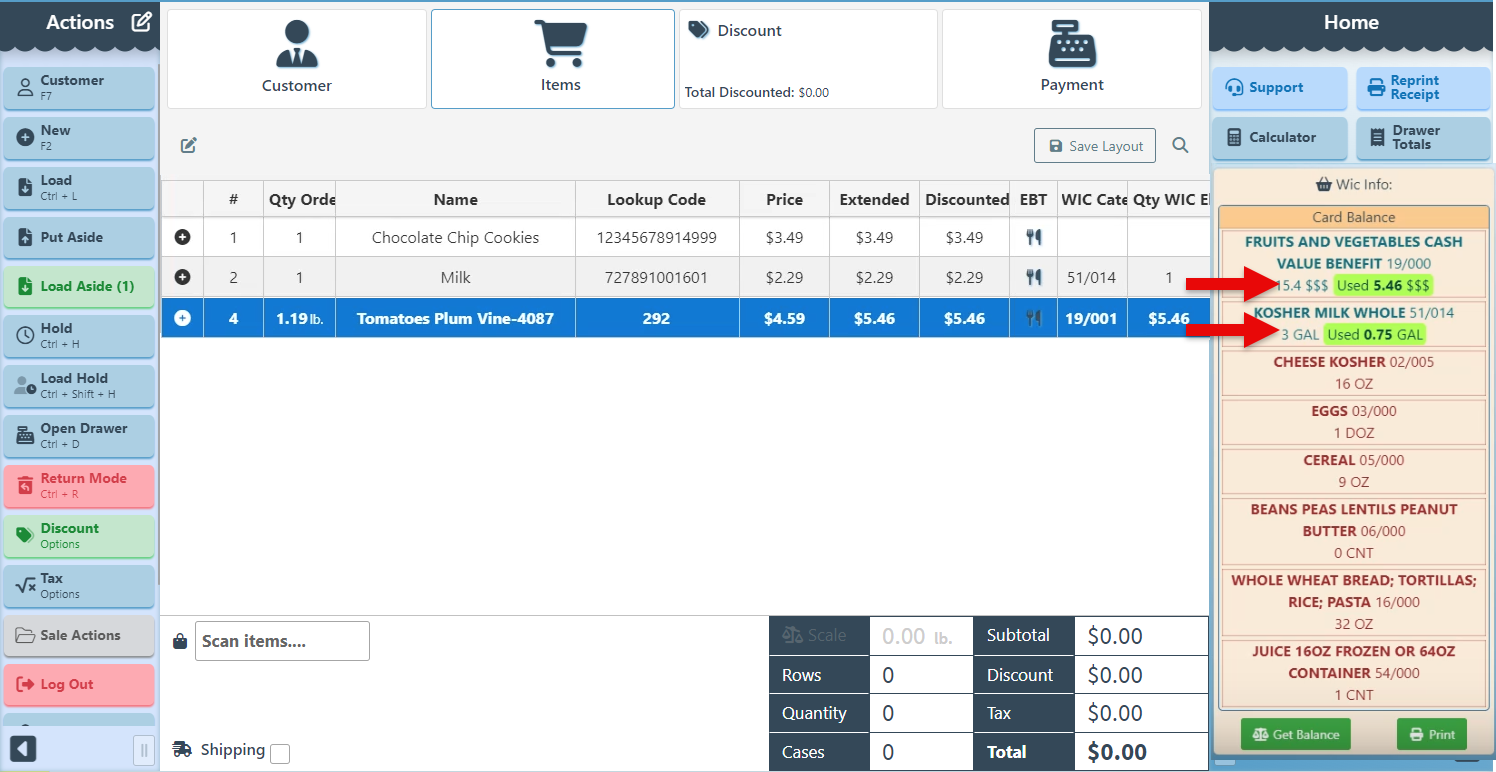
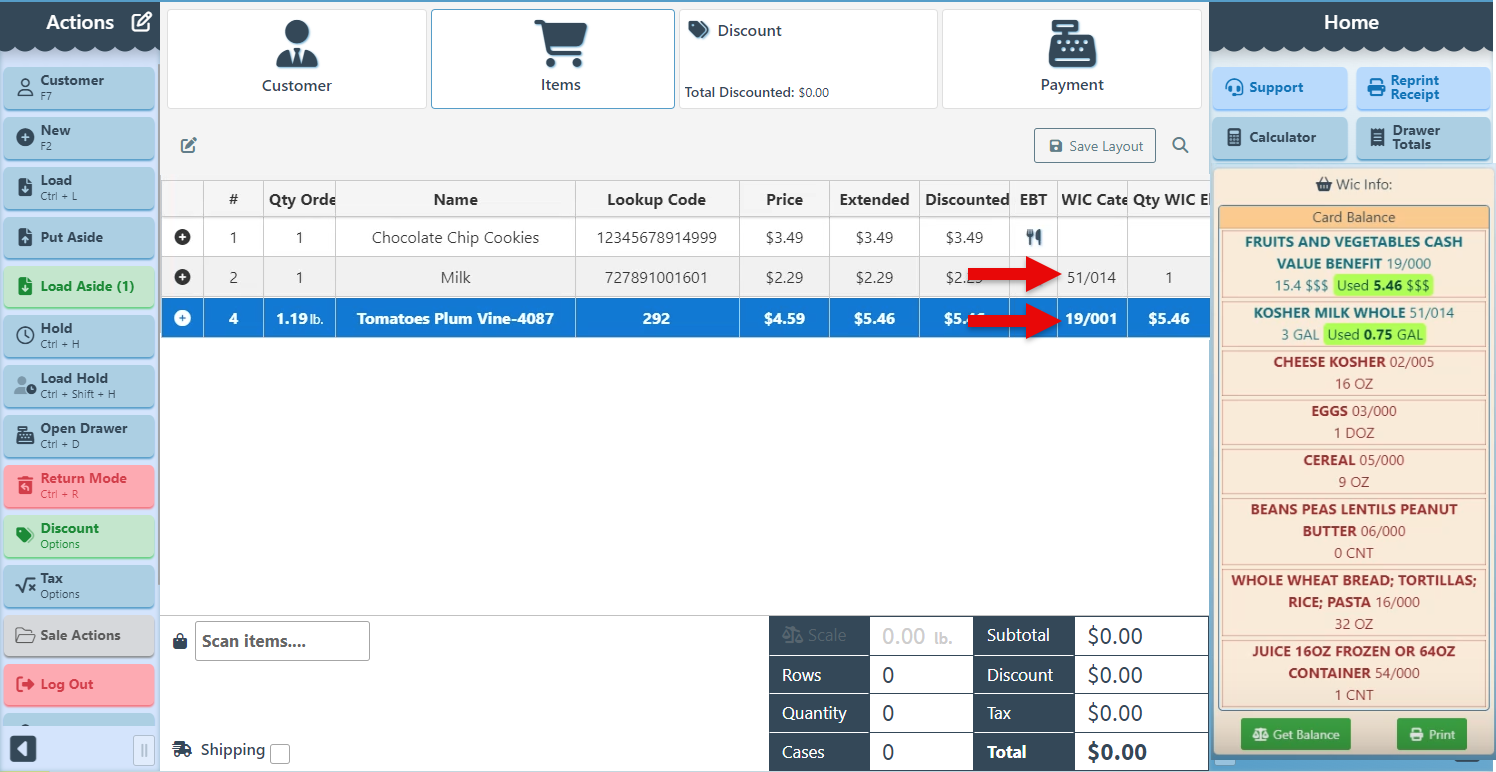
Additionally, the item row will display the quantity of the item covered by WIC in highlighted text, along with the item’s WIC category and subcategory numbers.
Navigate to the payment tab and select the eWIC tender to accept WIC payments. If there is a remaining balance after the WIC payment is completed, additional payment methods can be used to cover the remaining amount.
New Feature Coming Soon… Before processing, the WIC terminal will prompt for confirmation of the total WIC charge.

Speed Checkout- Coming soon…
Select a customer and scan items following the general checkout flow.
Navigate to the payment tab to take payment.

Select the WIC tender and click the “Take Payment” button. This will automatically load the Wic widget, run a check on the available coverage, and fill in the corresponding amount in the Wic tender field.
In the event that Wic does not completely cover the order, an additional payment tender can be selected to cover the remaining balance.
For WIC/EBT sales only, items can be removed after payment, so that the customer can leave behind those not covered by WIC.