Create Transaction Item Entry Sections
Transaction sections enable the items on invoices, purchase orders, and other transactions to be organized and grouped according to a specific item detail. This feature is most commonly used to group items according to the room they are designated for, although it can be utilized for other attributes such as item category, type, etc. Below is a guide on adding and using the sections feature in transactions, followed by instructions on creating a new section that will automatically be added to the sections dropdown on the transaction page.
Follow the steps below to add the sections dropdown to a transaction page layout:
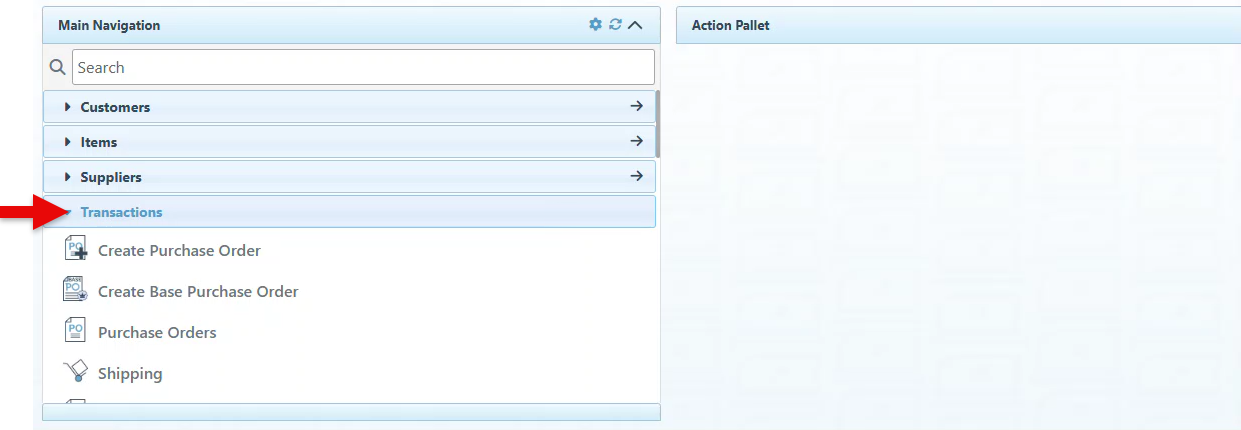
Click “Transactions” in the Main Navigation menu and select the preferred transaction type, such as PO, Invoice, etc., from the scrollable dropdown menu.
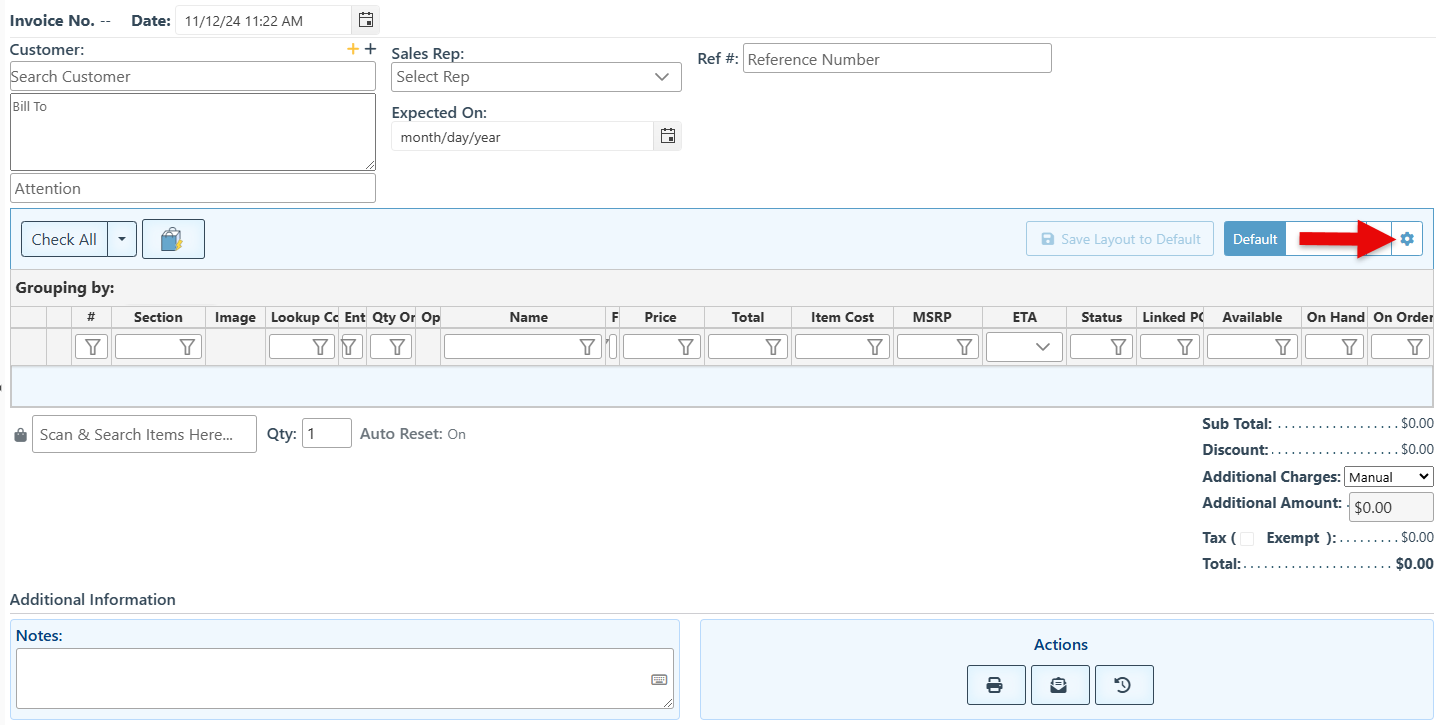
Click the “Transaction Grid Layout” button.
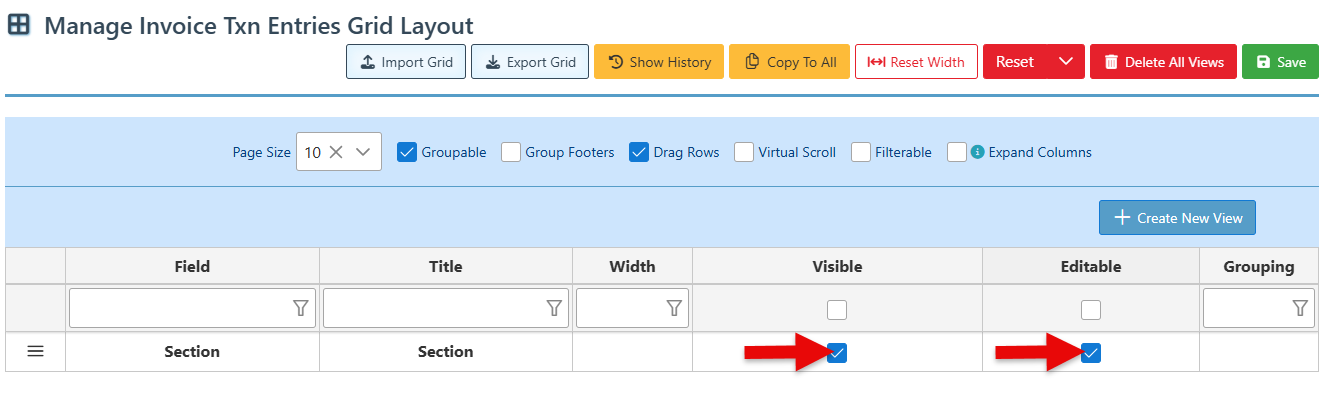
Use the Field Filter Bar to search for the “Section” column.
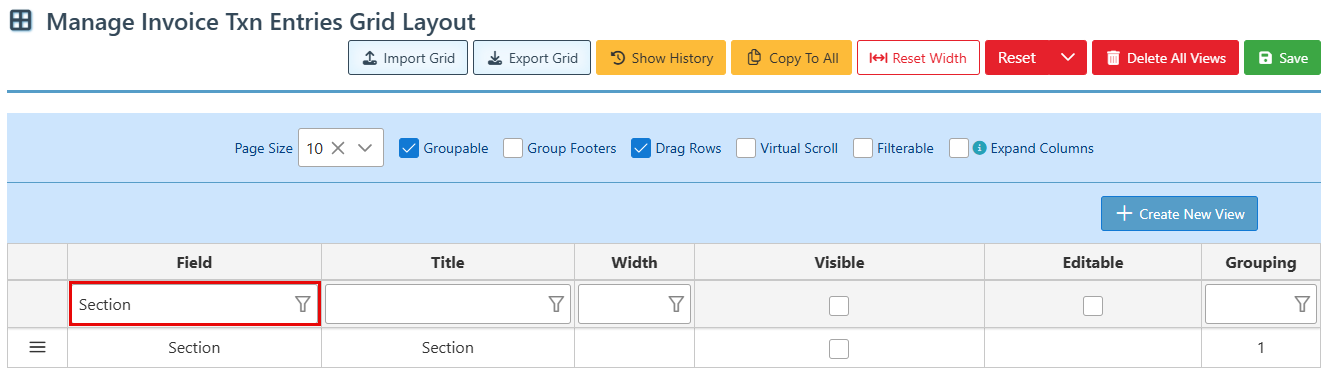
Select the Visible and Editable checkboxes to add the column to the transaction layout grid.
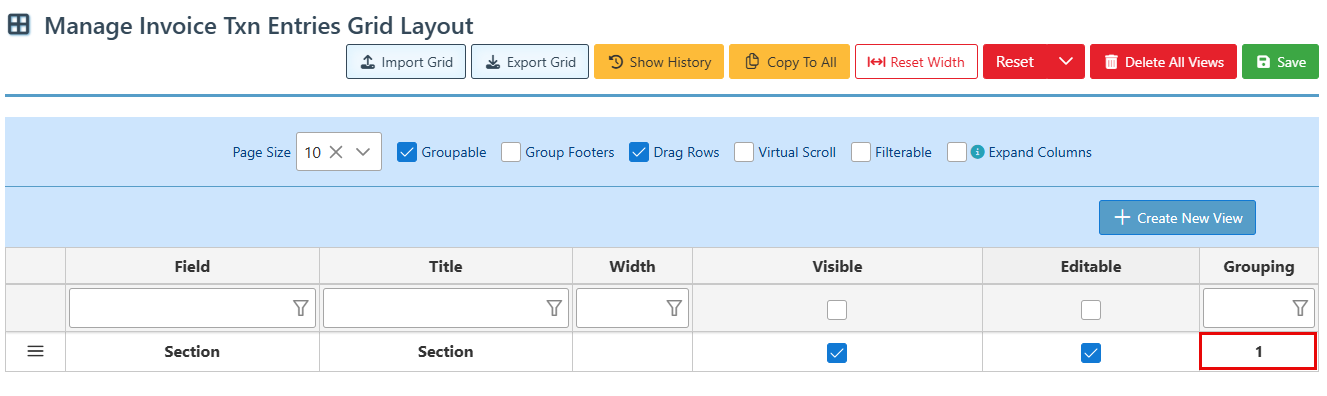
Enter the number 1 in the Grouping field to set the section grouping as 1st priority.This will first categorize the items in the transaction by their sections and if any additional grouping settings exist, those will be applied after this first priority grouping.
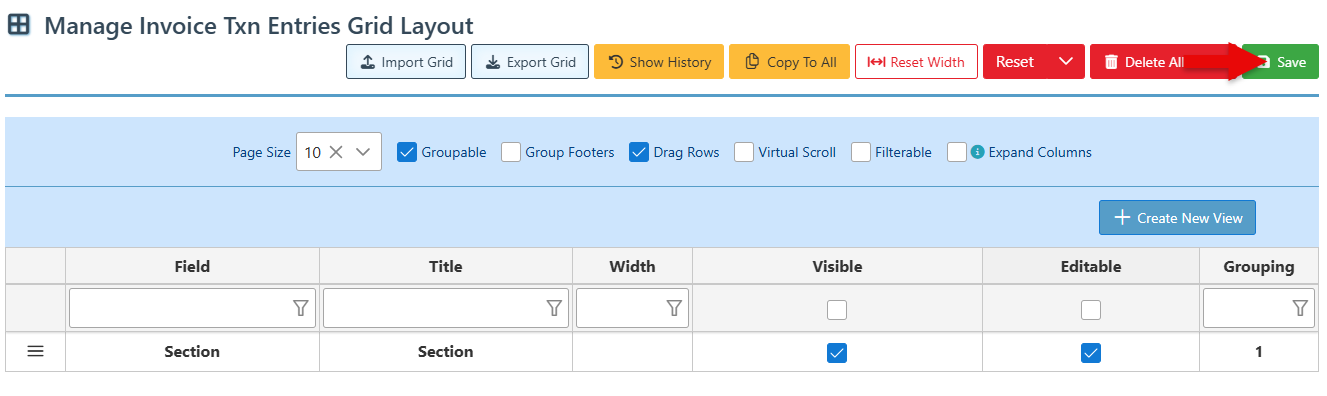
Click “Save” at the top right.
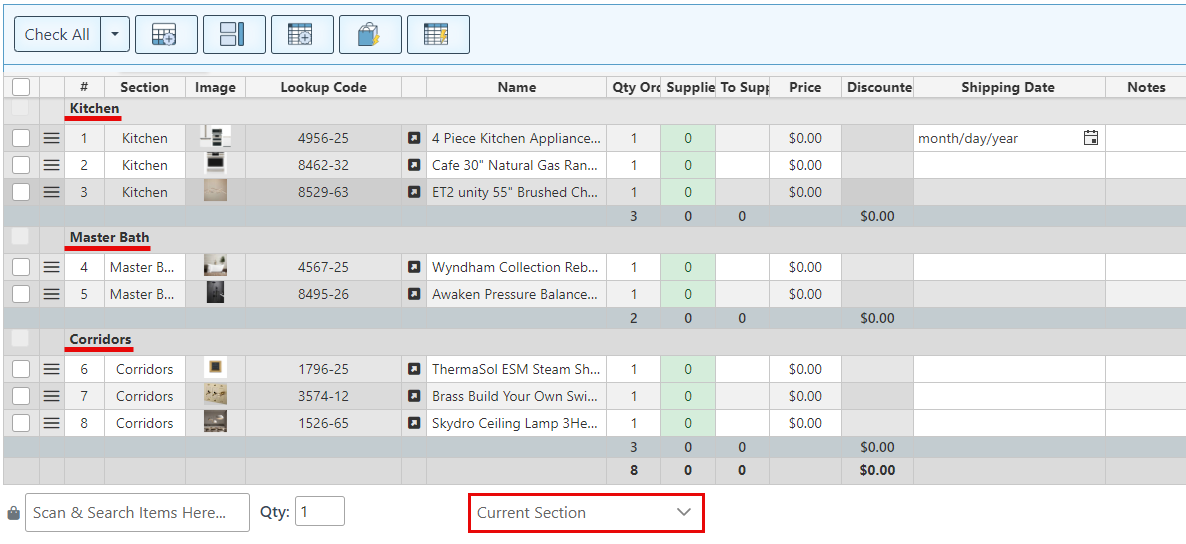
Once saved, a section dropdown will be added to the page layout, and items added to the transaction will be grouped according to the selected sections.
To use the sections feature, select a section from the dropdown menu and proceed to add items designated to that section. To start adding items under a new section, change the selected section in the dropdown and proceed to add items. The dropdown menu enables the order of the sections to be organized according to preference since the sections will be listed in the order in which they have been selected from the dropdown.
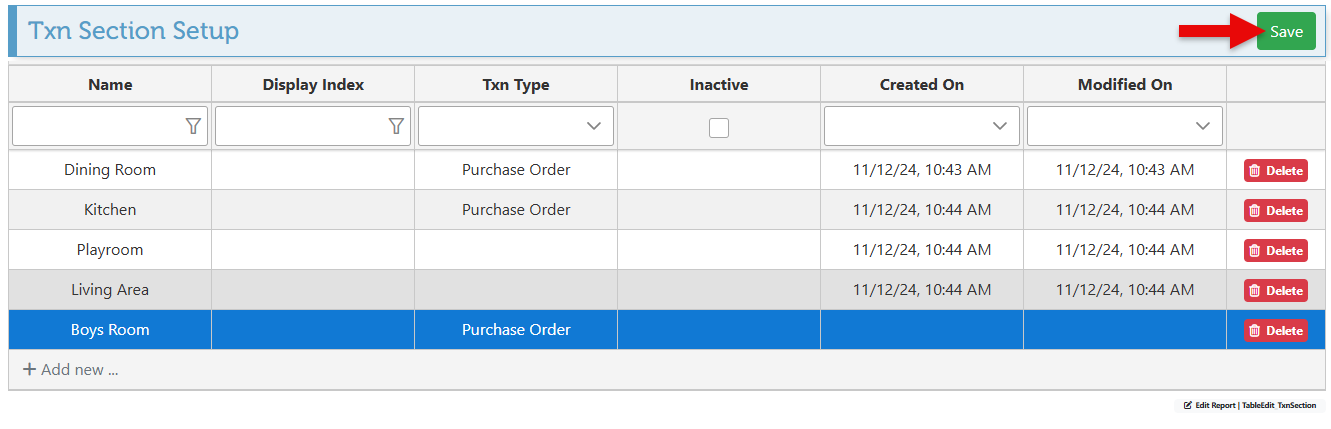
Follow the steps below to create a new transaction section:
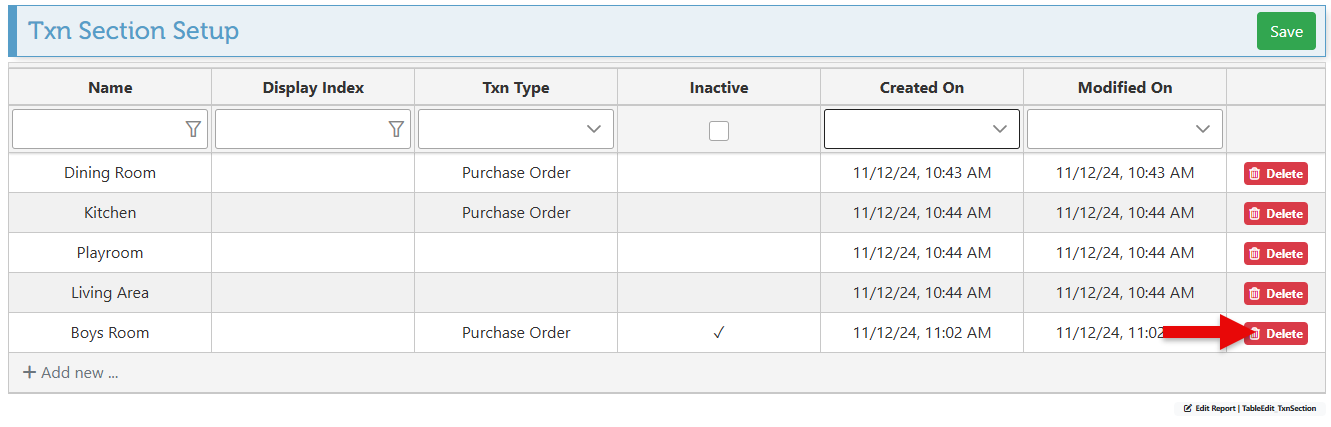
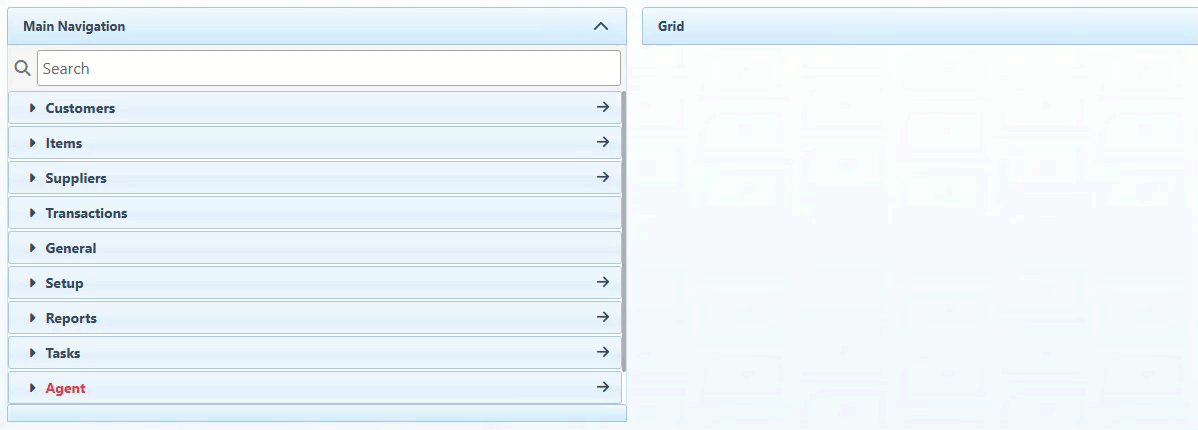
Click “Setup” in the Main Navigation menu, and select “Transaction sections” from the scrollable dropdown menu.
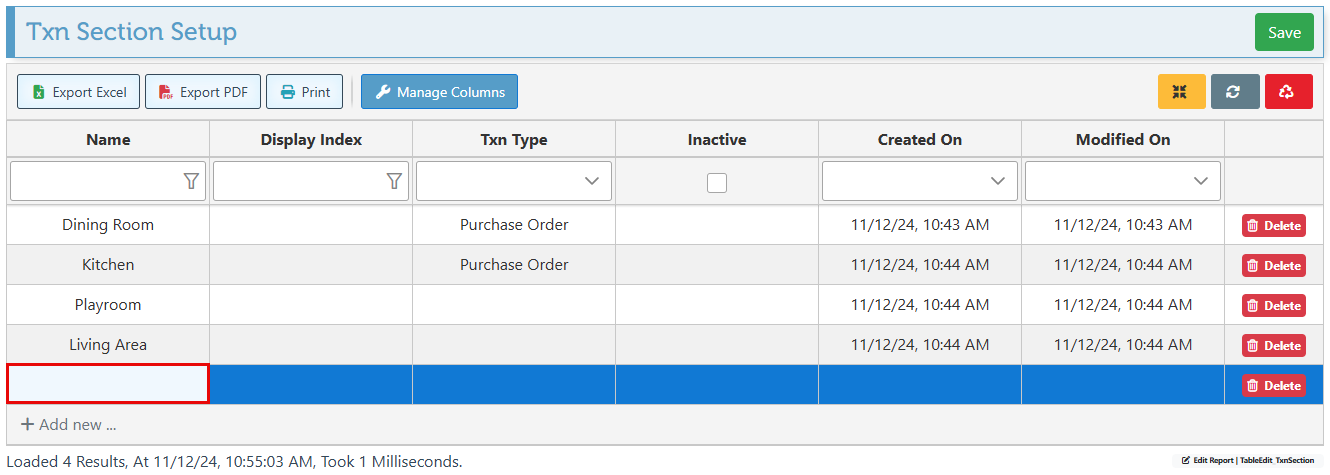
Click “Add New” to create a new section.
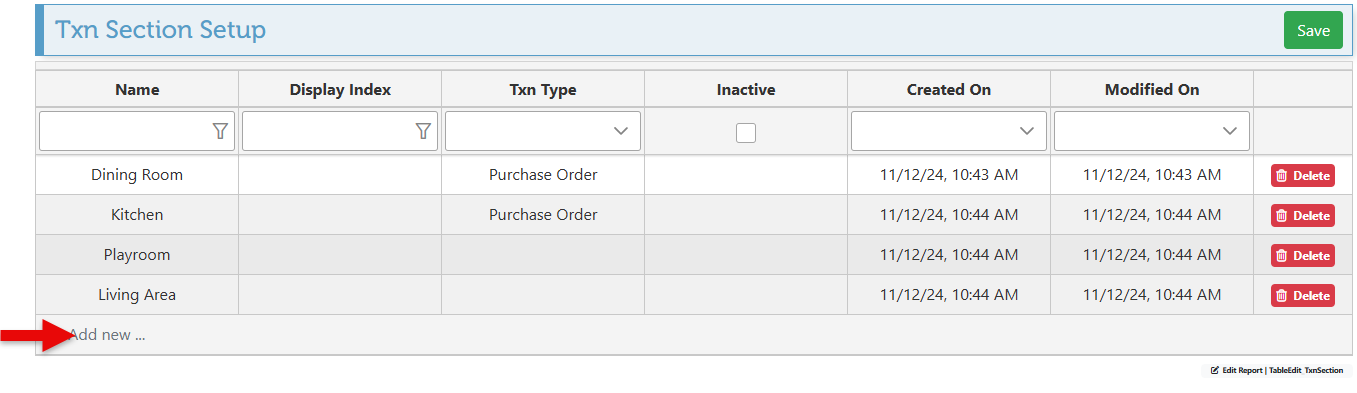
Enter the section name in the designated field.
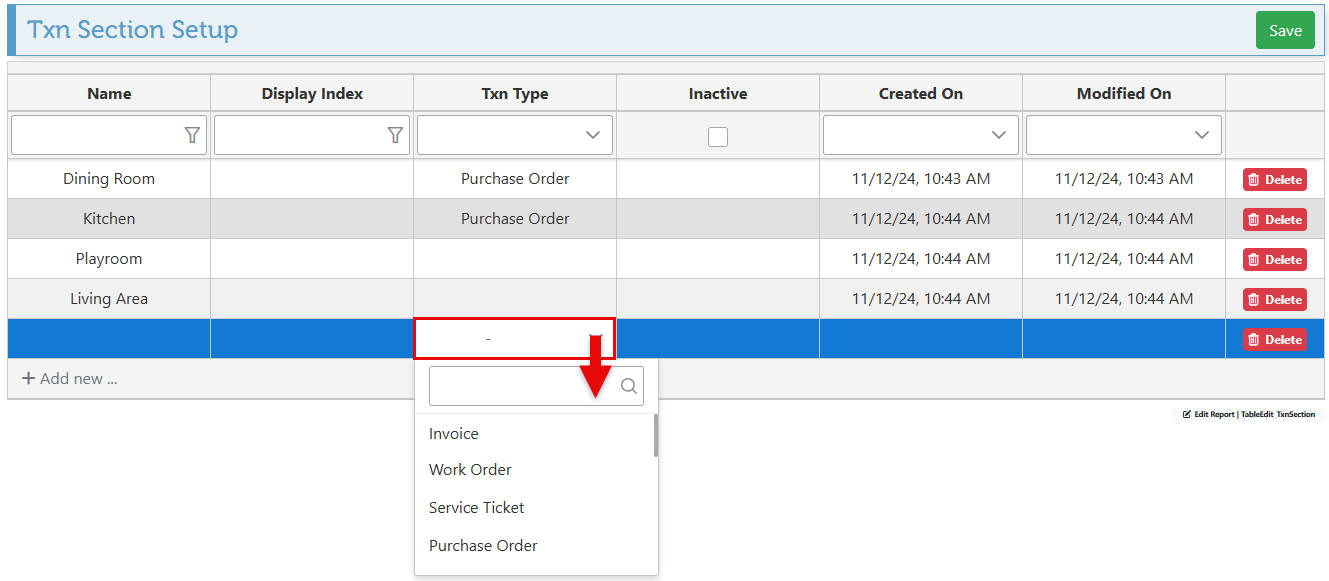
To add the section to a specific transaction type only, select a transaction type in the “Txn Type” field. Otherwise, the section will be added to all transaction types.
Click “Save” at the top right of the page to save new configurations.
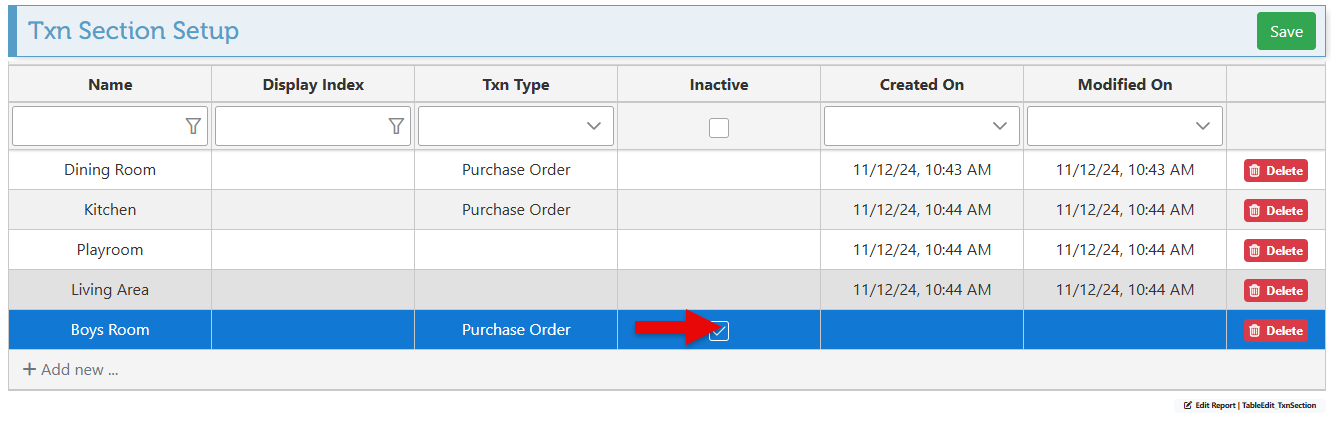
To set the section to be temporarily inactivated, select the inactive field.
To permanently delete a specific section, click “Delete” on the relevant section row.