Configure Receipt Item Icons
Follow the steps below to add item icons to the POS receipt layout:
Log in to app.firstchoicepos.com
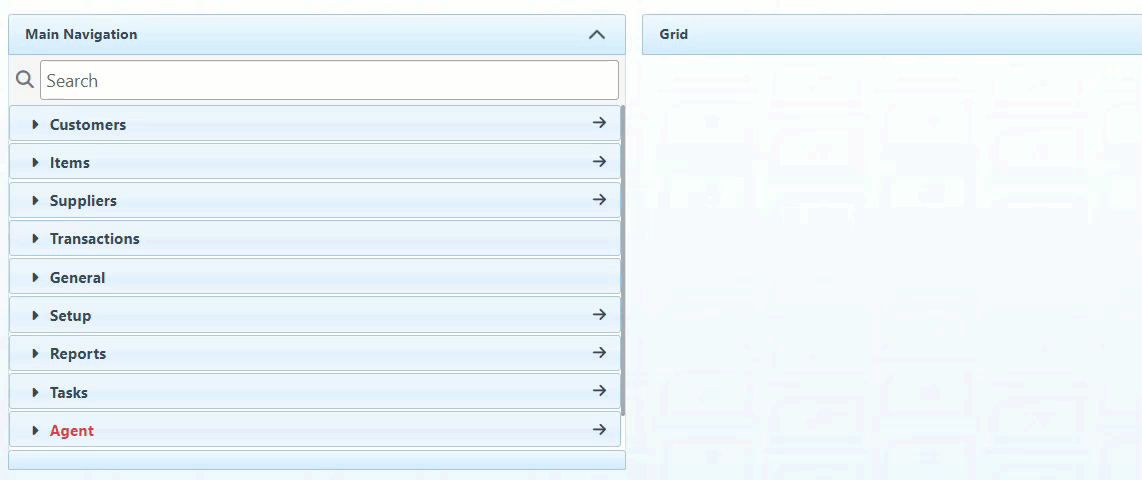
Click “Setup” in the Main Navigation menu, and select “Printout Layouts” from the scrollable dropdown.
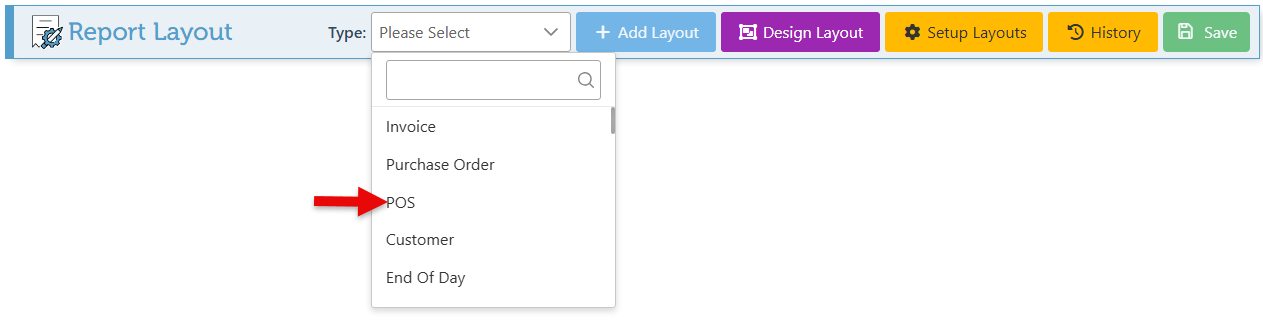
Select “POS” in the Type dropdown menu.
Click the Settings button on the card of the relevant receipt layout (on which to add the icons).

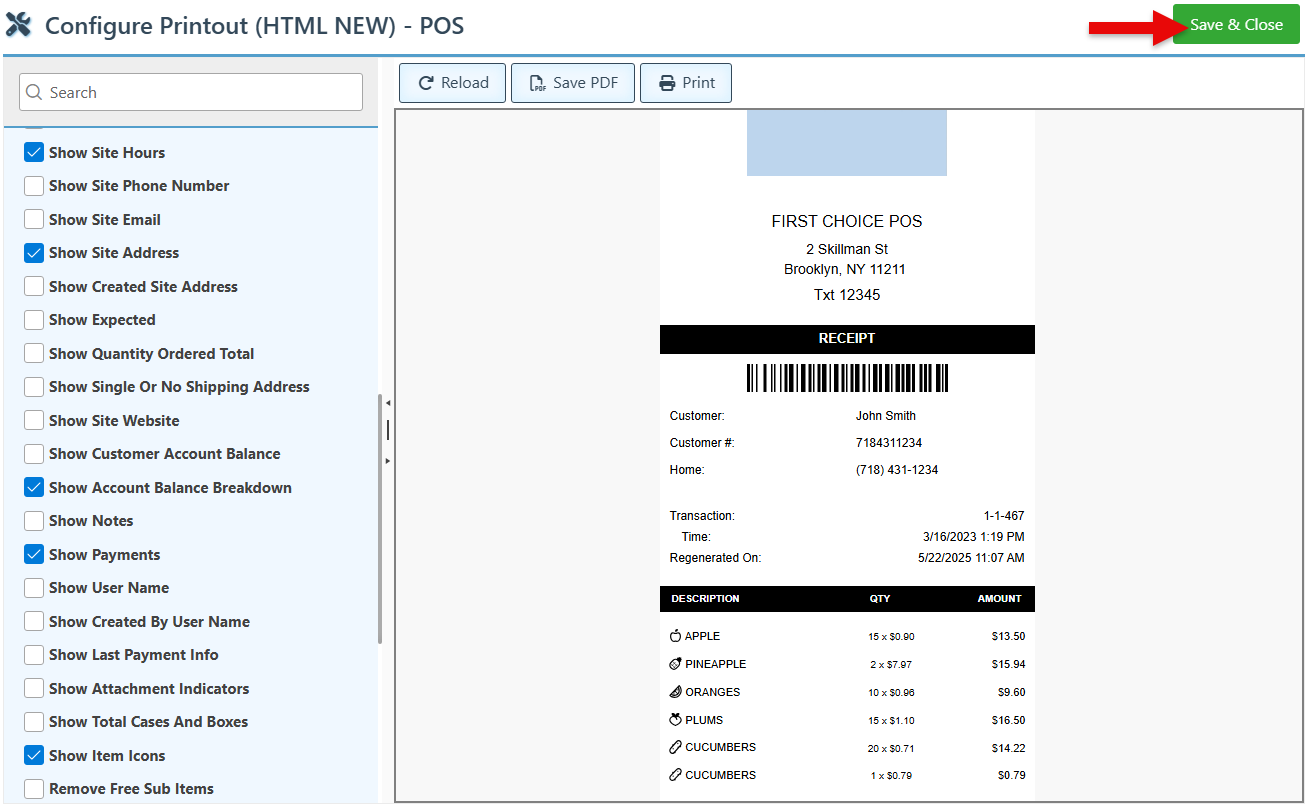
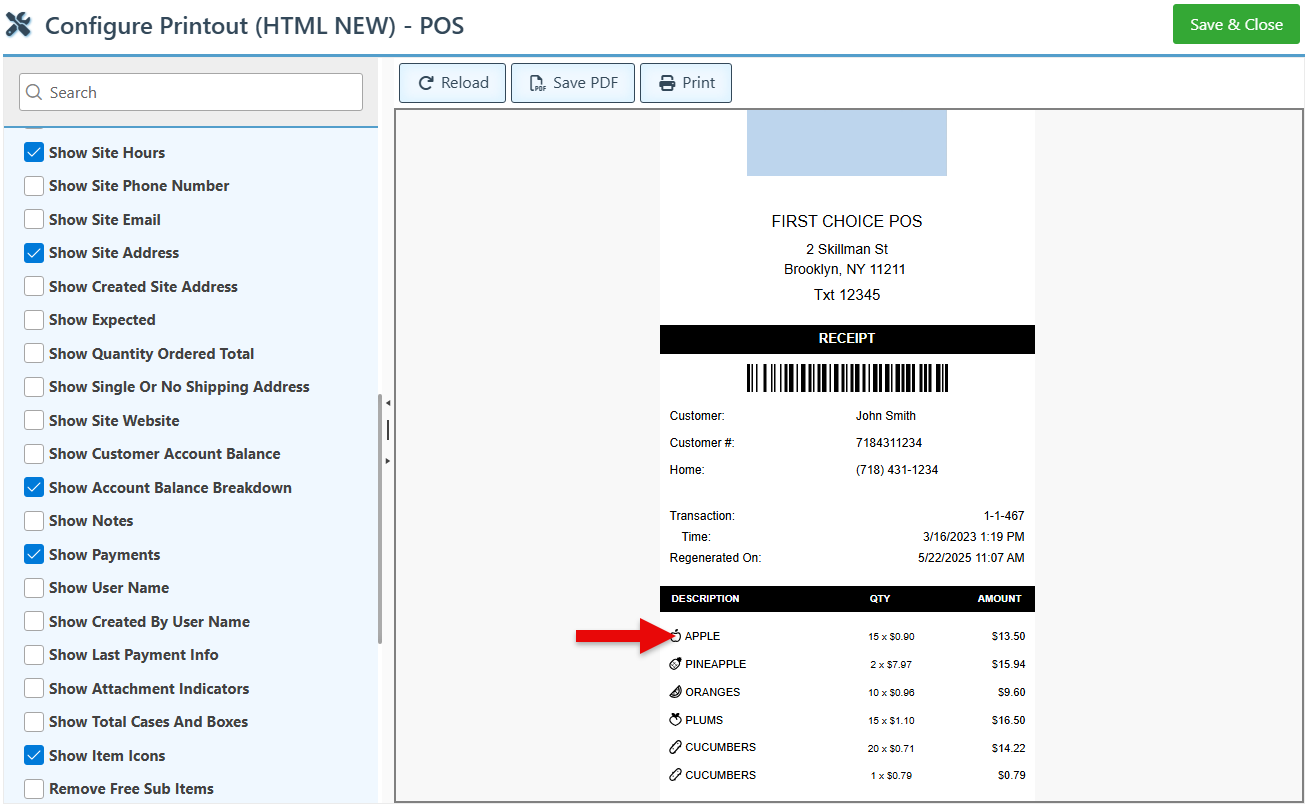
In the appearing configuration menu, navigate to the “Show Item Icons” configuration and select the checkbox to enable the configuration.
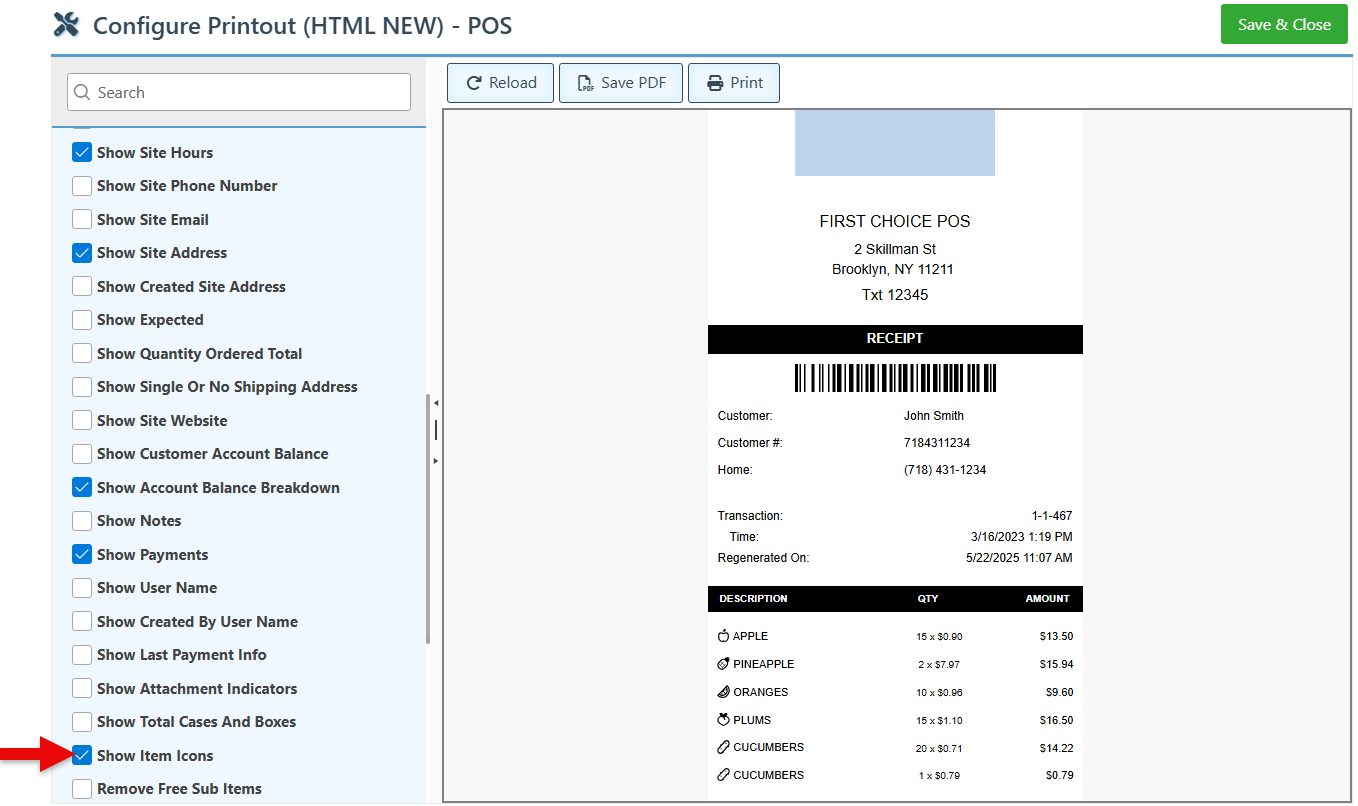
Item icons will now appear to the left of the transaction items.
Click “Save & Close” at the top right to save.